Experience the Sky Again: Expert Sunroof Replacement for the MINI Clubman 2016-2024 (F54)
The 2016 to 2024 MINI Clubman, internally designated by its chassis code F54, is a true masterclass in blending iconic British motoring heritage with practical, modern estate-car dimensions. With its distinctive split-rear "barn doors," elongated wheelbase, and go-kart-like handling, the F54 offers a remarkably refined and unique driving experience. However, one of the most captivating features of this premium vehicle is its expansive panoramic sunroof. This dual-pane glass roof is designed to flood the quirky, aviation-inspired cabin—complete with its signature central infotainment ring and premium toggle switches—with abundant natural light. When this glass is compromised by rogue road debris, severe hail, or structural thermal stress, the luxurious, open-air feel of your Clubman is instantly diminished. Replacing the sunroof on an F54 MINI is not a standard weekend project; it requires the precision, chemical knowledge, and structural understanding of an automotive auto glass Master Technician.
Why Immediate Sunroof Replacement is Crucial for Your F54 Clubman
Driving with a shattered, cracked, or severely leaking sunroof in your MINI Clubman is not merely an aesthetic issue; it is a significant safety and functional hazard. As a premium vehicle, the F54 relies on its complete structural envelope to keep the cabin quiet, dry, and safe. Addressing a compromised sunroof immediately is vital for several reasons:
- Structural Integrity: The panoramic sunroof glass is a load-bearing component of the vehicle's roof structure. A shattered panel weakens the overall rigidity of the roof, which can be dangerous in the event of a rollover.
- Water Infiltration and Electrical Damage: The F54 Clubman is packed with sensitive electronics. A broken or improperly sealed sunroof allows rain and moisture to bypass the weatherstripping, potentially destroying the headliner, soaking the premium upholstery, and corroding the complex wiring harnesses hidden in the roof pillars.
- Cabin Debris Hazards: Unlike laminated windshields, sunroofs are typically constructed from tempered glass. When compromised, they explode into thousands of sharp, pebble-like shards that can easily fall into the cabin while driving, posing a severe risk to the driver and passengers.
- Wind Noise and Climate Control: A cracked or broken sunroof completely disrupts the aerodynamic airflow over the vehicle, resulting in deafening wind noise at highway speeds and forcing your air conditioning or heating system to overwork.
Premium Mobile Auto Glass Services Across the Greater Toronto Area (GTA)
As residents of the Greater Toronto Area (GTA) know all too well, extreme weather fluctuations, busy commutes, and endless highway construction can be incredibly harsh on automotive glass. Whether you are navigating the heavy construction zones of Vaughan, dealing with the variable, freezing-to-thawing microclimates of Richmond Hill, or commuting along the high-speed stretches of the 407 in Markham, your MINI Clubman is constantly exposed to rogue debris and severe temperature shifts that can shatter a sunroof in an instant.
At AlexWindshield, we understand that your time is valuable. Driving a vehicle with a blown-out sunroof across the GTA to a repair shop is inconvenient and often unsafe. That is why our Master Technicians bring our state-of-the-art mobile auto glass shop directly to you. Whether your Clubman is parked in a residential driveway in Vaughan, an office complex in Markham, or a parking garage in Richmond Hill, we deliver uncompromising, dealership-level service right to your location.
The AlexWindshield Master Technician Process: Step-by-Step F54 Sunroof Replacement
Replacing the fixed bonded sections or the main moving panels of the F54 panoramic sunroof requires strict adherence to OEM (Original Equipment Manufacturer) standards. As a Master Technician at AlexWindshield, I follow a rigorous, highly detailed A-to-Z process to ensure your new sunroof is perfectly aligned, completely waterproof, and structurally sound.
Step 1: Meticulous Preparation and Interior Protection
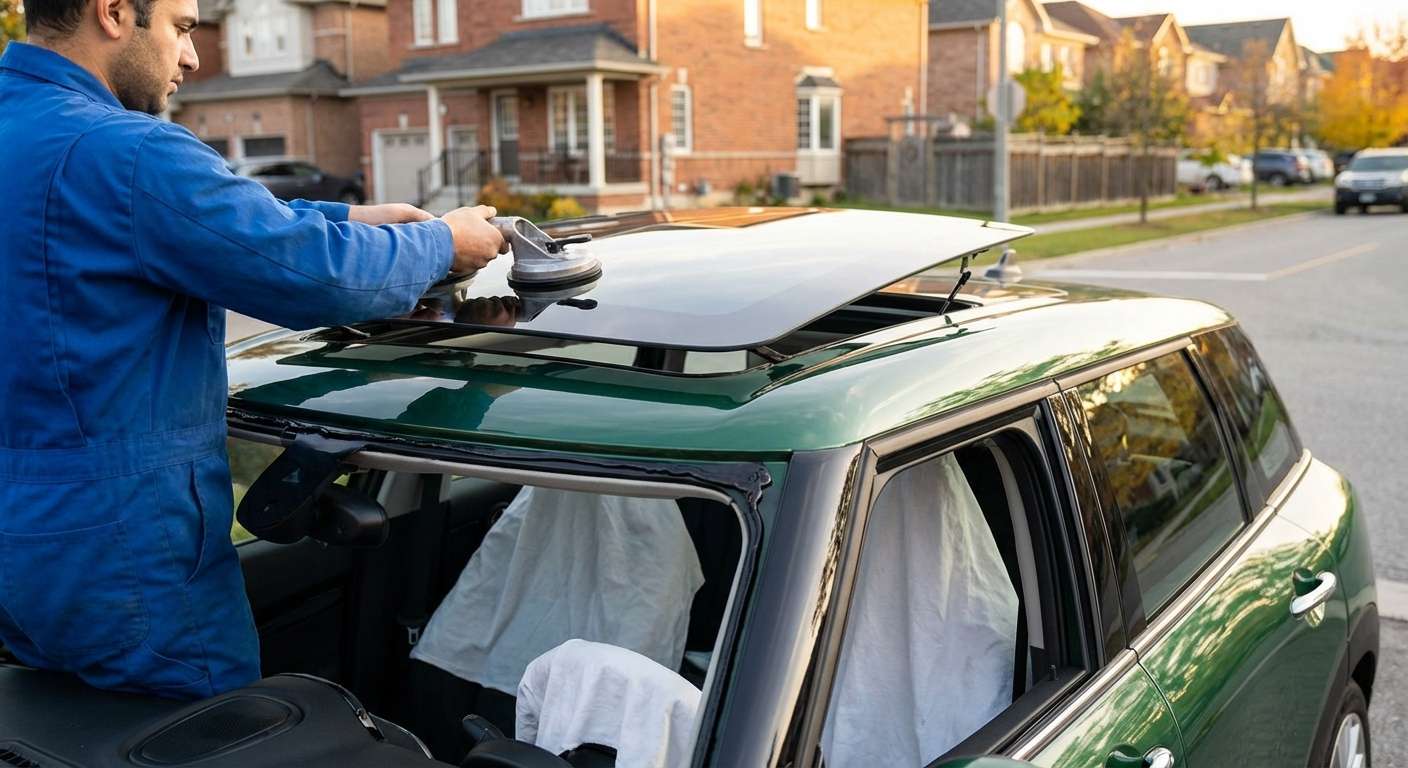
Before any tools are lifted, we secure the vehicle. The interior of the MINI Clubman F54 features premium materials, from leather seating to soft-touch dashboard plastics. We begin by thoroughly draping the entire interior with heavy-duty, scratch-resistant protective drop cloths. The dashboard, steering wheel, center console, and all seats are completely covered to ensure that no glass shards, dust, or chemical adhesives ever come into contact with your vehicle's pristine interior.
Step 2: Comprehensive Vacuuming and Tempered Glass Extraction
Because sunroofs are manufactured using tempered safety glass, a break usually results in an explosive shattering effect, sending thousands of tiny glass cubes everywhere. It is absolutely critical to remove every single piece of broken glass. We use high-powered industrial vacuums equipped with micro-crevice tools to extract all broken glass shards from the vehicle's interior, the seating crevices, the floor mats, and the headliner. Most importantly, we meticulously vacuum the delicate sunroof cassette tracks to ensure no microscopic glass fragments remain that could bind or destroy the sunroof motor mechanisms in the future.
Step 3: Hardware Disassembly and Removal of the Old Glass
With the interior protected and the loose debris cleared, we proceed to remove the compromised glass. For the moving glass panel, this involves carefully removing the specialized Torx screws that bind the glass to the motorized track arms. For the fixed, bonded sections of the panoramic roof, we utilize specialized cold-knife and wire-cutting extraction tools to cleanly slice through the factory urethane without scratching the MINI's painted roof frame. The remaining damaged glass or broken frame is then carefully lifted away from the vehicle.
Step 4: Sunroof Cassette Cleaning and Drainage Tube Inspection
The F54 Clubman utilizes a hidden network of rubber drainage tubes routed down the pillars of the car to channel water away from the sunroof cassette. Before installing new glass, we rigorously clean the mechanical tracks and flush the drainage tubes. We use compressed air and specialized cleaning solutions to ensure these drains are entirely free of dirt, tree sap, and glass shards. A clogged drain is the number one cause of post-installation leaks, so this step is absolutely mandatory for a perfect repair.
Step 5: Surface Cleaning and Primer Application
For the bonded sections of the sunroof, the bare metal and the old urethane track must be meticulously prepared. We use a specialized urethane trimming tool to level the existing adhesive bead down to a uniform 1-2 millimeter base layer. Next, we clean the pinch weld using an industry-grade, alcohol-based glass cleaner to strip away any remaining dirt, grease, or moisture. Once completely sanitized, we apply a high-tech chemical primer to both the vehicle's metal pinch weld and the bonding edge of the new sunroof glass. This primer application is non-negotiable; it creates an aggressive chemical bite, ensuring that the new adhesive will bond at a molecular level to both the glass and the vehicle frame, restoring the factory structural rigidity.
Step 6: High-Quality Urethane Adhesive Preparation and Application
With the primer cured, we load our electric caulking guns with a premium, OEM-certified, high-quality automotive urethane adhesive. This is not standard silicone; it is a rapid-curing structural adhesive designed to withstand massive kinetic forces. We apply a uniform, perfectly shaped V-bead of this high-quality adhesive around the perimeter of the mounting frame. The consistency and height of this adhesive bead are carefully calculated to prevent messy squeeze-out while ensuring a completely watertight and airtight seal.
Step 7: Precision Installation of the New Panoramic Glass
Handling large pieces of panoramic glass requires immense precision. Using industrial suction cups, our technicians carefully lower the new, OEM-quality sunroof glass into the exact correct position on the first try. Once the glass makes contact with the wet urethane adhesive, it cannot be shifted without compromising the seal. We apply gentle, even pressure around the perimeter to seat the glass securely into the adhesive bed. For the mechanically fastened moving panels, we carefully drop the new glass onto the tracks, hand-thread the Torx bolts to ensure the mounting brackets are not cross-threaded, and precisely torque them to factory specifications.
Step 8: Post-Installation Testing and Quality Assurance
Once the new glass is installed, we realign the weatherstripping to ensure it sits perfectly flush with the roofline, drastically reducing the potential for wind noise. We then reconnect the battery if it was disconnected and run the sunroof through its full mechanical cycle—tilting, sliding back, and closing—to ensure the motor operates smoothly without binding. Finally, we conduct a secondary, exhaustive vacuuming of the interior, remove all protective drop cloths, and clean the new glass to a streak-free, showroom shine.
Why Choose AlexWindshield for Your MINI Clubman F54
When you trust your premium vehicle to a glass shop, you need to know that the technicians working on it treat it with the respect it deserves. Here is why discerning MINI owners across the GTA choose us:
- Master Technician Expertise: We do not employ entry-level installers for complex panoramic roofs. Your vehicle will be serviced by a Senior Auto Glass Technician who understands the specific quirks and engineering tolerances of the MINI F54 platform.
- Premium Materials: We use only OEE (Original Equipment Equivalent) or true OEM glass, perfectly matched to your Clubman's factory tint and acoustic properties, paired with industry-leading, crash-tested urethane adhesives.
- Comprehensive Debris Removal: We guarantee the meticulous vacuuming of all broken glass shards from your vehicle's interior, tracks, and hard-to-reach crevices.
- Mobile Convenience: Serving Vaughan, Richmond Hill, Markham, and the wider GTA, we bring the auto glass shop directly to your home or workplace, saving you hours of transit and waiting time.
Book Your Mobile Sunroof Replacement Today with AlexWindshield
Do not let a shattered or leaking sunroof ruin the driving experience of your beloved MINI Clubman. Whether you need a full panoramic cassette replacement or a single glass panel swap, the Master Technicians at AlexWindshield are ready to restore your vehicle to its factory-fresh glory. As the most trusted expert for mobile auto glass services in the GTA, we stand proudly behind our craftsmanship by offering an industry-leading Lifetime Warranty on our workmanship, guaranteeing your new sunroof will be completely free of wind noise and water leaks for as long as you own the vehicle. Contact AlexWindshield today to schedule your specialized, mobile F54 sunroof replacement, and get ready to experience the sky again with total peace of mind.




