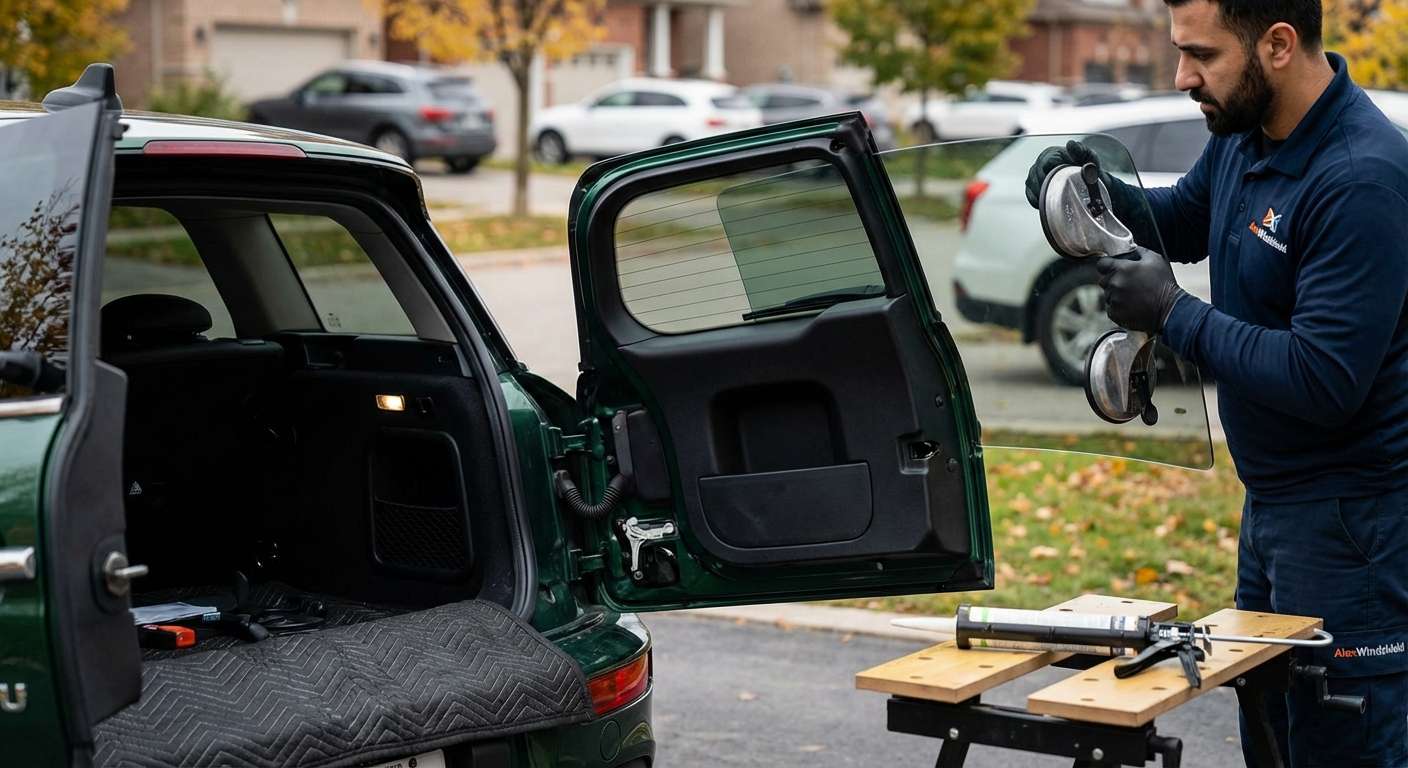
The Iconic Barn Doors: Specialized Back Glass Replacement for the MINI Clubman 2016-2024 (F54)
The MINI Clubman 2016-2024 (F54 generation) is an automotive masterpiece that perfectly blends iconic British styling with modern practicality. One of its most defining and beloved features is the unique six-door configuration, highlighted by the signature "barn doors" or split rear doors at the back. While these dual rear doors give the Clubman its unmistakable character, they also present a highly unique challenge when a rear window shatters. Unlike a standard hatchback with a single large piece of glass, the F54 Clubman utilizes two separate, precisely curved back glasses—each equipped with its own defroster grid and rear wiper integration. When tragedy strikes and one or both of these specialized windows break, you need a master technician who understands the intricate anatomy of the modern MINI.
At AlexWindshield, we don't just replace auto glass; we engineer solutions tailored to the exact specifications of your vehicle. A shattered back glass on an F54 Clubman leaves the interior exposed to the elements and scatters thousands of razor-sharp pieces throughout your premium interior. Generic glass shops often lack the specialized knowledge required to correctly dismantle the split-door mechanisms, leading to interior rattles, malfunctioning wipers, or failed defrosters. As senior auto glass specialists, we bring dealership-level precision directly to your driveway, restoring the safety, security, and aesthetic perfection of your MINI Clubman.
Premier Mobile Auto Glass Services Across the Greater Toronto Area (GTA)
Dealing with a broken back glass is incredibly stressful, especially when your vehicle is left vulnerable to theft and weather. Driving a MINI Clubman with a shattered rear window is not only dangerous due to compromised visibility and flying debris, but it is also highly impractical. That is exactly why AlexWindshield offers premium, fully mobile auto glass replacement services tailored specifically for European and luxury vehicles.
We proudly serve the entire Greater Toronto Area (GTA), bringing our state-of-the-art mobile glass shop directly to your home, office, or emergency location. Our master technicians frequently dispatch to key areas, ensuring rapid response times across the region. Whether you are parked outside a café in Vaughan, at your corporate office in Richmond Hill, or at your residential home in Markham, we provide seamless, on-site back glass replacements. You never have to worry about towing your Clubman or risking a dangerous drive across town; we bring our expertise, premium OEM-quality glass, and advanced tools directly to you.
The Shattered Reality: Tempered Glass and the Importance of Deep Cleaning
Unlike the front windshield, which is made of laminated glass designed to stay intact upon impact, the back glass of your MINI Clubman 2016-2024 is manufactured from tempered safety glass. When tempered glass sustains a severe impact—whether from road debris, vandalism, or a backing-up accident—it is engineered to instantly shatter into thousands of tiny, pebble-like cubes. While this prevents large, lethal shards from injuring passengers, it creates a massive, invasive mess.
Because the F54 Clubman features split rear doors, the shattered glass doesn't just fall into the trunk space. The force of the break forces hundreds of tiny glass cubes directly down into the internal cavity of the door shell itself. If a technician simply slaps a new piece of glass onto the vehicle without addressing this, every time you open or close your barn doors, you will hear the maddening sound of glass rattling inside the metal framework. Furthermore, these hidden shards can jam the rear wiper motor mechanism or damage the rear latch actuator. At AlexWindshield, comprehensive debris extraction is a mandatory pillar of our back glass replacement process.
A to Z Master Technician Step-by-Step Back Glass Replacement Process
Replacing the rear glass on an F54 Clubman requires extreme precision, patience, and technical proficiency. Below is the exact, comprehensive step-by-step methodology utilized by the master technicians at AlexWindshield to ensure a flawless, factory-grade installation.
Step 1: Vehicle Assessment and Interior Protection
- Pre-Inspection: We begin by verifying the specific glass required—identifying whether the left or right barn door glass is damaged (or both), and checking the specific factory tint level (privacy glass) and defroster compatibility.
- Protecting the Paint and Interior: We apply protective automotive tape around the exterior painted edges of the affected split door to prevent any scratches during the extraction process.
- Interior Shielding: Heavy-duty protective drop cloths are draped over the Clubman's premium rear seating and cargo area floor to capture any loose glass shards that may fall during the dismantling phase.
Step 2: Barn Door Panel and Component Removal
- Wiper Assembly Detachment: We carefully unbolt and remove the exterior rear wiper arm associated with the broken glass.
- Interior Trim Removal: Using specialized non-marring pry tools, we meticulously remove the interior plastic trim panels of the F54's rear split door. This exposes the inner mechanical workings of the door shell.
- Disconnecting Electronics: We carefully unplug the wiring harnesses for the rear window defroster grid and the rear wiper motor to ensure no electrical shorts occur.
Step 3: Extensive Glass Extraction and Cavity Vacuuming
- Clearing the Frame: Using specialized glass-handling tools and heavy-duty protective gloves, we remove any remaining large chunks of shattered glass still clinging to the door frame.
- Deep Interior Vacuuming: We deploy high-powered, industrial shop vacuums equipped with micro-crevice tools. We vacuum the cargo area, the rear seats, and the floor mats.
- Door Cavity Extraction: Most importantly, we vacuum completely inside the exposed metal cavity of the rear split door. We ensure every single micro-shard of glass is extracted, guaranteeing a rattle-free driving experience after the repair is complete.
Step 4: Pinch Weld Preparation and Old Adhesive Removal
- Cutting the Old Urethane: The original factory glass was held in place by a thick bead of urethane. We use precision extractor knives and cold-knife tools to carefully shave down this old urethane bead.
- Leaving the Base Layer: We shave the old adhesive down to a thin, uniform layer (about 1-2 millimeters thick). This remaining layer acts as the absolute best bonding surface for the new urethane to adhere to.
- Surface Cleaning: The entire channel (pinch weld) is rigorously cleaned using specialized, alcohol-based auto glass cleaning agents to remove dirt, grease, and microscopic glass dust. Any contamination here can cause devastating water leaks in the future.
Step 5: Primer Application and Corrosion Prevention
- Treating Bare Metal: If any minor scratches occurred on the pinch weld during the removal process (revealing bare metal), we immediately apply a specialized high-performance glass primer.
- Rust Prevention: This step is critical. The primer chemically treats the metal, sealing it away from moisture and preventing the formation of rust under the glass, which could otherwise compromise the vehicle's structural integrity years down the line.
- Glass Preparation: The ceramic frit band (the black border) of the brand new MINI Clubman glass is also cleaned and primed to promote maximum chemical adhesion.
Step 6: High-Quality Urethane Adhesive Application
- Premium Materials: We exclusively use industry-leading, fast-curing, OEM-grade urethane adhesive. This is the exact same chemical bonding agent used on the MINI assembly line.
- The V-Bead Technique: Our technicians apply the urethane using a specialized caulking gun equipped with a V-notch nozzle. We extrude a perfectly uniform, triangular "V-bead" of urethane around the entire perimeter of the glass or the door frame. This specific shape ensures that when the glass is pressed into place, the adhesive spreads perfectly, eliminating air pockets, wind noise, and water leaks.
Step 7: Precision Installation of the New Clubman Back Glass
- Setting the Glass: Utilizing heavy-duty suction cup grips, the technician carefully aligns the uniquely shaped curved glass with the F54's split door frame. The glass is gently pressed into the fresh urethane bed.
- Alignment Checks: We double-check the exact factory gaps and spacing around all edges, ensuring the glass sits perfectly flush with the adjacent door and body panels.
- Reconnecting Hardware: The rear wiper motor is re-installed, the wiper arm is torqued to factory specifications, and the specialized MINI electrical connectors for the heated defroster grids are securely plugged back in.
- Reassembling the Interior: The interior plastic door panels and trim pieces are carefully snapped back into place, restoring the cabin to its pristine original condition.
Step 8: Final Inspection, Curing Time, and Clean-Up
- System Testing: We power on the vehicle to test the rear wiper functionality and verify that the electrical current is flowing correctly through the newly installed rear defroster grid.
- Safe Drive-Away Time (SDAT): We calculate the precise curing time of the urethane based on the current temperature and humidity. We strictly advise the client on exactly when the vehicle is safe to drive, ensuring the adhesive has cured enough to meet Federal Motor Vehicle Safety Standards.
- Final Polish: The new glass is polished using professional-grade, streak-free glass cleaners. We do one final walkthrough of the vehicle's interior to ensure it is spotlessly clean and exactly as you left it—if not cleaner.
Why Premium Glass Matters for Your MINI F54
The F54 Clubman is a premium vehicle, and installing cheap, aftermarket glass can ruin its aesthetic and functional value. Inferior glass often suffers from visual distortion, improper curvature, and poorly constructed defroster lines that burn out prematurely. At AlexWindshield, we strictly source High-Quality Original Equipment Equivalent (OEE) or true OEM glass for all MINI replacements. This guarantees that your new barn door glass features the exact factory privacy tint, precise edge molding, and highly durable defroster grids required to survive harsh Canadian winters. Furthermore, exact curvature ensures that your rear wiper blade maintains perfect contact with the glass, preventing annoying streaks and missed spots during rainstorms.
Trust AlexWindshield: Your GTA Auto Glass Experts
Your MINI Clubman is a statement of style and engineering, and it deserves to be treated with the highest level of respect. Attempting to drive with a broken rear window, or trusting the complex split-door mechanics to inexperienced budget glass shops, is a risk you simply do not have to take. Our highly skilled master technicians are equipped with the specialized knowledge required to handle the intricate electronics, unique body styling, and extensive cleanup processes specific to the MINI Clubman 2016-2024 (F54).
When you choose AlexWindshield, you are choosing unparalleled convenience and uncompromising quality. We proudly offer fully mobile services across the GTA, bringing our top-tier expertise directly to your location in Vaughan, Richmond Hill, Markham, and beyond. Every single piece of glass we install is backed by our comprehensive Lifetime Warranty against leaks, whistling, and manufacturer defects. You can drive away with absolute confidence, knowing your vehicle has been restored by the very best in the industry.
Don't let a shattered barn door ruin the drive of your beloved MINI. Contact AlexWindshield today to schedule your expert mobile back glass replacement, and experience the ultimate standard in auto glass repair across the Greater Toronto Area!




