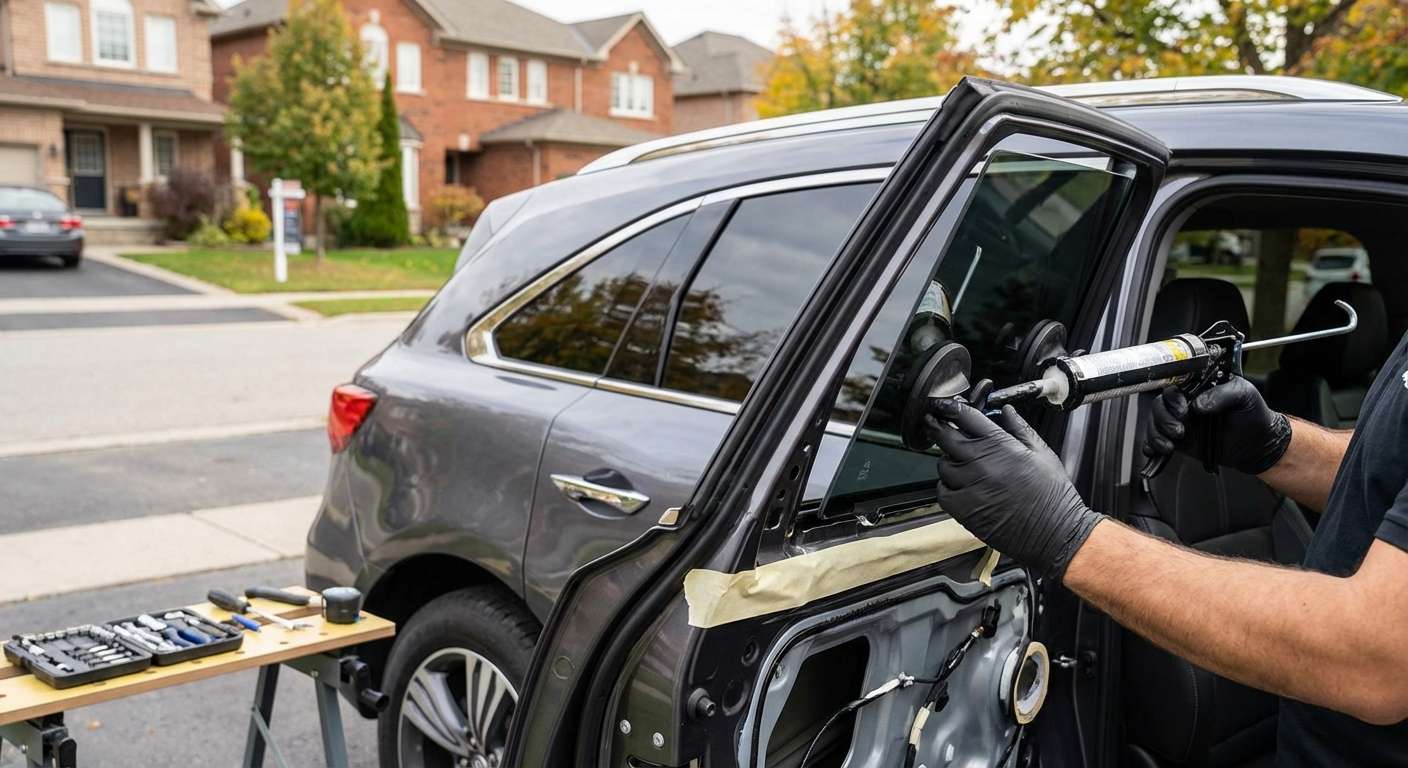
Restoring the Silence and Security of Your 3rd Gen Acura MDX: Expert Vent Glass Replacement
The sharp lines, Jewel Eye LED headlights, and aerodynamic profile of the 3rd Generation Acura MDX (2014-2020) are designed to convey motion even when standing still. However, nothing disrupts the sleek aesthetic and the meticulously engineered cabin silence of this luxury SUV quite like a shattered vent glass. Often the victim of road debris or, more unfortunately, a targeted break-in due to its discreet size, a broken vent glass is more than a cosmetic annoyance—it is a breach in your vehicle’s security and weatherproofing. At AlexWindshield, we understand that for an Acura MDX owner, "good enough" is not an option. You require factory-spec precision, hermetic sealing, and an installation process that respects the intricate engineering of your vehicle.
Whether you are commuting from Vaughan, parked in a driveway in Richmond Hill, or at an office in Markham, a compromised window requires immediate professional attention. This guide details our master-level technical process for replacing the rear door vent glass on the 2014-2020 Acura MDX, demonstrating why AlexWindshield is the premier choice for auto glass solutions across the Greater Toronto Area (GTA).
Understanding the Role of the Vent Glass in Your Acura MDX
Many drivers mistakenly believe that the small, triangular piece of glass located on the rear door—known technically as the vent glass or quarter glass—is the simplest piece to replace. In reality, it is often one of the most mechanically complex installations on the vehicle. Unlike the main roll-down window, the vent glass is typically a fixed unit that is structurally bonded to the door frame or held in place by a rigid division bar.
For the 2014-2020 Acura MDX, this glass contributes to the vehicle's acoustic damping and structural rigidity. A poor installation can lead to high-pitched wind whistles at highway speeds, water leaks that damage the door speakers, or rust formation within the pinch weld. At AlexWindshield, we treat this replacement as a surgical procedure, ensuring the complex interplay between the glass, the division bar, and the door frame is perfectly restored.
Service Availability: Mobile Auto Glass Repair in the GTA
We recognize that driving a vehicle with shattered glass is unsafe and uncomfortable. That is why AlexWindshield offers a comprehensive Mobile Service that brings our workshop to you. We proudly serve the entire Greater Toronto Area, with specific rapid-response teams dedicated to:
- Vaughan: From Woodbridge to Maple, we handle replacements on-site.
- Richmond Hill: We service residential and commercial hubs along Yonge Street and beyond.
- Markham: covering Unionville, Cornell, and surrounding business districts.
- Toronto Core & Suburbs: Anywhere your Acura MDX is parked.
The AlexWindshield Technical Protocol: Step-by-Step Replacement
As Master Technicians, we do not skip steps. The following is a detailed, A-to-Z breakdown of how we perform a vent glass replacement on an Acura MDX (2014-2020). This transparent look into our process highlights the care we take with your luxury SUV.
Phase 1: Site Preparation and Interior Protection
Before any glass is removed, we must protect the vehicle. The shattered remains of tempered glass can scratch leather and scratch paint if not handled correctly.
- Exterior Protection: We apply low-tack automotive masking tape to the painted surfaces of the rear door frame and the "C" pillar. This prevents accidental scratches from glass removal tools.
- Interior Shielding: We place heavy-duty covers over the rear seats and floor mats. The Acura MDX leather upholstery is premium, and we ensure it remains pristine.
- Debris Containment: If the glass is still partially intact but shattered, we apply a specialized retention film over the break to keep shards together during the removal process.
Phase 2: Door Panel Disassembly
Unlike a windshield replacement, replacing the vent glass on an MDX requires access to the internal mechanics of the door. The glass is held in place by a "division bar" (the vertical pillar separating the small glass from the main window), which is anchored inside the door shell.
Step-by-Step Disassembly:
- Trim Removal: We carefully use non-marring plastic pry tools to remove the decorative cover behind the interior door handle and the cover inside the armrest pull cup to reveal the mounting screws.
- Fastener Removal: We unscrew the hidden Phillips-head screws securing the door card to the metal door frame.
- Unclipping the Panel: Starting from the bottom edge, we pop the retention clips holding the door panel in place. We lift the panel upward to clear the window weatherstrip.
- Cable Disconnection: We disconnect the door latch cables and the electrical harness for the power window switch and door locks. The panel is then stored safely outside the work zone.
- Vapor Barrier Management: The MDX features a moisture barrier (vapor shield) glued to the door metal. We carefully peel this back to access the service holes, ensuring the butyl adhesive remains intact for resealing later.
Phase 3: Deep Cleaning and Glass Extraction
This is a critical safety step. When tempered glass breaks, it explodes into thousands of cubes that fall deep into the door cavity.
- Vacuuming the Interior: We thoroughly vacuum the seats, floor, and carpet.
- Internal Door Cavity Cleaning: This is where amateurs fail. We insert a flexible vacuum nozzle inside the door shell to suck up glass shards resting at the bottom of the door. Failure to do this results in a "rattling" sound every time you close the door or drive over a bump.
- Regulator Protection: We ensure no glass shards are lodged in the grease of the main window regulator tracks or the gears, which could cause the main window to fail later.
Phase 4: Removing the Vent Glass Assembly
On the 2014-2020 Acura MDX, the vent glass interacts closely with the division bar (run channel).
- lowering the Main Window: We temporarily reconnect the window switch to lower the main glass, moving it out of the way.
- Loosening the Division Bar: We locate the bolts securing the vertical division bar at the top of the door frame and inside the door shell. These are loosened or removed to allow the bar to shift.
- Removing the Old Weatherstrip: The rubber channel that runs around the vent glass is usually removed or pulled back.
- Cutting the Adhesive (If Bonded): Depending on the specific sub-model trim, the vent glass may be encapsulated or bonded directly to the frame. If bonded, we use a cold knife to slice through the existing urethane bead without scratching the pinch weld.
- Extraction: We manipulate the division bar and the glass frame to slide the old unit (or remains of it) out of the door.
Phase 5: Surface Preparation and Priming
A leak-free install depends on chemical adhesion. We prepare the metal frame to receive the new glass.
- Trimming the Old Bead: If urethane was used, we trim the old adhesive down to a thin, clean layer (approx. 1-2mm). This serves as the best base for the new adhesive.
- Clean and Prime: We clean the bonding surface with a specialized impurity-removing solvent. Any bare metal exposed during the removal process is treated with a black anti-corrosion primer. This prevents rust from forming under the glass, which is a common issue in the salty winter conditions of the GTA.
Phase 6: Installation of the New Vent Glass
We use only OEM-equivalent glass that matches the tint, thickness, and curvature of your Acura MDX original manufacturing specifications.
- Adhesive Application: We apply a high-viscosity, high-modulus urethane adhesive. This is the same industrial-grade glue used in the factory. It provides structural strength and prevents the glass from shifting.
- Setting the Glass: The new vent glass is carefully angled into the door frame. We must simultaneously align the glass with the body of the car and the division bar.
- Securing the Division Bar: Once the glass is seated in the urethane or gasket, the division bar is pushed back into position tight against the vent glass rubber. This creates the seal.
- Torquing Bolts: The bolts holding the division bar are tightened to factory torque specs. This ensures the main window still slides up and down smoothly without binding against the bar.
Phase 7: Reassembly and Final Checks
The job isn't done until the car looks exactly as it did before the break.
- Testing the Main Window: Before putting the door panel back on, we test the main roll-down window to ensure it moves freely and doesn't catch on the newly installed vent assembly.
- Vapor Barrier Reseal: We re-stick the moisture barrier to the door. This keeps water from entering the cabin and damaging your door panel leather.
- Panel Installation: The door card is reconnected (harnesses plugged in) and snapped back onto the door. Screws are replaced, and decorative covers are installed.
- Final Clean: We perform a final glass clean with alcohol-based cleaner to remove any fingerprints or smudge marks, leaving you with a crystal-clear view.
Why Choose AlexWindshield for Your Acura MDX?
The 2014-2020 Acura MDX is a sophisticated machine. Replacing the glass requires more than just generic knowledge; it requires familiarity with Acura's assembly techniques. Choosing AlexWindshield guarantees:
1. Master Technician Expertise
Our technicians are not entry-level installers. We understand the complexities of door internals, side airbags, and acoustic glass requirements specific to luxury SUVs.
2. High-Quality Materials
We utilize Sika® or Dow® automotive urethane systems that offer rapid drive-away times and superior holding power. Our glass meets or exceeds all safety standards for the North American market.
3. Local Focus
We are a part of your community. Whether you are in Vaughan, Richmond Hill, or Markham, we treat your vehicle with the neighborly care and professional respect it deserves. We know the local climate and prep your vehicle to withstand Ontario winters.
Our Promise: The Lifetime Warranty
We stand firmly behind our craftsmanship. Every vent glass replacement performed by AlexWindshield comes with a Lifetime Warranty on leakage and workmanship for as long as you own the vehicle. If the glass leaks or creates wind noise due to our installation, we fix it—free of charge. No questions asked.
Do not let a broken vent glass compromise the security or the silence of your Acura MDX. Trust the experts who know your vehicle inside and out.
Contact AlexWindshield today at [Insert Phone Number] or request a free quote online to schedule your mobile service in the GTA. Restoring your view, protecting your journey.




