The Unique Appeal of the MINI Cooper F55/F56 and Its Specific Windshield Demands
The MINI Cooper and Cooper S (2014-2024), specifically the 3-door (F56) and 5-door (F55) platforms, are globally celebrated for their signature "go-kart" handling, spirited turbocharged performance, and unmistakable retro-modern styling. However, a core element of this iconic design is the vehicle's steeply raked, nearly vertical windshield. While this upright orientation provides exceptional driver visibility and contributes to the classic MINI silhouette, it acts as a literal wall against road debris. Because the glass lacks a sweeping aerodynamic angle, stones and gravel kicked up by other vehicles are far more likely to cause severe impacts, rock chips, and spreading cracks.
When your MINI Cooper suffers irreversible glass damage, a standard patch job simply will not suffice. Modern MINIs are equipped with highly sophisticated electrical and safety systems embedded directly into or mounted onto the windshield glass. As a Master Auto Glass Technician, I approach every MINI Cooper F55/F56 windshield replacement with precision engineering in mind, ensuring your vehicle remains as safe, structurally sound, and technologically accurate as the day it rolled off the assembly line in Oxford.
Understanding the Technology Behind Your MINI F55/F56 Windshield
Before we dive into the replacement process, it is vital to understand that a windshield on a modern 2014-2024 MINI Cooper / S is not just a piece of curved glass; it is a critical safety component and a hub for advanced technology. Depending on your trim level, your windshield may house:
- Rain and Light Sensors: Automated systems that detect moisture to activate wipers and gauge ambient lighting to control your headlights. These require pristine optical clarity and specialized silicone gel pads during installation.
- Heated Glass Elements: Many Canadian and Northern market MINIs feature ultra-fine micro-wires embedded in the glass for rapid winter defrosting.
- Condensation Sensors: Integrated directly with your MINI’s automatic climate control system to prevent interior fogging.
- Advanced Driver Assistance Systems (ADAS): The forward-facing KAFAS camera mounted behind the rearview mirror controls vital safety features like Forward Collision Warning, Pedestrian Detection, and Adaptive Cruise Control.
Our Master Technician's Step-by-Step Windshield Replacement Process for the MINI Cooper (F55/F56)
Replacing the windshield on a modern MINI Cooper requires specialized tools, extensive training, and absolute meticulousness. Here is the comprehensive, A-to-Z technical process utilized by our expert technicians to guarantee a flawless installation.
Step 1: Comprehensive Pre-Inspection and Interior Protection
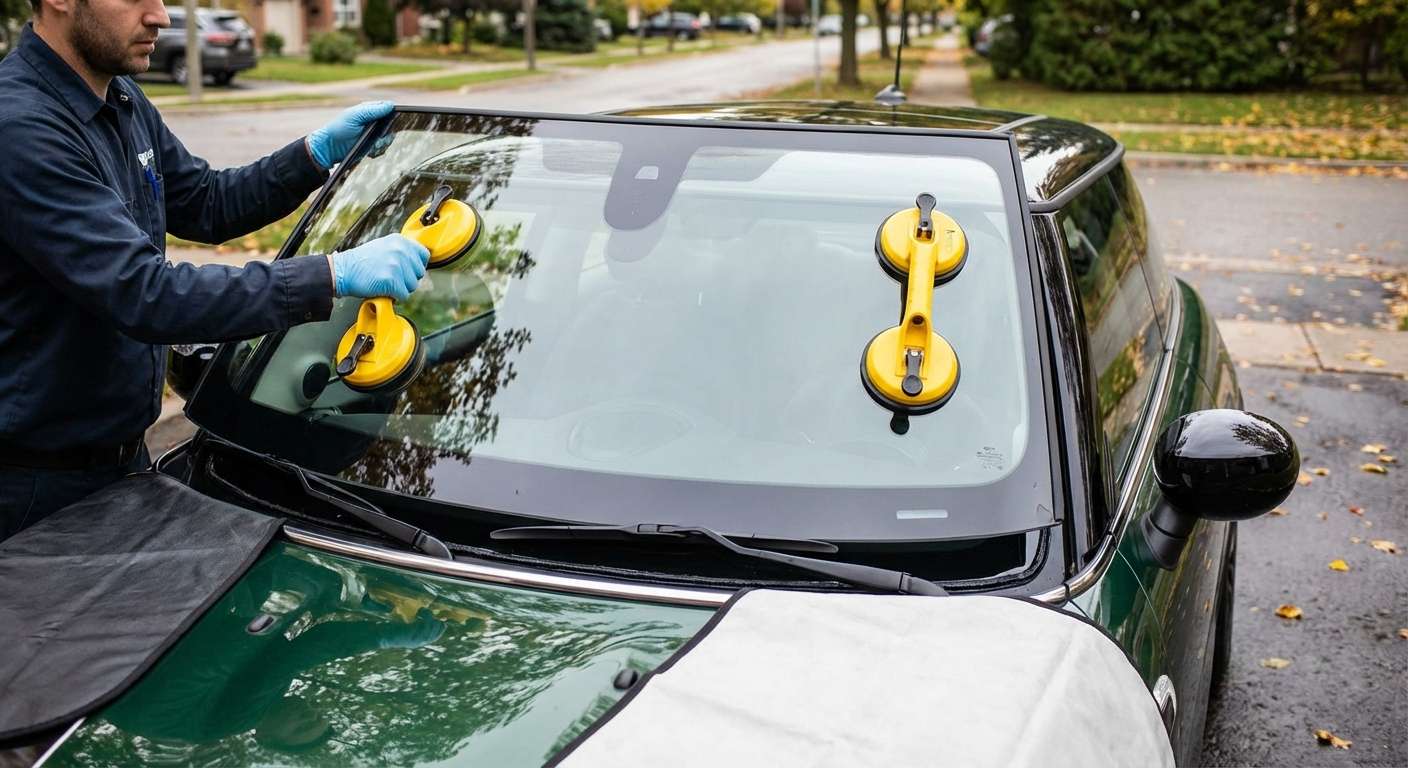
The service begins before any tools touch the vehicle. We conduct a thorough pre-inspection of the MINI’s electronics, testing the rain sensor, wiper functionality, and checking for any pre-existing ADAS fault codes. Next, we prioritize the protection of your vehicle. We drape specialized, scratch-resistant protective covers over the front fenders and hood. Inside the cabin, we place protective drop cloths over the steering wheel, dashboard, and front seats to ensure zero debris or urethane contaminates your pristine MINI interior.
Step 2: Careful Removal of Wiper Arms, Cowl, and Delicate Exterior Trims
The F55 and F56 MINIs feature highly specific exterior moldings. We begin by unbolting and removing the windshield wiper arms using a specialized puller tool to prevent stripping the splines. Next, we carefully detach the plastic lower cowl assembly. The MINI Cooper A-pillar trims (side moldings) are notoriously delicate; we use dedicated non-marring nylon pry tools to disengage the internal retaining clips without breaking the plastics or scratching the vehicle's paint. Inside, we carefully detach the rearview mirror assembly and disconnect the wiring harnesses for the ADAS camera, rain sensor, and heated glass elements.
Step 3: Precise Removal of the Damaged Windshield
To extract the broken glass, we employ advanced wire-cutting systems (such as the WRD or Spider fiber line systems) rather than outdated, aggressive cold knives. We thread a high-tensile cutting line through the original polyurethane bead. By methodically pulling the line around the perimeter of the glass, we slice through the factory adhesive. This sophisticated technique guarantees that the vehicle's metal pinch weld remains completely unscathed, entirely eliminating the risk of future rust formation—a common issue with rushed, low-quality glass shops.
Step 4: Pinch Weld Preparation and Cleaning
Once the old windshield is safely lifted away, we are left with the vehicle's pinch weld and the old layer of urethane adhesive. Using specialized scraping blades, we perform a "close cut," trimming the existing urethane bead down to a uniform thickness of 1 to 2 millimeters. This thin layer of old adhesive acts as the perfect chemical base for the new urethane to bond to. We then rigorously clean the channel, vacuuming any hidden dirt, pine needles, or micro-shards of glass from the dashboard gaps. The area is subsequently wiped down with a specialized, lint-free chemical prep wash.
Step 5: Primer Application and High-Quality Adhesive Extrusion
Preparation of the new glass is just as vital. We clean the new, OEM-quality windshield with an industrial-grade glass cleaner. We then apply an automotive glass primer to the ceramic frit band (the black painted edge of the glass) and to any minuscule areas of bare metal on the vehicle's body. The primer acts as an essential bonding agent and UV protectant. Following this, we use an electric caulking gun to extrude a precise, continuous "V-bead" of premium, fast-curing structural polyurethane adhesive along the pinch weld. The V-shape ensures a perfectly even spread of adhesive when the glass is compressed, guaranteeing a watertight and airtight seal.
Step 6: Setting the New Windshield
Because the urethane begins to cure quickly, the setting process must be flawless. Using heavy-duty suction cup lifting tools, two master technicians carefully align the new windshield with the MINI’s frame. The glass is gently lowered into the fresh urethane bead. We use alignment pins and specific measuring techniques to ensure the glass is perfectly centered, matching the precise factory depth and preventing any wind noise or water leaks.
Step 7: Reassembly and Safe Drive-Away Time (SDAT)
With the new glass securely in place, we reverse the disassembly process. We re-attach the ADAS camera module, reconnect all electrical harnesses, and affix a new silicone gel pad for the rain/light sensor to ensure perfect optical clarity. The A-pillar trims, lower cowl, and wiper arms are reinstalled and torqued to factory specifications. Finally, we respect the mandatory Safe Drive-Away Time (SDAT) of the specific urethane used, ensuring the adhesive has cured enough to structurally support the roof in the event of a rollover collision.
Mandatory ADAS Camera Calibration for the MINI F55/F56
When executing a windshield replacement on a 2014-2024 MINI Cooper equipped with a forward-facing KAFAS camera, physical installation is only half the job. ADAS Camera Calibration is an absolute, non-negotiable requirement.
Because the camera is physically removed from the old glass and mounted onto the new windshield, its viewing angle is inevitably altered by microscopic fractions of a millimeter. If left uncalibrated, safety systems like Automatic Emergency Braking, Lane Keep Assist, and Adaptive Cruise Control will receive distorted spatial data. This means your MINI might fail to brake for a pedestrian or violently steer you out of your lane.
Using state-of-the-art diagnostic computers and precisely measured optical target boards, our technicians tap into your MINI’s OBD-II port. We perform a comprehensive recalibration—often requiring both static workshop alignment and dynamic road testing—to ensure the camera’s pitch, yaw, and roll are reset to absolute factory zero. We do not hand the keys back until the vehicle's computer confirms the ADAS systems are functioning flawlessly.
Premium Mobile Auto Glass Services Across the Greater Toronto Area (GTA)
We understand that dealing with a shattered windshield disrupts your busy schedule. You shouldn't have to risk driving an unsafe vehicle across town or spend hours waiting in a shop. That is why we bring the shop to you. We offer premium, fully-equipped mobile windshield replacement services directly to your home, office, or workplace.
Whether you are navigating the heavy commuter traffic on Highway 400 in Vaughan, parked at a corporate office complex in Richmond Hill, or at home in a residential neighborhood in Markham, our mobile fleet covers the entire Greater Toronto Area (GTA). Our mobile service vans are outfitted with climate-controlled adhesive storage, portable ADAS calibration systems, and all the specialized tools required to perform a dealership-quality installation right in your driveway.
The AlexWindshield Guarantee: Lifetime Warranty and Expert Care
Your MINI Cooper F55/F56 is a masterpiece of compact engineering, and it deserves auto glass care that matches its premium pedigree. At AlexWindshield, we pride ourselves on being the most trusted, technically advanced mobile auto glass experts in the GTA. We exclusively utilize premium OEM-equivalent glass, the highest-rated chemical adhesives, and factory-certified calibration tools.
To give you ultimate peace of mind, every windshield replacement performed by AlexWindshield is backed by our comprehensive Lifetime Warranty. We guarantee our workmanship against any wind noise, water leaks, or manufacturer defects in the glass for as long as you own your MINI. Do not compromise on your safety or the structural integrity of your vehicle. Contact AlexWindshield today to schedule your expert MINI Cooper auto glass replacement in Vaughan, Richmond Hill, Markham, or anywhere across the GTA.




