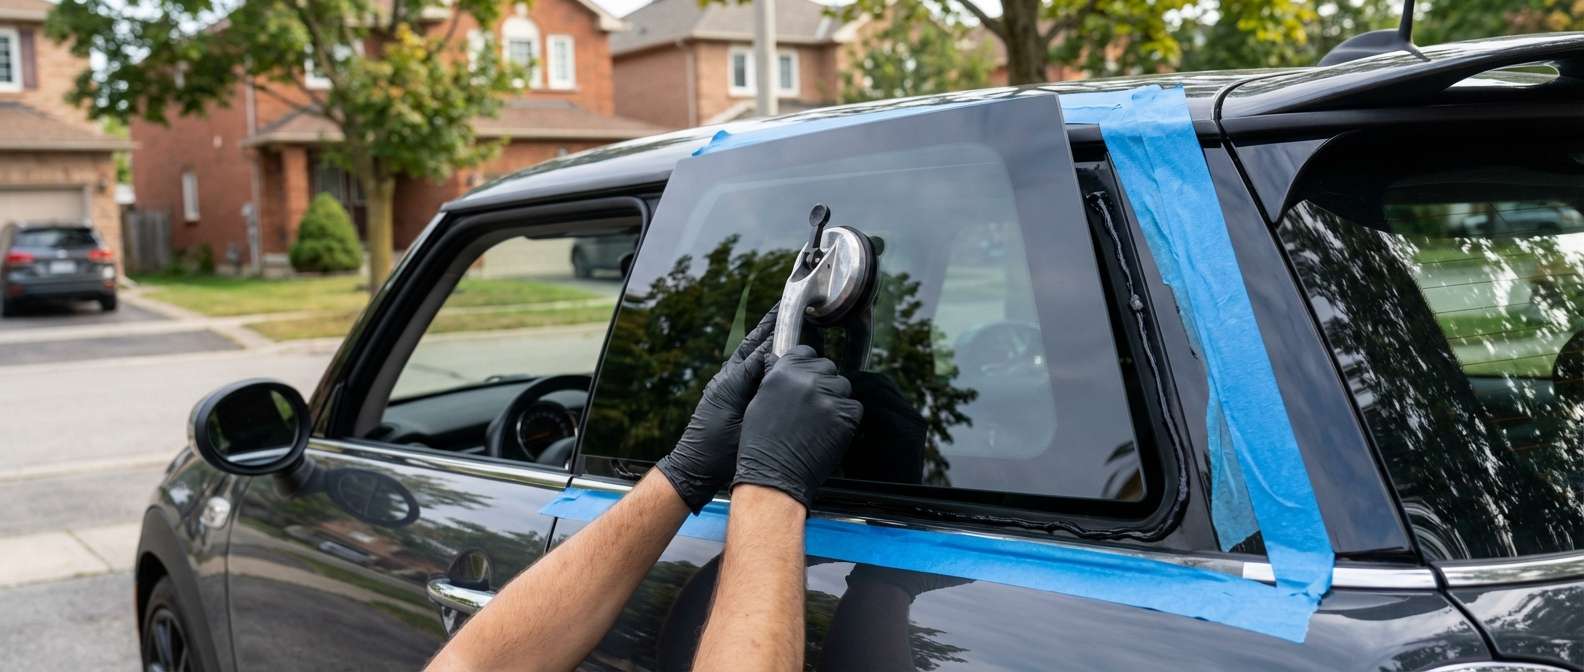
Reviving the Iconic Floating Roof: MINI Cooper F55/F56 Quarter Glass Replacement
The 2014-2024 MINI Cooper and Cooper S (F55/F56 chassis) are globally celebrated for their legendary go-kart handling, turbocharged performance, and unmistakable British charm. One of the most striking exterior features of this modern classic is its signature "floating roof" design. This visual masterpiece is achieved through seamlessly blackened pillars and elegantly flush-mounted quarter glass. When this specific piece of glass shatters—whether due to an unfortunate break-in, a rogue rock on the highway, or a severe thermal shock—it does more than just expose your cabin to the elements; it shatters the iconic silhouette of your MINI.
Replacing the encapsulated quarter glass on an F55 (5-door) or F56 (3-door) is far from a standard pop-and-swap job. Unlike older vehicles with simple rubber gaskets, the modern MINI utilizes structural, urethane-bonded glass that directly contributes to the vehicle's overall cabin rigidity. At AlexWindshield, we combine advanced automotive glazing techniques with a deep passion for European vehicles to restore your MINI to its factory-perfect condition.
Why the F55 and F56 MINI Cooper Require Expert Glass Services
The MINI Cooper F55 and F56 quarter glass is a highly specialized automotive component. Because it sits flush with the body panels to create an aerodynamic and aesthetically pleasing wrap-around effect, the tolerances for installation are incredibly tight. Even a millimeter of misalignment can result in an unsightly gap, aggressive wind noise at highway speeds, or catastrophic water leaks during heavy rain. Furthermore, these windows are made from premium tempered glass. When compromised, tempered glass is designed to safely explode into thousands of blunt, pebble-like shards rather than dangerous jagged shards. While safer for occupants, this creates an absolute mess inside the compact interior of a MINI.
As a Master Technician at AlexWindshield, I have seen countless botched installations where inexperienced technicians scratched the sensitive clear coat around the C-pillar or failed to apply the correct primer, leading to hidden rust. Our specialized service guarantees that the structural integrity, aesthetic appeal, and watertight seal of your vehicle are flawlessly maintained.
Mobile Auto Glass Replacement Across the Greater Toronto Area (GTA)
Dealing with a shattered window is stressful enough without the added burden of driving a severely compromised vehicle to a repair shop. Driving with a missing quarter glass exposes your interior to road dust, unpredictable Canadian weather, and deafening wind noise. That is exactly why AlexWindshield offers premium, fully mobile auto glass repair and replacement services across the Greater Toronto Area (GTA).
Whether you are parked in a residential driveway in Vaughan, stuck at a corporate office park in Richmond Hill, or visiting a shopping center in Markham, our state-of-the-art mobile service vans come directly to you. We bring the entire auto glass shop to your location, fully equipped with OEM-quality glass, specialized cutting tools, and climate-adaptive adhesives, ensuring you receive world-class service without ever having to disrupt your daily schedule.
Step-by-Step Quarter Glass Replacement Process for 2014-2024 MINI Cooper / S
Transparency is key to our customer service. When you book a quarter glass replacement with AlexWindshield, our Master Technicians follow a strict, manufacturer-approved standard operating procedure. Here is our detailed, A-to-Z technical process for restoring your MINI F55/F56:
Step 1: Pre-Inspection and Extensive Interior Protection
Before any tools are utilized, we conduct a comprehensive assessment of the damage. We inspect the surrounding painted body panels, the C-pillar trim, and the interior condition. We then apply wide, automotive-grade masking tape around the exterior window frame to completely protect the MINI's paintwork from accidental scratches during the removal process. Inside the vehicle, we lay down heavy-duty protective drop cloths over your premium cloth or leather seats, as well as the center console, to safeguard the unique interior from debris and adhesive.
Step 2: Thorough Vacuuming of Broken Glass Shards
Because the quarter glass is tempered, a break means thousands of tiny glass cubes have infiltrated your vehicle. Leaving even a few shards behind can cause annoying rattles or pose a cutting risk to passengers. We carefully remove the interior rear quarter panels and C-pillar trim as necessary. Using high-powered industrial vacuums equipped with specialized crevice tools, we meticulously extract every single shard of glass. We vacuum the rear seats, the parcel shelf, deep inside the window cavity, and the carpeting. We guarantee a clean, safe cabin before proceeding to the installation phase.
Step 3: Removing the Damaged Quarter Glass and Urethane Seal
With the area protected and clean, we begin the extraction of the broken window module. The MINI's quarter glass is securely bonded to the vehicle's body using heavy-duty polyurethane. We use advanced wire-cutting systems and specialized cold knives to carefully slice through the factory urethane bead from the inside out. This precision technique ensures that the pinch weld (the metal frame where the glass sits) remains perfectly intact without bending or suffering paint damage.
Step 4: Pinch Weld Preparation and Surface Cleaning
Once the remnants of the old glass and encapsulation are removed, we must prepare the bonding surface. The old polyurethane cannot be completely scraped away; instead, it is professionally trimmed down to a thin, level base layer of about 1-2 millimeters. This "close-cut" method provides the ultimate foundation for the new adhesive to grip. After trimming, the entire pinch weld channel is aggressively cleaned using a specialized, alcohol-based glass cleaner to remove grease, dirt, and any remaining micro-shards of glass.
Step 5: Primer Application to the Frame and Glass
This is a critical step that many budget shops skip, leading to disastrous long-term rust. We carefully inspect the pinch weld for any microscopic scratches in the paint that may have occurred during the life of the vehicle or the extraction process. We apply an advanced, fast-drying black glass primer to any exposed bare metal to inhibit rust. We also apply this specialized primer to the ceramic frit band on the edge of the brand-new quarter glass. This primer acts as a chemical bridge, ensuring the urethane adhesive creates a permanent, molecular bond with the glass.
Step 6: Applying High-Quality Urethane Adhesive
The strength of your new quarter glass relies entirely on the quality of the adhesive. At AlexWindshield, we exclusively use premium, OEM-grade, high-modulus polyurethane adhesive. Using an electric caulking gun, we apply a structurally perfect, continuous V-shaped bead of urethane directly onto the prepared pinch weld. The V-bead guarantees that when the glass is compressed, the adhesive spreads evenly without creating air pockets or messy spillover.
Step 7: Precision Installation of the New Quarter Glass
Handling the new glass requires a steady hand and an expert eye. For the MINI F55/F56, the quarter glass must align perfectly with the front door glass and the rear hatch to maintain the illusion of the floating roofline. We carefully set the new quarter glass into the wet urethane bed. Using specialized suction cups, we apply firm, even pressure to seat the glass into the channel, ensuring the outer encapsulation sits completely flush with the surrounding body panels. Retention tape is then applied to hold the glass in perfect alignment while the adhesive begins its initial curing process.
Step 8: Final Cleanup, Reassembly, and Quality Assurance
While the high-quality adhesive cures, we begin reassembling the vehicle. We carefully reinstall all interior C-pillar trim pieces and panels, ensuring all factory clips snap back into place without rattles. A final, meticulous vacuuming of the interior is performed, followed by a streak-free cleaning of all the exterior glass. We then verify the panel gaps and ensure the aesthetic flow of the MINI is fully restored. Finally, we advise the customer on the Safe Drive-Away Time (SDAT) to ensure the urethane sets perfectly.
Choose AlexWindshield: Your Trusted GTA Glass Experts
When you drive a vehicle with as much character as a 2014-2024 MINI Cooper or Cooper S, you shouldn't trust its maintenance to just anyone. Your safety, vehicle security, and driving pleasure depend on flawless automotive glass installation.
By choosing AlexWindshield, you are opting for unparalleled expertise, ultimate convenience, and supreme peace of mind. Our mobile fleet proudly serves the entire GTA, with a strong focus on delivering rapid, reliable service to the communities of Vaughan, Richmond Hill, and Markham. We stand behind the quality of our craftsmanship and the durability of our materials by backing every single installation with our comprehensive Lifetime Warranty. This warranty protects you against any wind noise, water leaks, or manufacturer defects for as long as you own your MINI.
- Expert Master Technicians: Deep knowledge of European auto glass intricacies.
- Premium Materials: High-modulus urethane and OEM-equivalent glass.
- Unmatched Convenience: 100% mobile service directly to your home or workplace.
- Immaculate Cleanup: Comprehensive removal of all shattered glass shards.
- Lifetime Warranty: Guaranteed protection against leaks and installation defects.
Don't let a shattered quarter glass ruin the aesthetic and safety of your MINI Cooper F55 or F56. Contact AlexWindshield today to schedule your mobile auto glass replacement and experience the highest standard of automotive care in the Greater Toronto Area.




