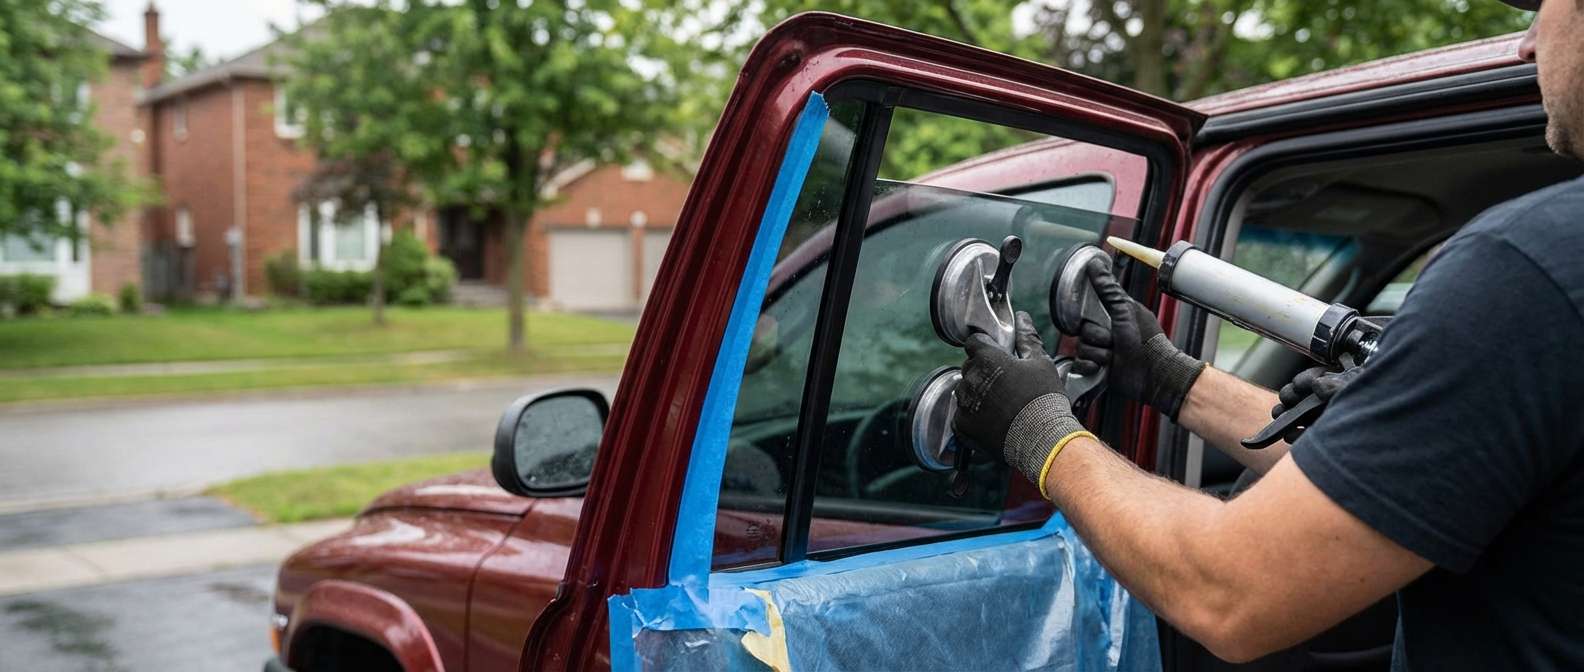
Reviving a First-Generation Classic: Dodge Durango 1998-2003 Vent Glass Replacement
The 1998-2003 Dodge Durango is a true icon of the early SUV boom. Built on the rugged Dodge Dakota platform and famously housing the muscular Magnum V8 engine, this first-generation beast bridged the gap between compact agility and full-size towing capability. However, despite its muscular build and enduring legacy, the Durango is not immune to the vulnerabilities of automotive glass. Whether due to a targeted break-in or a rogue piece of highway debris, shattered vent glass instantly compromises the security, acoustics, and weather-resistance of your classic SUV. Because the vent glass often serves as a structural and aesthetic bridge in the door assembly, replacing it requires far more than just slapping a new piece of glass into a frame.
As Master Technicians at AlexWindshield, we understand the specific quirks of 90s and early 2000s Chrysler/Dodge engineering. The plastics can be brittle, the weatherstripping is often aged, and precision is paramount. We don't just replace your glass; we restore the integrity of your classic Durango using modern, high-grade materials and advanced installation techniques.
Premium Mobile Auto Glass Service Across the GTA
A shattered window shouldn't force you to drive an unsafe, loud, and drafty vehicle across town. At AlexWindshield, we bring our fully equipped mobile auto glass shop directly to your driveway, office, or parking garage. We proudly provide comprehensive mobile auto glass services across the Greater Toronto Area (GTA), with specialized rapid response routes servicing Vaughan, Richmond Hill, and Markham.
Whether you are parked near the busy commercial districts of Vaughan, navigating the suburban neighborhoods of Richmond Hill, or working in the high-tech hubs of Markham, our Master Technicians arrive on-site with the exact 1998-2003 Dodge Durango vent glass and premium adhesives required to execute a flawless, factory-grade installation.
Why Professional Vent Glass Replacement is Critical
Many vehicle owners underestimate the complexity of a vent glass replacement. Because it is a smaller window, it is often wrongfully assumed to be a quick, superficial fix. In reality, side and vent auto glass management involves complex mechanical teardowns. Because vent glass is typically tempered, it shatters into thousands of tiny, granular pieces upon impact. Replacing it requires meticulous attention to detail to ensure safety and longevity.
- Interior Safety: Broken vent glass leaves thousands of sharp shards hidden inside your door cavity, which can cause mechanical failure of your main window regulator.
- Weatherproofing: A poorly sealed vent window will lead to severe water leaks, resulting in mold, electrical shorts, and interior corrosion.
- Acoustic Insulation: Wind noise at highway speeds is a massive nuisance. High-quality adhesive and proper seating are required to maintain a quiet cabin.
- Security: The vent glass is a common target for thieves. A robust, adhesive-bonded installation ensures the new glass cannot be easily compromised.
The AlexWindshield Master Technician Process: Step-by-Step Replacement
Replacing the vent glass on a 1998-2003 Dodge Durango is a multi-stage process that requires specialized tools, chemical treatments, and deep technical knowledge. Here is the rigorous A to Z procedure our senior technicians follow to ensure absolute perfection.
Step 1: Vehicle Preparation and Interior Protection
Before any tools touch your vehicle, we meticulously prepare the workspace. We lay down heavy-duty protective blankets over your Durango's upholstery, center console, and floor mats. We also apply automotive-grade protective tape around the exterior painted surfaces surrounding the door frame to prevent any accidental scratches during the extraction and installation process. Safety goggles and cut-resistant gloves are equipped before handling the shattered debris.
Step 2: Door Panel and Hardware Removal
Because the vent glass is integrated directly into the door assembly, we must gain full access to the internal mechanics. We carefully remove the interior door trim panel, taking special care with the aging retaining clips common in 1998-2003 Dodge models. We disconnect the power window switches, speaker wiring, and door latch mechanisms. Once the panel is safely stored, we carefully peel back the vapor barrier to expose the inner door cavity and the division bar that separates the main roll-down glass from the stationary vent glass.
Step 3: Comprehensive Shard Vacuuming
When tempered vent glass breaks, it explodes. Thousands of glass shards fall down into the bottom of the door shell. We mandate the thorough vacuuming of all broken glass shards from the vehicle's interior and door cavity. Using high-powered HEPA-filtered shop vacuums equipped with narrow crevice tools, we extract every single piece of glass from the door tracks, the regulator gears, the window motor housing, and the cabin floor. Failing to do this step would result in rattling noises, scratched window tint on your main roll-down glass, and potential mechanical jamming of the window regulator.
Step 4: Old Glass and Sealant Removal
With the inner door clean, we unbolt the division bar and roll the main door glass out of the way. We then address the remnants of the broken vent glass frame. Using precision cut-out tools, we slice through the old polyurethane adhesive that bonded the original vent glass to the vehicle frame. We meticulously trim the existing urethane bead down to a uniform thickness of about 1-2 millimeters, creating a clean, flat base that will bond seamlessly with the new adhesive.
Step 5: Surface Cleaning and Preparation
A flawless seal is entirely dependent on a pristine surface. We treat the bare metal frame and the encapsulating edge of the new vent glass with specialized auto glass foaming cleaners. This removes all dust, grease, and moisture. Any dirt left behind at this stage would create microscopic gaps, leading to devastating water leaks during the heavy rainstorms common in the GTA.
Step 6: Primer Application
This is a critical chemical bonding step that amateur installers frequently skip. We apply a specialized, high-performance auto glass primer to any areas of the pinch weld where the paint may have been scratched during the removal process. This primer acts as an aggressive rust inhibitor, protecting your Durango's frame from oxidation. Furthermore, we apply an adhesion-promoting primer to the frit band (the black painted edge) of the new vent glass to ensure maximum chemical cross-linking with the urethane adhesive.
Step 7: High-Quality Adhesive Application
Using a battery-operated caulking gun for absolute consistency, we apply a triangular bead of high-quality, fast-curing polyurethane adhesive around the perimeter of the vent glass frame. We utilize industry-leading urethane that boasts advanced crash-test ratings and incredibly fast safe-drive-away times. This thick, structural adhesive ensures the glass will be permanently locked into place, completely impervious to wind, water, and vibration.
Step 8: Installation of the New Vent Glass
With the urethane applied, our technician carefully guides the new vent glass into the door frame. Using suction cups for precise handling, the glass is pressed firmly into the adhesive bed. We then reinstall and torque the division bar back to factory specifications, securing the physical structure of the window channel. We verify the alignment from both the interior and exterior to ensure flush fitment alongside the Durango's factory weatherstripping.
Step 9: Reassembly and Final System Testing
While the high-quality adhesive begins its rapid curing process, we begin reassembling the door. The vapor barrier is resealed to block moisture and road noise. The door panel is carefully aligned and clipped back into place. All electrical harnesses—including power windows, mirrors, and locks—are reconnected. We then conduct a rigorous functional test, rolling the main door window up and down multiple times to ensure it glides smoothly along the newly installed division bar without any binding or friction.
Step 10: Final Polish and Inspection
The final step involves cleaning the newly installed vent glass, the main door glass, and the surrounding panels with a streak-free, ammonia-free glass cleaner. We perform a final visual inspection to guarantee the urethane seal is uniform and invisible from the outside. The technician then briefs the customer on the post-installation care instructions, ensuring the vehicle is fully ready for the road.
Your Trusted GTA Auto Glass Experts
Replacing auto glass on a classic vehicle like the 1998-2003 Dodge Durango requires a blend of mechanical expertise, specialized chemical adhesives, and an uncompromising dedication to safety. Attempting this repair without the proper primer, urethane, and interior cleaning protocols can lead to catastrophic leaks and severe mechanical damage to your door internals.
When you choose AlexWindshield, you are choosing unparalleled craftsmanship. We take immense pride in servicing the communities of Vaughan, Richmond Hill, Markham, and the broader GTA. Our mobile units bring the dealership-level experience right to your doorstep, saving you time, stress, and towing fees.
Because we use only the highest-grade glass, industry-certified primers, and top-tier urethane adhesives, we stand behind our work with absolute confidence. Every replacement performed by AlexWindshield comes backed by our comprehensive Lifetime Warranty, guaranteeing your new vent glass against wind noise, water leaks, and manufacturer defects for as long as you own your vehicle. Don't compromise the safety and integrity of your Dodge Durango—trust the Master Technicians at AlexWindshield to deliver secure, weatherproof, and flawless auto glass replacement today.




