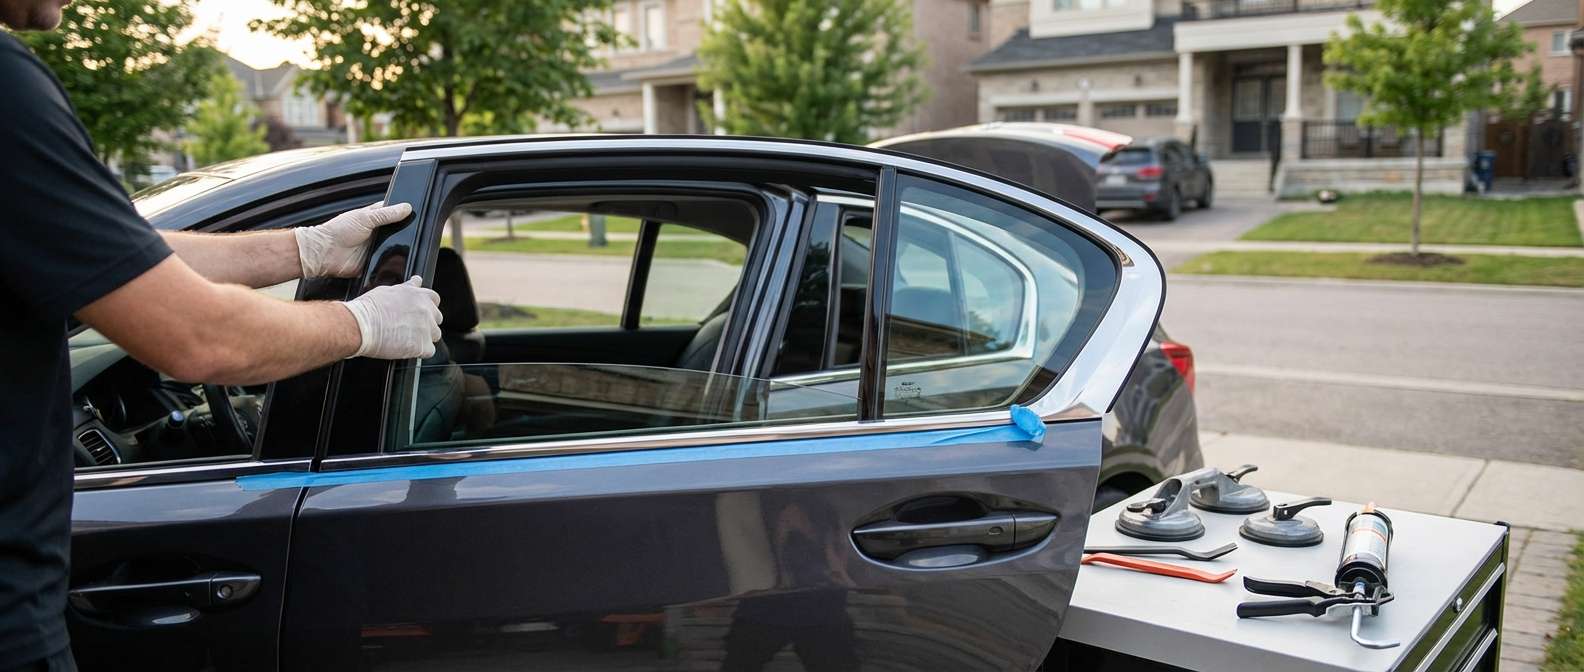
Restoring the Silence: Premium Vent Glass Replacement for Acura RLX (2014-2020)
The Acura RLX (2014-2020) acts as the flagship sedan for the brand, renowned for its "Jewel Eye" LED headlights, precision all-wheel steer, and, most importantly, a cabin engineered for absolute silence. This luxury vehicle utilizes acoustic dampening technologies to shut out the noise of the outside world. However, when your rear vent glass—the small, often triangle-shaped window located on the rear door next to the roll-down glass—is shattered due to theft, vandalism, or road debris, that sophisticated silence is instantly broken. Unlike a standard windshield, the vent glass is a structural component of the door assembly that requires intricate disassembly to replace correctly without damaging the vehicle’s high-end leather interior or electronic locking mechanisms.
At AlexWindshield, we do not view this as a simple glass swap. We view it as a restoration of your vehicle's security and acoustic integrity. As a Master Technician, I have refined a specific protocol for the Acura RLX 2014-2020 to ensure that every replacement meets or exceeds OEM specifications.
Mobile Service Across the Greater Toronto Area
We understand that driving a luxury vehicle with a broken window is not only unsafe but also exposes your interior to the harsh Canadian elements. That is why AlexWindshield offers a premium mobile auto glass service. You do not need to drive your compromised RLX to a shop.
We bring the repair facility to your driveway or workplace. Our mobile units are fully equipped to handle complex vent glass replacements throughout the Greater Toronto Area (GTA). We have specialized teams dedicated to serving:
- Vaughan: From Woodbridge to Maple, we ensure rapid response times.
- Richmond Hill: Servicing all neighborhoods from Oak Ridges to the Doncrest.
- Markham: Covering Unionville, Cornell, and the business districts.
Whether you are parked at a GO Station or in your own garage, our technicians arrive with the specific glass, tools, and vacuum equipment required to return your Acura RLX to pristine condition.
The Technical Process: Step-by-Step Vent Glass Replacement
Replacing the vent glass on an Acura RLX (2014-2020) is significantly more complex than replacing a windshield. The vent glass is integrated into the rear door frame and separated from the main moving window by a "division bar" or "run channel." To access this, the interior of the door must be dismantled.
Below is the detailed, A-to-Z technical process we utilize at AlexWindshield. This is not a rushed job; it is a surgical procedure for your car.
Phase 1: Vehicle Preparation and Interior Protection
Before any tools touch the vehicle, we prioritize protection. The RLX interior often features Milano leather and wood-grain finishes that are susceptible to scratches.
- We apply protective tape to the exterior door paint and the B and C pillars to prevent accidental scratches from glass shards or tools.
- Inside, we cover the rear seats and floor mats with heavy-duty protective covers.
- If the window was shattered, we place a containment mat specifically designed to catch falling debris during the door panel removal.
Phase 2: Door Panel Removal
To access the mounting points for the vent glass, the inner door card (door panel) must be removed. This requires specific knowledge of the Acura RLX fastener locations.
- Using non-marring nylon trim tools, we carefully pry open the hidden covers behind the interior door handle and inside the grab handle cup to reveal the Phillips screws.
- We locate the master retention screw often hidden behind the courtesy light or reflector at the bottom of the door.
- Once all screws are removed, we use a wide-fork trim tool to pop the perimeter clips. These clips are tight on the RLX; we apply precise pressure to release them without breaking the plastic mounts on the panel itself.
- We lift the panel upward to clear the window weatherstrip.
- Crucial Step: We disconnect the Bowden cables (for the door latch) and the electrical harnesses for the window switch, ambient lighting, and door locks. The panel is then set aside in a safe, padded area.
Phase 3: Vapor Barrier and Debris Extraction
Once the panel is off, we are faced with the plastic vapor barrier (water shield) sealed with butyl rubber. We carefully peel this back to access the door shell. This is where the cleanup begins.
When tempered vent glass breaks, it explodes into thousands of tiny cubes. These cubes fall down into the bottom of the door, where they can jam the window regulator, block drain holes, or rattle incessantly.
- We use a high-powered industrial vacuum with a flexible "crevice tool" to reach the absolute bottom of the door skin.
- We vacuum inside the window run channels and around the speaker magnet.
- We inspect the window regulator gears and grease tracks to ensure no glass dust has contaminated the lubricant.
Phase 4: Disassembly of the Window System
You cannot simply slide the new vent glass in. The Acura RLX rear door architecture requires us to create space.
- We temporarily lower the main roll-down glass to a specific service position.
- We locate the bolts securing the division bar (the vertical pillar separating the main glass from the vent glass). There is usually one bolt at the top of the door frame (under the rubber seal) and one inside the door shell.
- We remove these bolts and gently slide the division bar forward or remove it entirely, depending on the specific model year nuances. This creates the necessary gap to extract the old vent glass frame or urethane bead.
- If the old glass was bonded (glued) in, we use a specialized "cold knife" or oscillating tool to slice through the old urethane adhesive without scratching the pinch weld (the metal frame of the car).
Phase 5: Surface Preparation and Primer Application
A leak-free seal depends entirely on surface preparation. If the vent glass is encapsulated (bolt-in), we clean the mating surfaces. If it is a bonded glass (which is common for noise reduction in luxury cars like the RLX), we must prepare for new adhesive.
- We trim the old urethane down to a thin, clean layer (approx. 1-2mm).
- We clean the metal pinch weld with a specialized contaminant remover to eliminate road grease and silicone.
- We apply a high-quality black primer to any exposed metal scratches caused by the glass breakage or removal process. This prevents rust (which creates bubbles under the paint years later) and promotes molecular bonding with the adhesive.
- We also clean and prime the new glass unit's rim to ensure the glue sticks to it permanently.
Phase 6: Installation of the New Vent Glass
We use only OEM-quality glass that matches the tint and acoustic properties of your Acura RLX.
- We apply a continuous bead of high-modulus, non-conductive urethane adhesive to the glass or the vehicle frame (depending on the specific part design). This adhesive is heated to 60°C in our mobile van to ensure smooth application and rapid curing.
- The new vent glass is carefully inserted into the frame. We align it precisely with the body lines to ensure no wind noise occurs at highway speeds.
- We reinstall the division bar immediately, sliding it back into position and bolting it down. This locks the vent glass in place and compresses the adhesive for a watertight seal.
Phase 7: Reassembly and Function Testing
Before putting the door panel back on, we perform a rigorous functional test.
- We operate the main roll-down window up and down several times. This ensures the glass travels smoothly in the run channel and does not bind against the newly installed division bar.
- We check the door lock actuator and latch mechanism to ensure no glass debris is interfering with the locking system.
- We re-adhere the vapor barrier, ensuring a watertight seal to prevent water from leaking onto your interior carpets.
- The door panel is reconnected (wiring and cables) and snapped back into place. All screws are tightened, and cosmetic covers are replaced.
Phase 8: Final Cleanup
The job isn't done until the car is cleaner than when we arrived. We perform a final vacuum of the rear seats and carpets to ensure no stray glass fragments remain. We clean the new glass with alcohol-based cleaner to remove any handling marks or suction cup rings.
Why the Acura RLX Requires Expert Attention
The 2014-2020 Acura RLX is equipped with complex electronics in the doors, including the premium Krell or ELS Studio audio systems and keyless entry sensors. An inexperienced technician can easily damage the speaker wiring or the moisture barriers inside the door.
Furthermore, the RLX features acoustic glass in many trim levels. Replacing this with cheap, substandard aftermarket glass will result in increased road noise, defeating the purpose of owning a luxury sedan. At AlexWindshield, we source glass that maintains the factory sound-dampening standards.
The AlexWindshield Guarantee
We are not just changing glass; we are preserving the value of your vehicle. Our dedication to quality allows us to offer the best warranty in the business.
Lifetime Warranty: We offer a lifetime warranty on our workmanship. If you ever experience a water leak, air noise, or loose molding related to our installation for as long as you own the vehicle, we will fix it free of charge.
Book Your Acura RLX Vent Glass Replacement Today
Don't let a broken vent glass compromise the security of your Acura RLX or the safety of your passengers. Trust the Master Technicians who understand the intricacies of luxury Japanese engineering.
If you are located in Vaughan, Richmond Hill, Markham, or anywhere in the GTA, contact us immediately. We offer same-day or next-day appointments to get you back on the road securely.
Call AlexWindshield now for a free quote and experience the difference of true craftsmanship.




