Restoring the Flagship: Premier Back Glass Replacement for Acura RLX (2014-2020)
The Acura RLX, produced between 2014 and 2020, stands as a testament to understated luxury and advanced engineering. As the flagship sedan of the Acura lineup, replacing the Legend and the RL, this vehicle was designed with "Sport Hybrid" technology and a cabin specifically engineered for active noise cancellation and acoustic isolation. When the rear windshield of such a sophisticated machine is compromised, it is not merely a cosmetic issue; it is a breach of the vehicle’s structural integrity and its carefully calibrated interior environment. Unlike a front windshield that cracks, the tempered safety glass used in the rear of your RLX is designed to shatter into thousands of granular pieces upon impact, creating an immediate chaotic mess and exposing your luxury interior to the elements.
At AlexWindshield, we understand that an Acura RLX owner expects perfection. You did not purchase a standard commuter car; you purchased a high-end executive sedan. Therefore, a standard glass replacement service is insufficient. Our Master Technicians provide a specialized, white-glove service that restores your vehicle to factory specifications, ensuring that the heating elements, integrated antennas, and acoustic seals perform exactly as they did on the showroom floor.
Mobile Auto Glass Services Across the Greater Toronto Area
A shattered back glass renders your vehicle unsafe to drive and vulnerable to theft and weather. Driving to a shop with a gaping hole in the rear of your car is not only uncomfortable but dangerous due to flying glass shards and exhaust fumes entering the cabin. Recognizing this urgency, AlexWindshield offers a premium mobile auto glass service that comes directly to your location.
We proudly serve the entire Greater Toronto Area (GTA). Whether your RLX is parked in a driveway in Vaughan, an office complex in Markham, or a residential street in Richmond Hill, our fully equipped mobile units bring the repair facility to you. Our technicians carry self-contained power sources, industrial vacuums, and climate-controlled urethane storage to ensure a dealership-quality installation wherever you are.
The Technical Anatomy of the Acura RLX Rear Windshield
Before understanding the replacement process, it is vital to understand what makes the 2014-2020 Acura RLX back glass unique. This is not simply a sheet of glass; it is a complex electronic component of your vehicle.
- Tempered Safety Glass: The rear glass is heat-treated. When it breaks, it explodes into small, dull-edged cubes to prevent serious injury. However, these cubes migrate everywhere inside the vehicle.
- Integrated Defroster Grid: The horizontal lines across the glass are conductive heating elements. A poor installation can sever these connections, leaving you with a foggy rear view in winter.
- Embedded Antenna Systems: The RLX often utilizes the rear glass surface for AM/FM and sometimes GPS or satellite radio reception. The glass we install comes with these connectors pre-integrated to ensure your infotainment system remains fully functional.
- Acoustic Properties: To maintain the RLX’s whisper-quiet cabin, the glass must fit perfectly against the pinch weld to prevent wind noise.
Step-by-Step Replacement Process: The AlexWindshield Standard
Replacing a back glass is significantly more labor-intensive than a front windshield due to the cleanup required and the interior trim removal. Below is the detailed, step-by-step protocol our Master Technicians follow when working on your Acura RLX.
Phase 1: Site Preparation and Safety Protocols
Upon arrival in Vaughan, Richmond Hill, or Markham, our technician begins with a safety assessment. We don rigorous personal protective equipment (PPE), including cut-resistant gloves and eye protection.
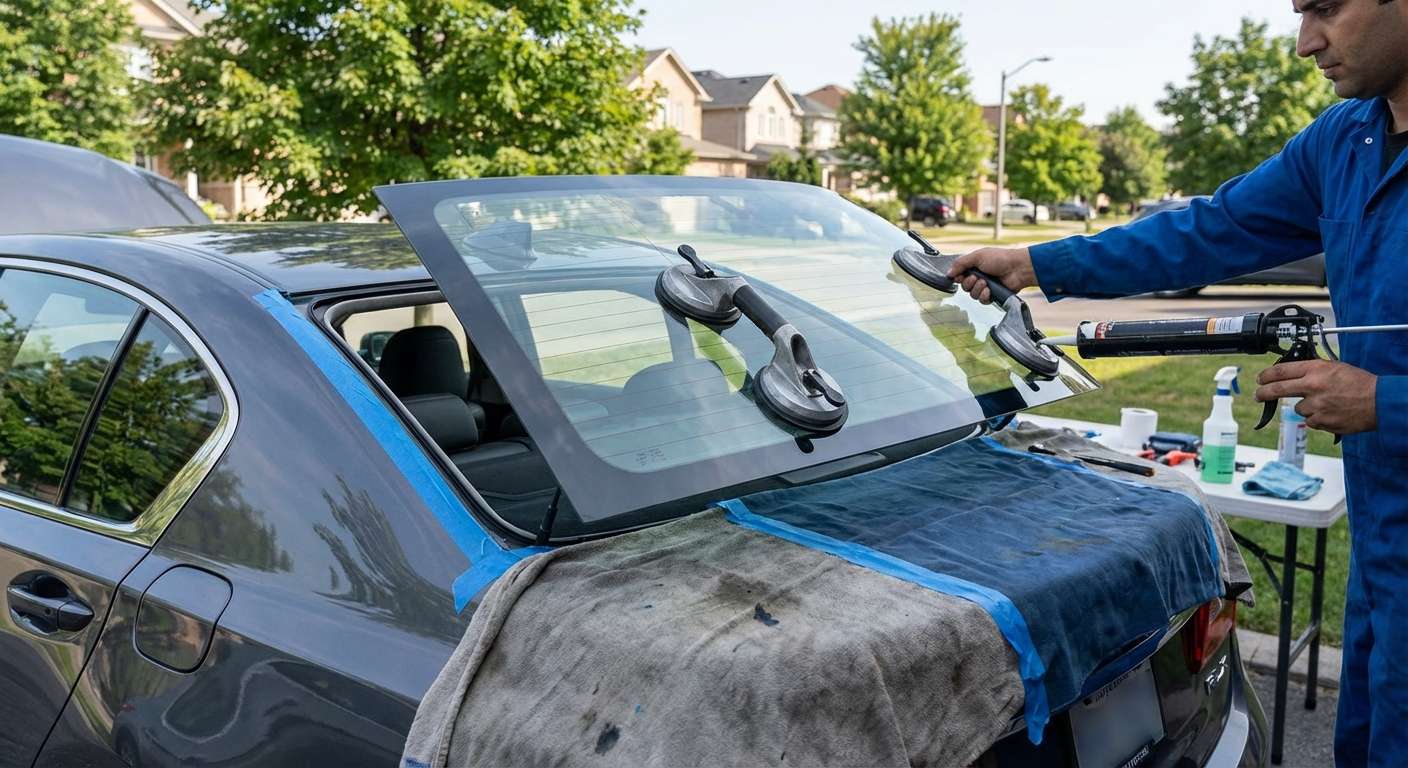
- Exterior Protection: We apply protective tape and heavy-duty covers over the trunk lid, rear quarter panels, and the roof area surrounding the rear glass. This prevents accidental scratches from tools or falling glass debris during the removal process.
- Interior Shielding: The Acura RLX features premium Milano leather and soft-touch materials. We place protective covers over the rear seats, the rear parcel shelf (deck lid), and the center console to prevent damage from glass shards or urethane drips.
Phase 2: Debris Management and Disassembly
The most critical differentiator between a budget shop and AlexWindshield is how we handle the broken glass.
- Initial Vacuuming: Using a high-powered industrial vacuum, we remove the bulk of the shattered glass from the rear seats, the floor, and the parcel shelf.
- Interior Trim Removal: To access the glass properly and clean hidden shards, we carefully remove the C-pillar interior trims and, in many cases, the rear bench seat. Glass shards notoriously migrate under the seat cushions and into the seatbelt retractors. We check and clean these mechanisms thoroughly.
- Rear Parcel Shelf Cleaning: The area directly beneath the back glass (where the speakers are located) often traps glass. We use compressed air to dislodge shards from speaker grilles and vents, followed immediately by vacuuming.
- Electrical Disconnection: We locate the electrical pigtails for the rear defroster and the antenna system. These are carefully disconnected to avoid damaging the vehicle's wiring harness.
Phase 3: Removing the Old Seal and Surface Prep
Once the area is clean and accessible, we proceed to the surgical part of the operation.
- Cutting the Urethane: Using a specialized oscillating tool or a cold knife, we cut through the existing urethane bead that holds the glass remnants to the car's frame (pinch weld). We cut as close to the pinch weld as safety allows without scratching the metal.
- Full Cut-Out: We remove all remaining glass shards from the frame. We then trim the old urethane down to a thin, even layer (approximately 1-2mm). This old urethane serves as the best bonding surface for the new adhesive.
- Priming the Pinch Weld: If any metal was exposed during the cutting process, we apply a high-grade anti-corrosion primer. This is a non-negotiable step. Failure to prime scratches can lead to rust forming under the glass, which can eventually cause water leaks and structural failure.
Phase 4: Installation of the New Glass
We use only OEM-quality (Original Equipment Manufacturer) or OEE (Original Equipment Equivalent) glass for your Acura RLX to ensure perfect fitment and optical clarity.
- Glass Preparation: The new glass is cleaned thoroughly. We apply a specifically formulated glass activator and primer to the "frit" band (the black ceramic border) of the new glass to ensure a molecular bond with the adhesive.
- Adhesive Application: We utilize a high-viscosity, high-modulus urethane adhesive. This structural glue is applied in a precise, continuous triangular bead using an electric caulking gun to ensure consistent height and width. This prevents air pockets that could cause leaks or wind noise.
- Setting the Glass: Using specialized suction cups (known as vacuum lifters), our technicians—often working in pairs for precision—carefully lower the new back glass onto the vehicle. We align it strictly with the roofline and the trunk gaps, referencing the Acura factory tolerance marks.
Phase 5: Reassembly and Final Inspection
The job is not done once the glass is glued in. The finishing touches define the quality of the service.
- Electrical Reconnection: We reconnect the heating grid tabs and antenna wires. We test the continuity to ensure the rear defroster will function correctly during Canadian winters.
- Trim Reinstallation: All C-pillar trims, the rear parcel shelf, and seat components are reinstalled. We inspect all clips to ensure no rattles will occur.
- Molding Installation: If the RLX model requires exterior reveal moldings, these are installed flush against the glass and bodywork for a seamless look.
- Final Cleanup: We perform a secondary vacuum of the interior to catch any rogue glass shards that may have shifted during installation. The exterior glass is cleaned to a streak-free shine.
The Importance of Proper Cure Time
After the installation, the urethane adhesive requires time to cure and reach a "Safe Drive Away Time" (SDAT). Because the rear glass contributes to the structural rigidity of the sedan, driving too soon can cause the glass to shift or the seal to break.
For the Acura RLX, we typically recommend a minimum wait time of 60 minutes post-installation before the vehicle is driven, depending on humidity and temperature. Our technicians will provide specific instructions based on the weather conditions in the GTA on the day of service. We also apply retention tape to hold the glass in position while the adhesive sets; this tape should remain in place for 24 hours.
Why AlexWindshield is the GTA's Top Choice for Acura Owners
Your Acura RLX is a sophisticated machine that deserves specialized care. Choosing AlexWindshield ensures that you are hiring technicians who respect the engineering of your vehicle.
Our Commitment to Excellence:
- Mobile Convenience: We come to you in Vaughan, Richmond Hill, Markham, and throughout the GTA, saving you time and towing fees.
- Debris Removal Guarantee: We take pride in our meticulous vacuuming process. We understand that finding broken glass months later is unacceptable.
- Lifetime Warranty: We stand behind our workmanship. Our auto glass replacement services come with a Lifetime Warranty against leakage and workmanship defects for as long as you own the vehicle.
- Insurance Friendly: We work directly with all major insurance providers in Ontario to handle your glass claim efficiently, often covering your deductible (conditions apply).
Book Your Acura RLX Back Glass Replacement Today
Don't compromise the safety or luxury of your 2014-2020 Acura RLX with a subpar repair. A shattered rear windshield requires immediate, professional attention to restore the security and quiet comfort of your cabin.
Trust the Master Technicians at AlexWindshield to deliver a flawless installation with the convenience of mobile service right to your door in the GTA. We treat your vehicle with the same care and precision that went into building it.
Contact AlexWindshield today for a free quote and experience the premier auto glass solution in Vaughan, Richmond Hill, and Markham.




