The 4th Generation Subaru Outback (2010-2014): Restoring Your Adventure-Ready Wagon
The 4th generation Subaru Outback, produced between 2010 and 2014, is celebrated across Canada as the ultimate adventure-ready wagon. With its legendary symmetrical all-wheel drive, spacious cargo capacity, and rugged reliability, it is the vehicle of choice for families, daily commuters, and weekend explorers alike. However, when your journey is abruptly halted by a shattered rear window—whether due to a rogue golf ball, an unfortunate break-in, or severe weather conditions—you need specialized, immediate attention. Replacing the rear glass on this specific vehicle requires more than just popping in a new window; it demands a deep understanding of the Outback's complex tailgate mechanics, integrated defroster systems, and rear wiper assemblies. That is where the master technicians at AlexWindshield step in, delivering unparalleled Subaru Outback back glass replacement services directly to your location.
Premium Mobile Auto Glass Service Across the Greater Toronto Area (GTA)
Driving with a shattered rear window is not only a massive safety hazard but also exposes your vehicle’s interior to the unpredictable Canadian elements. Recognizing the urgency of a broken back glass, AlexWindshield offers comprehensive, fully equipped mobile repair services across the Greater Toronto Area (GTA). You do not need to risk driving an unsafe vehicle to a shop; our certified master technicians bring the auto glass shop directly to your driveway, workplace, or parking lot.
We proudly provide rapid-response, same-day or next-day mobile glass replacement in key regions, including:
- Vaughan: Whether you are near Vaughan Mills or commuting down the 400, our mobile units arrive fully stocked with premium materials to secure your Subaru.
- Richmond Hill: From residential neighborhoods to busy commercial centers, we ensure that your vehicle is serviced promptly, keeping your family safe and your cargo protected.
- Markham: Navigating Markham's bustling streets requires a structurally sound vehicle. Our technicians deliver precise, factory-standard back glass installations right at your doorstep.
The Anatomy of the 2010-2014 Subaru Outback Rear Glass
Unlike front windshields, which are made of laminated glass designed to stay intact upon impact, the rear window of your 2010-2014 Subaru Outback is constructed from tempered safety glass. When compromised, tempered glass is engineered to shatter into thousands of small, blunt, pebble-like pieces rather than dangerous, jagged shards. While this minimizes the risk of severe lacerations, it creates a massive mess inside your vehicle's cargo area and within the internal cavities of the tailgate door. Furthermore, the back glass of this specific Outback model houses vital electronic components, including the rear defroster grid, the high-mount third brake light housing, and the rear wiper motor assembly. Replacing this glass requires a meticulous, multi-step teardown and reassembly process.
Step-by-Step Back Glass Replacement Process for the 2010-2014 Subaru Outback
At AlexWindshield, we do not cut corners. As a Senior SEO Specialist and Master Technician, I have engineered our replacement protocol to exceed OEM (Original Equipment Manufacturer) safety standards. Here is the rigorous, A-to-Z technical process we follow for every 2010-2014 Subaru Outback back glass replacement.
Step 1: Pre-Inspection and Extensive Interior Protection
Before any tools are lifted, we perform a comprehensive vehicle inspection. We assess the damage, test the rear wiper motor, and check the defroster wiring harness for any electrical shorts caused by the breakage. Next, we prioritize the protection of your Subaru’s interior. We lay down heavy-duty protective drop cloths over the rear cargo area, fold down the rear seats to protect the upholstery, and tape off the exterior paint surrounding the tailgate to prevent any accidental scratches during the extraction process.
Step 2: Disassembly of the Rear Tailgate Components
To ensure a flawless installation, the exterior and interior components attached to or surrounding the back glass must be carefully removed. Our technicians carefully unbolt the rear wiper arm and extract the wiper motor housing. We then carefully remove the upper rear spoiler (if equipped) and disconnect the high-mount brake light. Most importantly, we unclip and remove the interior plastic trim panels of the rear liftgate door. This step is non-negotiable, as it grants us access to the internal electrical connectors and the lower pinch weld.
Step 3: Thorough Vacuuming and Glass Shard Removal
Because tempered glass explodes upon impact, thousands of tiny glass shards inevitably fall straight down into the mechanical cavity of the rear tailgate door. If left uncleaned, these shards will rattle every time you open or close the trunk, drive over a bump, or use your vehicle's audio system. Our technicians use high-powered industrial vacuums with specialized, flexible crevice nozzles to extract every single piece of broken glass from inside the metal door frame. We also thoroughly vacuum the rear cargo floor, the spare tire compartment, and the folded rear seats, ensuring your vehicle is completely safe for children and pets.
Step 4: Removal of the Old Glass and Residual Urethane
With the area cleaned and prepped, we begin the extraction of the remaining glass perimeter. Using professional-grade cold knives, specialized wire-cutting systems, and power extractors, we carefully cut through the original urethane bead holding the broken glass frame to the vehicle. We must slice through this heavy-duty adhesive without damaging the delicate metal pinch weld beneath it. Once the perimeter frame is removed, we use sharp scraping tools to trim the old urethane down to a thin, even 1-2 millimeter base layer, which serves as the perfect bonding foundation for the new adhesive.
Step 5: Surface Cleaning, Preparation, and Primer Application
Contamination is the enemy of a safe auto glass installation. We scrub the structural pinch weld using specialized, alcohol-based auto glass cleaners that leave zero chemical residue. If our tools exposed any bare metal during the urethane trimming process, we meticulously apply a high-grade black rust-preventative primer. This primer not only protects your 2010-2014 Subaru Outback from the harsh, salt-heavy winters of the Greater Toronto Area but also acts as a chemical activator, ensuring the new urethane creates an unbreakable molecular bond with the vehicle's frame.
Step 6: Application of High-Quality Adhesive and Glass Installation
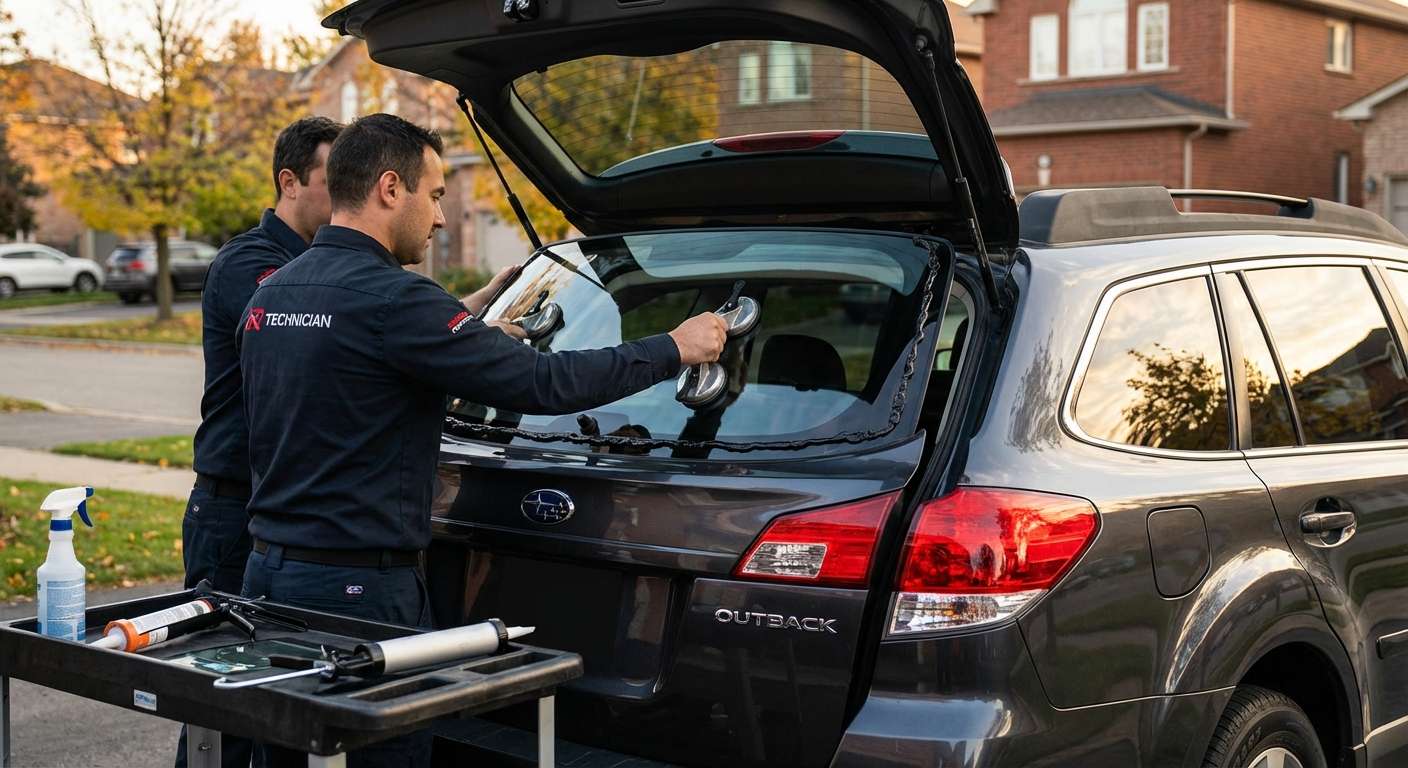
We exclusively use premium, rapid-curing, high-quality adhesive (urethane) that meets or exceeds federal motor vehicle safety standards. Using an electric caulking gun, we apply a consistent, precise V-bead of urethane around the entire perimeter of the tailgate pinch weld. The new, OEM-equivalent tempered back glass—pre-cleaned and treated with a glass bonding primer—is then carefully lifted. Using heavy-duty suction cups, two master technicians precisely align the glass and press it firmly into the fresh urethane. We secure the glass with specialized retention tape to hold it in the perfect position while the adhesive begins its chemical curing process.
Step 7: Reassembly, Defroster Connection, and Final Polish
Once the glass is structurally secured, we reverse the disassembly process. We meticulously reconnect the rear defroster wiring harness, ensuring the electrical continuity is perfect so you have full visibility during icy Canadian mornings. The rear wiper motor is reinstalled, the wiper arm is calibrated to its correct resting position, and the interior liftgate trim panels are firmly clipped back into place. Finally, we clean the new back glass with premium glass polish, perform a secondary vacuum of the vehicle's interior just to be absolutely certain no micro-shards remain, and wipe down the exterior tailgate area.
Post-Installation Care for Your Subaru Outback
To guarantee the longevity and safety of your newly installed rear glass, our master technicians provide detailed post-installation instructions. The high-quality adhesive we use features a rapid Safe Drive Away Time (SDAT), but the chemical curing process continues for several days. We advise our clients in Vaughan, Richmond Hill, and Markham to adhere to the following guidelines:
- Leave the windows slightly cracked: For the first 24 hours, keep a side window rolled down an inch. This prevents air pressure buildup inside the cabin from pushing against the curing back glass when you close the doors.
- Avoid high-pressure car washes: Do not take your Subaru Outback through an automatic or high-pressure car wash for at least 48 hours to prevent water from compromising the fresh urethane seal.
- Leave the retention tape on: Keep the exterior holding tape in place for the first 24 hours to ensure the glass does not shift under its own weight while driving over uneven roads in the GTA.
Why Choose AlexWindshield for Your Auto Glass Needs
When it comes to the structural integrity of your 2010-2014 Subaru Outback, compromise is not an option. A poorly installed back window can lead to severe water leaks, electrical failures in your defroster grid, rattling tailgate panels, and most dangerously, a compromised vehicle cabin during a collision. You need a team that combines cutting-edge technical expertise with an uncompromising commitment to customer safety.
AlexWindshield is recognized as the trusted expert for mobile auto glass services across the Greater Toronto Area (GTA). Our technicians are not just installers; they are master craftsmen who treat every vehicle as if it were their own. By utilizing OEM-equivalent glass, premium urethane adhesives, and executing a flawless, step-by-step installation protocol, we guarantee a factory-perfect fit every single time. Furthermore, we stand fiercely behind the quality of our workmanship. Every back glass replacement performed by AlexWindshield is backed by our industry-leading Lifetime Warranty against leaks, whistling, and manufacturer defects.
Do not let a shattered rear window keep your Subaru Outback off the road. Trust the seasoned professionals who understand the specific technical requirements of your vehicle. Contact AlexWindshield today to schedule your mobile back glass replacement in Vaughan, Richmond Hill, Markham, or anywhere in the GTA, and get back to your daily adventures with absolute confidence and peace of mind.




