Expert Auto Glass Restoration: 2014-2018 Subaru Forester
The fourth-generation Subaru Forester (2014-2018) is celebrated globally for its commanding outward visibility, rugged all-wheel-drive reliability, and the groundbreaking introduction of Subaru's EyeSight® Driver Assist Technology. However, that expansive front glass is not just a transparent shield against the elements; it is a vital structural component of your vehicle's cabin and the literal optical lens through which your SUV's advanced safety systems monitor the road. When a stray rock on the highway spiders into a massive, distracting crack, replacing this specific windshield requires far more than generic auto glass repair skills. It demands the specialized precision of a master technician who intimately understands acoustic glass properties, heated wiper de-icer grids, and complex camera recalibration protocols.
At AlexWindshield, we do not just swap out glass; we restore the structural integrity and advanced safety parameters of your Subaru. As senior auto glass technicians, we know that a compromised windshield in a 2014-2018 Forester directly impacts passenger safety in the event of a rollover and severely inhibits the performance of collision-avoidance systems. Below, we outline our master-level, meticulous approach to safely and permanently replacing your Subaru Forester's windshield.
Why the 2014-2018 Forester Windshield Demands Specialized Care
Before diving into the replacement procedure, it is crucial to understand the technology embedded within your vehicle's windshield. Depending on your specific trim level—whether it is a Base, Premium, Limited, or Touring—your 2014-2018 Forester may be equipped with a sophisticated combination of features. Many models utilize acoustic laminated glass designed to significantly reduce highway wind noise and cabin droning. Furthermore, Canadian and northern climate models frequently feature a built-in heated wiper de-icer grid resting at the base of the glass, which requires precise electrical reconnection. Most importantly, models equipped with Subaru's EyeSight system require absolute optical clarity in the designated upper center zone of the glass. Even a microscopic distortion in aftermarket glass can blind the dual color cameras, rendering your safety features useless. We source only premium, OEM-equivalent glass manufactured to strict Department of Transportation (DOT) standards to ensure seamless integration with these native systems.
Our Master-Level Step-by-Step Windshield Replacement Process
To guarantee a factory-perfect seal, absolute safety, and the elimination of wind noise or water leaks, AlexWindshield strictly adheres to the Auto Glass Safety Council (AGSC) replacement standards. Here is the comprehensive, A-to-Z breakdown of how our expert technicians service your Subaru Forester.
Step 1: Thorough Pre-Inspection and Vehicle Preparation
Precision begins before any tools touch your vehicle. Our technicians conduct a thorough pre-inspection of the vehicle's bodywork, existing glass, and dashboard. We verify the functionality of the heated wiper grid and ensure the dashboard is free of preexisting damage. To protect your vehicle's interior and exterior, we deploy heavy-duty protective drop cloths over the hood and fenders. Inside the cabin, we cover the steering wheel, dashboard, and front seats to guard against debris. We then gently unclip the rearview mirror, unplug the rain sensors (if equipped), and carefully detach the sensitive EyeSight camera housing shroud without touching the delicate camera lenses.
Step 2: Removing the Cowl, Wipers, and Exterior Trim
To access the bottom edge of the windshield, we must remove the exterior components. We carefully unbolt and remove the windshield wiper arms, setting them aside safely. Next, we extract the plastic cowl panel at the base of the windshield, exposing the lower urethane bead and the electrical harness for the wiper de-icer, which we carefully disconnect. We then remove the side molding trims running up the A-pillars, ensuring the retaining clips are kept intact or replaced if they have become brittle from UV exposure.
Step 3: Precision Extraction of the Damaged Glass
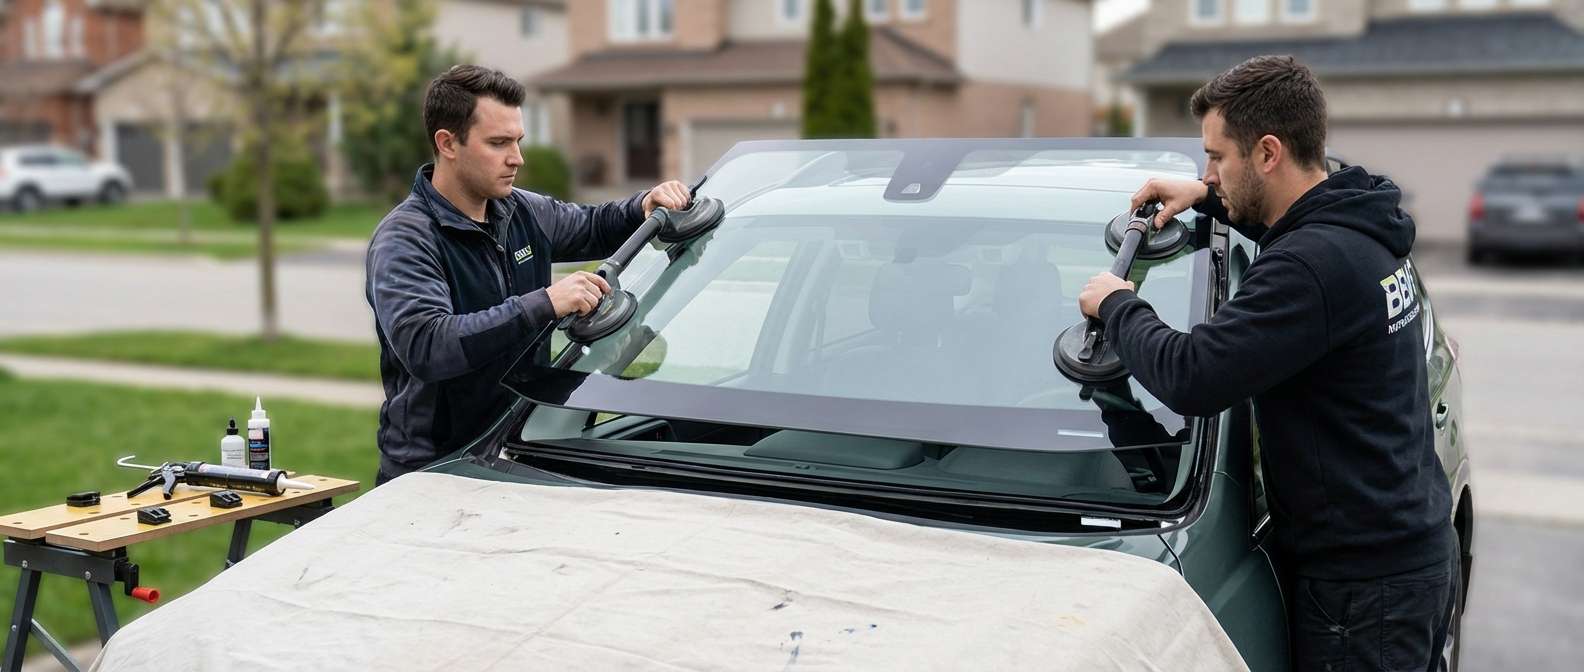
Removing the old windshield without damaging the vehicle's metal frame is a task that separates master technicians from amateurs. We utilize advanced wire-cutting systems and specialized cold knives to carefully slice through the original polyurethane adhesive holding the glass in place. By running a high-tensile cutting wire around the perimeter of the windshield, we cleanly sever the bond from the inside out. This specialized method guarantees that the underlying metal pinch weld is never scratched, preventing the devastating rust issues that plague poorly executed windshield replacements. Once the adhesive is completely cut, two technicians use heavy-duty suction cups to lift the damaged glass safely away from the vehicle.
Step 4: Pinch Weld Preparation and Contaminant Cleaning
With the old glass removed, the vehicle's metal frame (the pinch weld) is exposed. The old urethane cannot be entirely removed; instead, it is expertly trimmed down to a thin, uniform base layer of 1 to 2 millimeters. This "close-cut" technique provides the ideal bonding surface for the new adhesive. We then utilize powerful vacuums to remove any hidden dirt, leaves, or microscopic debris from the cowl area and dashboard crevices. The trimmed pinch weld is thoroughly cleaned with a specialized, lint-free prep-solvent to remove oils, waxes, and silicones that could compromise the chemical bond.
Step 5: Applying High-Quality Primer and Advanced Urethane Adhesive
Chemical preparation is the secret to a lifetime seal. We first apply a specialized black glass primer to the ceramic frit band (the black border) of the new windshield. If any micro-scratches occurred on the vehicle's metal frame during the vehicle's lifespan, we meticulously prime those bare metal spots to prevent future oxidation and rust. Next, using a high-powered electric caulking gun, we apply a consistent, triangular bead of high-viscosity, fast-curing automotive polyurethane adhesive directly on top of the old trimmed urethane. This high-quality adhesive is the sole component keeping the windshield securely attached during a high-speed collision or rollover, and we only use industry-leading, crash-tested materials.
Step 6: Precision Installation of the New Windshield
Timing and precision are critical in this phase. Before the urethane begins to "skin over," two technicians carefully align the new, premium windshield over the vehicle. Using the vehicle's factory alignment pins as a guide, we gently lower the glass onto the fresh adhesive bead. We apply light, even pressure around the perimeter to "set" the glass, ensuring optimal compression of the urethane for a watertight, airtight seal. We then secure the glass with specialized retention tape while the adhesive begins its curing process.
Step 7: Reassembly and Final Quality Checks
While the high-quality adhesive cures to achieve its Safe Drive Away Time (SDAT), we meticulously reassemble your vehicle. We reconnect the heated wiper de-icer harness, reinstall the lower plastic cowl, and bolt the wiper arms back into their exact factory resting positions. Inside the cabin, we remount the rearview mirror, reinstall any sensors, and carefully snap the EyeSight camera shroud back into place. Finally, we clean the new windshield with professional-grade, streak-free glass cleaner.
Mandatory ADAS Calibration: Protecting Your Subaru EyeSight System
For the 2014-2018 Subaru Forester, installing the glass is only half the job. If your Forester is equipped with Subaru's EyeSight® Advanced Driver Assistance Systems (ADAS), a mandatory camera calibration is required immediately following the windshield replacement.
The dual cameras mounted near your rearview mirror control life-saving features such as Pre-Collision Braking, Adaptive Cruise Control, Lane Departure Warning, and Lane Keep Assist. Because a new windshield alters the optical angle—even by fractions of a millimeter—the cameras must be digitally realigned to recognize the new glass. Failing to calibrate the system can result in the cameras miscalculating the distance of the vehicle ahead of you, causing delayed automatic braking or completely disabling the safety features.
At AlexWindshield, our master technicians utilize state-of-the-art diagnostic software and precision optical targeting systems to perform a dynamic and static ADAS calibration. We digitally reset the camera parameters, ensuring your Subaru's "eyes" are perfectly focused and fully operational before you ever turn the key.
Premium Mobile Auto Glass Services Across the Greater Toronto Area (GTA)
We understand that dealing with a shattered windshield disrupts your busy schedule. That is why AlexWindshield brings the auto glass repair shop directly to your doorstep. We proudly offer premium mobile windshield replacement services across the Greater Toronto Area (GTA).
- Vaughan: Whether you are at home in Woodbridge or working near the Vaughan Metropolitan Centre, our mobile fleet will arrive fully equipped to perform your replacement and calibration on-site.
- Richmond Hill: Do not risk driving on Highway 404 with a severely cracked windshield. We can service your Subaru safely in your driveway or office parking lot anywhere in Richmond Hill.
- Markham: From Unionville to Cornell, our expert technicians navigate Markham daily to provide rapid, reliable, and convenient mobile auto glass solutions.
Our mobile units are outfitted with the same high-tech equipment, premium adhesives, and calibration tools found in a traditional brick-and-mortar facility, guaranteeing a factory-quality installation without the hassle of a waiting room.
Trust AlexWindshield for Your Subaru Auto Glass Needs
Your 2014-2018 Subaru Forester was engineered to keep you and your family safe against unpredictable road conditions. Do not compromise that safety with substandard glass, inferior adhesives, or skipped camera calibrations. When you choose AlexWindshield, you are choosing unparalleled expertise and peace of mind.
- Master Technicians: Decades of combined experience in handling complex automotive glass and ADAS recalibrations.
- Premium Materials: We use only DOT-certified OEM-equivalent glass and advanced, rapid-cure polyurethane adhesives.
- Complete Convenience: Fully equipped mobile service spanning Vaughan, Richmond Hill, Markham, and the broader GTA.
- Ironclad Guarantee: Every replacement is backed by an industry-leading Lifetime Warranty against leaks, wind noise, and manufacturer defects.
Contact Us Today for a Lifetime Warranty Windshield Replacement
Restore the safety, clarity, and structural integrity of your Subaru Forester today. Reach out to the certified experts at AlexWindshield to schedule your mobile windshield replacement and comprehensive EyeSight calibration. Experience the ultimate in auto glass professionalism right at your doorstep, backed by a Lifetime Warranty you can trust.




