Expert Back Glass Replacement for the Mercedes-Benz E-Class 2010-2016 (W212)
The Mercedes-Benz E-Class W212 (2010-2016) is a masterpiece of German engineering, characterized by its sharp, ponton-inspired rear quarter styling and impeccable cabin insulation. However, this executive sedan's refined driving experience is immediately compromised when its rear window sustains damage. Unlike a standard piece of automotive glass, the W212 back glass is a sophisticated, multi-functional component. It houses an intricate, high-voltage defroster matrix and seamlessly integrated AM/FM and GPS antenna lines. When this tempered glass shatters, it doesn't just leave your luxury interior exposed to the elements; it disrupts your vehicle's electronic connectivity and climate control capabilities.
As a Master Technician and auto glass specialist, I understand that replacing the back glass on a European luxury vehicle requires more than just basic tools. It demands precision, a deep understanding of Mercedes-Benz electrical systems, and an uncompromising commitment to safety. At AlexWindshield, we specialize in returning your W212 to its factory-original condition using industry-leading techniques and premium materials.
Understanding the Unique Properties of W212 Rear Glass
Before diving into the replacement process, it is essential to understand what makes the back glass of the 2010-2016 E-Class unique. The rear window is constructed from tempered safety glass. Unlike the laminated glass used in windshields, tempered glass is subjected to extreme heating and rapid cooling during manufacturing. This process creates immense internal surface tension. When struck by a severe impact, the glass is designed to shatter instantly into thousands of small, blunt pebble-like pieces rather than dangerous, jagged shards. While this mechanism is critical for passenger safety, it creates a massive cleanup challenge for technicians. Furthermore, the W212 glass is equipped with precision-milled electrical nodes that connect to the vehicle's C-pillar wiring harness, powering the rear defogger and radio antennas.
Step-by-Step Back Glass Replacement Process for the Mercedes-Benz W212
At AlexWindshield, our replacement protocol is meticulously designed to ensure structural integrity, prevent water leaks, and restore the electrical functionality of your Mercedes-Benz. Here is our comprehensive, A-to-Z technical process.
Step 1: Pre-Installation Inspection and Interior Protection
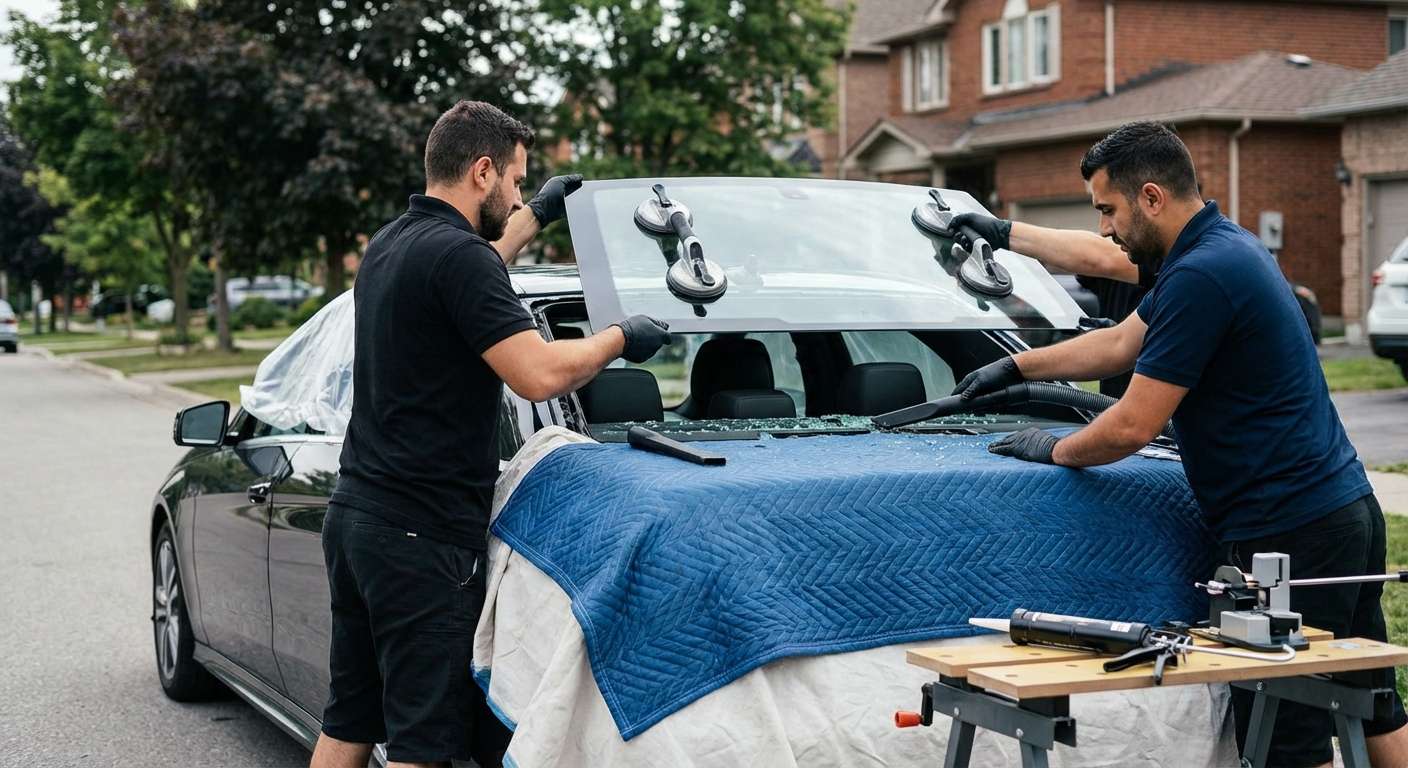
The moment our technician arrives at your location, we conduct a thorough pre-inspection of the vehicle. We assess the extent of the damage and examine the surrounding rear quarter panels and trunk lid for any paint scratches caused by flying debris. Because luxury preservation is our priority, we immediately begin the protection phase. We lay heavy-duty protective drop cloths over the premium leather rear seats, the center console, and the exterior trunk lid. Protective tape is applied to the edges of the C-pillars and the roofline to safeguard the delicate clear coat of your Mercedes-Benz during the extraction process.
Step 2: Extensive Glass Clean-Up and Vacuuming
Because the W212 back glass is tempered, a blowout results in thousands of tiny glass shards flooding the vehicle's interior. We do not just install new glass; we remediate the entire rear cabin.
- Rear Parcel Shelf Removal: We carefully detach the speaker grilles and rear parcel shelf covers, as shards often fall into the premium audio system enclosures.
- Industrial Vacuuming: Using a high-powered, multi-stage shop vacuum with specialized crevice tools, we extract glass from the rear seat stitching, the floor mats, the child seat anchors (LATCH system), and the deep recesses of the trunk.
- Door Panel & Cavity Checks: If any glass has migrated, we inspect the rear door panels and trunk weatherstripping channels, vacuuming all broken glass shards from the vehicle's interior to ensure absolute safety for your passengers.
Step 3: Disconnecting Electrical Components
With the debris cleared, we meticulously unclip the interior C-pillar trim panels. This exposes the electrical wiring harnesses that connect the vehicle's electrical system to the back glass. We carefully detach the high-amperage defroster connectors and the fragile antenna ribbon cables. Mishandling these connectors can lead to expensive module failures, which is why our AlexWindshield technicians treat these components with absolute precision.
Step 4: Removing the Remaining Glass and Old Adhesive
The perimeter of the back glass is bonded to the vehicle's steel frame using high-strength factory polyurethane. To safely cut through this dense adhesive, we utilize an advanced wire-cutting system. A specialized, braided cutting wire is threaded through the urethane bed and attached to a mechanized winch system mounted on the exterior of the glass. This method smoothly slices through the old adhesive without ever introducing metal blades to the vehicle's painted pinch weld, entirely eliminating the risk of scratching the frame and causing future rust issues.
Step 5: Pinch Weld Preparation and Cleaning
Once the remnants of the old glass are lifted away, we must prepare the vehicle's frame (the pinch weld). The existing bead of factory urethane is carefully trimmed down to a thin, even layer of approximately 1 to 2 millimeters. This remaining layer provides the ideal base for the new adhesive to chemically bond with. The entire channel is then scrubbed using a specialized, alcohol-based auto glass cleaner to remove any dirt, residual glass dust, or ambient oils that could compromise the final seal.
Step 6: Primer Application
Proper adhesion is impossible without chemical preparation. We apply a high-grade, blackout glass primer to any microscopic scratches on the vehicle's pinch weld to prevent oxidation and rust. Next, we apply this specialized primer to the ceramic frit band (the black painted edge) of the new, OEM-quality replacement back glass. This primer activates the surface, ensuring a molecular bond with the urethane while also providing critical UV protection to prevent the sun from degrading the adhesive over time.
Step 7: Urethane Adhesive Application
The structural integrity of your vehicle's roof relies heavily on the back glass. In the event of a rollover, the back glass supports the roof's rigidity. Therefore, we exclusively use premium, fast-curing automotive polyurethane adhesive. Using an electric caulking gun, our Master Technicians lay down a perfectly uniform, triangular "V-bead" of urethane along the perimeter of the new glass. The geometry of the V-bead is critical; it ensures that when the glass is pressed into place, the adhesive spreads evenly without creating air pockets or weak points.
Step 8: Precision Installation of the New Back Glass
Installing the back glass on a Mercedes-Benz W212 requires perfectly synchronized movements. Utilizing heavy-duty suction cup grips, two technicians carefully lift the primed and glued glass over the vehicle. The glass is gently lowered into the pinch weld opening. We meticulously align the glass to match the factory-specified gaps around the roofline and trunk lid, ensuring the vehicle's aerodynamics and aesthetic symmetry remain flawless. Gentle, even pressure is applied to set the glass deeply into the urethane bead.
Step 9: Reconnecting Electronics and Final Curing
Once the glass is set, we immediately reconnect the defroster terminals and antenna modules behind the C-pillars, testing the circuit continuity to guarantee optimal performance. The interior trim panels are snapped back into place, and a final, exhaustive vacuuming of the trunk and rear seating area is performed. We secure the exterior glass with specialized retention tape to hold it perfectly still while the fast-curing urethane dries. We will advise you on the Safe Drive-Away Time (SDAT), which is typically less than one hour thanks to the advanced chemical properties of our adhesives.
Mobile Auto Glass Services Across the Greater Toronto Area (GTA)
Driving a Mercedes-Benz with a shattered back window is incredibly dangerous and exposes your luxury interior to unpredictable weather. That is why AlexWindshield brings our state-of-the-art auto glass shop directly to your driveway, office, or parking garage. We proudly offer comprehensive, fully equipped mobile replacement services across the Greater Toronto Area (GTA).
- Vaughan: Whether you are at home in Woodbridge or working in the bustling Vaughan Metropolitan Centre, our mobile vans arrive fully equipped to handle your W212 glass replacement safely on-site.
- Richmond Hill: Navigating the Yonge Street corridor with a broken rear window is unsafe. We provide rapid response mobile services to residential driveways and commercial spaces throughout Richmond Hill, ensuring your vehicle is secured quickly.
- Markham: From the thriving tech hubs to residential neighborhoods, our master technicians dispatch to Markham with all the necessary OEM-quality glass, industrial vacuums, and premium urethanes to complete the job seamlessly without disrupting your daily schedule.
Choose AlexWindshield: Lifetime Warranty and Unmatched Expertise
When it comes to servicing a high-caliber vehicle like the Mercedes-Benz E-Class W212, you cannot afford to cut corners. Poorly installed back glass can lead to severe water leaks, electrical shorts in your defroster system, and hazardous rust development within the vehicle's frame. You need a team that combines high-level technical expertise with an uncompromising dedication to quality.
AlexWindshield is recognized as the trusted expert for mobile auto glass services in the GTA. We don't just replace your glass; we restore the safety, security, and elegance of your Mercedes-Benz. Every back glass replacement we perform is backed by our comprehensive Lifetime Warranty, which guarantees our workmanship against air leaks, water leaks, and manufacturer defects for as long as you own the vehicle. Don't let shattered glass compromise your driving experience. Trust the master technicians at AlexWindshield to deliver flawless, factory-standard results right at your doorstep.




