Reviving the Skyward View: Expert Sunroof Replacement for Your 2002-2005 Kia Sedona
The first-generation Kia Sedona (2002-2005) redefined the modern family minivan, offering a robust V6 engine, expansive interior comfort, and a heavy-duty chassis built for long road trips. For many of these classic family haulers, the factory-installed power sunroof was a premium feature that brought natural light and fresh air into the spacious cabin. However, after two decades of enduring fluctuating Canadian temperatures, harsh winter ice, and flying highway debris, the tempered glass of your Sedona's sunroof is highly susceptible to shattering or seal failure. When a sunroof breaks, it does not just compromise your vehicle's aesthetic; it exposes your minivan's interior to catastrophic water damage and creates a severe safety hazard for your passengers.
As a Master Technician at AlexWindshield, I have spent years specializing in intricate auto glass restorations. Replacing the sunroof on a classic 2002-2005 Kia Sedona is a precise, highly technical procedure. Unlike a standard bolt-on swap, restoring the sunroof assembly on these specific models often requires carefully separating the shattered glass from the mechanical sliding frame and bonding a fresh, OEM-quality glass panel in its place. We combine old-school automotive craftsmanship with modern, high-grade chemical bonding agents to ensure your Kia Sedona's roof is sealed tight, looks pristine, and functions flawlessly.
Mobile Sunroof Replacement Across the Greater Toronto Area (GTA)
Driving a minivan with a shattered or missing sunroof is not just uncomfortable—it is incredibly dangerous. That is why AlexWindshield brings our state-of-the-art auto glass shop directly to you. We provide premium mobile sunroof replacement services across the Greater Toronto Area (GTA), ensuring you never have to risk driving a compromised vehicle to a garage.
Our fully equipped mobile service vans frequently operate in key GTA regions, including:
- Vaughan: Whether you are parked outside Vaughan Mills or in a residential driveway in Woodbridge, our technicians will arrive with all the necessary tools and replacement glass.
- Richmond Hill: From busy commercial plazas to quiet neighborhood streets, we provide rapid, on-site sunroof replacements to get your family back on the road safely.
- Markham: We service all of Markham, ensuring that even if your sunroof shatters during your morning commute, our mobile technicians can perform the repair while you are at work or home.
The AlexWindshield Technical Process: A to Z Sunroof Replacement
Replacing a sunroof on a 2002-2005 Kia Sedona is a multi-stage process that demands absolute precision. Sunroof glass is manufactured from tempered safety glass, meaning that when it breaks, it explodes into thousands of tiny, granular shards. Our comprehensive, step-by-step approach ensures your vehicle is fully cleaned, prepped, and restored to factory specifications.
Step 1: Interior Protection and Comprehensive Vacuuming
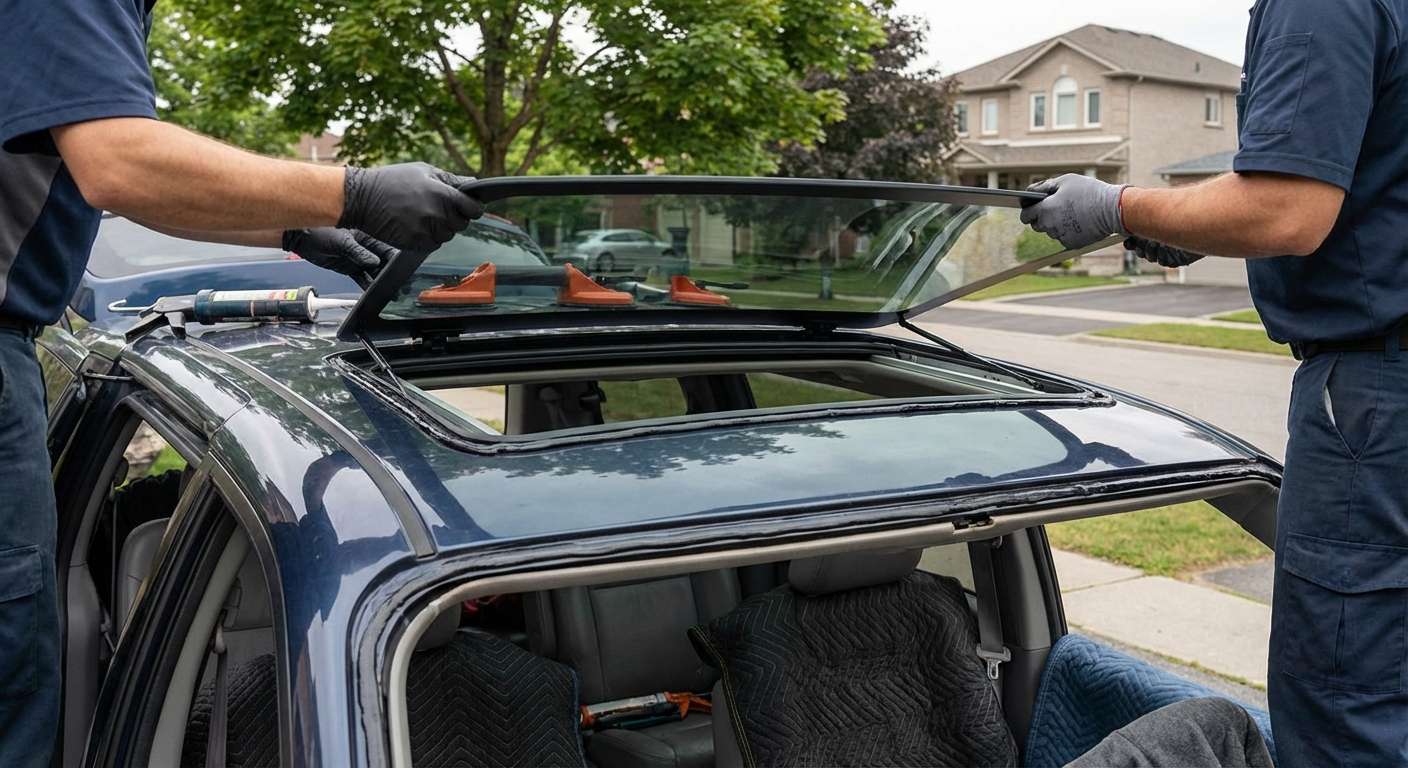
The moment our Master Technician arrives at your location in the GTA, the first priority is protecting the interior of your Sedona. We lay down heavy-duty protective moving blankets and drop cloths over the front and middle-row captain's chairs, the center console, and the dashboard. Because a shattered sunroof acts much like broken door or back glass, we utilize industrial-grade shop vacuums to meticulously extract every single piece of broken glass. We vacuum the seats, the floor mats, the cup holders, and most importantly, we drop the headliner slightly to vacuum all broken glass shards from the internal roof cavity and the sunroof sunshade track. Leaving even a single shard behind can cause the sunshade to jam or create an irritating rattle while driving.
Step 2: Removing the Damaged Sunroof Glass and Frame Hardware
Once the interior is safe and free of glass debris, we begin the mechanical disassembly. On the 2002-2005 Kia Sedona, the sunroof glass is mated to a metal sliding frame that connects to the track via Torx bolts. We carefully remove the side accordion weather shields to expose the mounting brackets. Using specialized auto glass hand tools, we unbolt the frame from the track and carefully lift the entire assembly out through the roof of the minivan. We then lay the frame on our mobile workbench to begin the glass-to-frame extraction process.
Step 3: Surface Cleaning and Sunroof Drain Inspection
With the frame removed, we turn our attention to the sunroof cassette mounted in the roof. We perform a deep cleaning of the tracks, removing decades of built-up dirt, pine needles, and grime that typically plague older minivans. Crucially, we inspect and blow compressed air through the four sunroof drain tubes located in the corners of the cassette. Clogged drains are the number one cause of water leaking into a Sedona's cabin; ensuring they are clear is a mandatory step in our service. Next, we meticulously clean the removed metal sliding frame, cutting away the old, degraded adhesive and utilizing chemical solvents to strip the mounting channel down to the bare metal. A perfectly clean surface is required for the new adhesive to bond correctly.
Step 4: Primer Application
The structural integrity of your new sunroof relies entirely on the chemical preparation. At AlexWindshield, we never skip corners. We apply a specialized, high-grade glass prep cleaner to the ceramic frit band (the black painted border) of the brand-new tempered sunroof glass. Once flashed off, we apply a generous coat of black urethane primer to both the glass edge and the freshly cleaned bare metal of the sliding frame. This primer serves a dual purpose: it prevents future rust formation on the metal frame and alters the molecular structure of the glass surface, allowing the adhesive to bite and create an unbreakable, permanent bond.
Step 5: Precision Installation Using High-Quality Adhesive
With the primer cured, we load our electric caulking gun with premium, fast-curing automotive polyurethane adhesive. Our Master Technicians lay a perfectly uniform, V-notched bead of high-quality adhesive into the channel of the metal sliding frame. Two technicians then carefully align and lower the new tempered glass panel onto the frame. We apply even, measured pressure around the perimeter to ensure the adhesive compresses perfectly, creating a watertight, factory-grade seal between the glass and the mounting hardware.
Step 6: Reinstallation, Alignment, and Final Calibration
After the adhesive has set sufficiently, we carefully lift the newly bonded sunroof assembly back into the roof of the Kia Sedona. We re-insert the Torx bolts but leave them slightly loose. This allows us to perform the critical alignment phase. We close the sunroof and manually adjust the height of the glass panel from the inside. The front edge of the sunroof must sit exactly 1 millimeter below the roofline, while the rear edge must sit exactly 1 millimeter above the roofline. This precise aerodynamic calibration prevents wind noise and whistling at highway speeds. Once perfectly aligned, we torque the bolts to factory specifications and reattach the side accordion trim pieces.
Step 7: Water Testing and Quality Assurance
We never leave a job site without verifying our work. Once the sunroof replacement is mechanically complete, we perform a rigorous water leak test. We flood the roof of your minivan with water, simulating a heavy GTA rainstorm, and meticulously check the interior headliner, the tracking mechanism, and the newly bonded glass seal for any signs of moisture intrusion. We cycle the sunroof through its tilt and slide functions multiple times to ensure the motor operates smoothly and the glass moves without any binding.
Why Settle for Less When You Can Have the Best?
Replacing the sunroof on a vintage 2002-2005 vehicle is not a job for amateurs. If the old adhesive is not properly removed, if the primer is skipped, or if low-grade sealants are used, you will inevitably experience severe water leaks that can destroy your minivan's electrical systems and interior upholstery. By utilizing advanced chemical bonding agents and adhering strictly to OEM-equivalent replacement protocols, our technicians ensure that your new sunroof is actually stronger and more resilient than the original factory installation.
Furthermore, maintaining the pristine condition of your family vehicle is our priority. We treat every Kia Sedona as if it were our own, guaranteeing that no broken glass shards are left behind in your carpets or seating, protecting your children and passengers from hidden dangers.
Contact AlexWindshield Today
Do not let a shattered sunroof ruin your driving experience or put your minivan at risk of water damage. If you are located in Vaughan, Richmond Hill, Markham, or anywhere else within the Greater Toronto Area, professional help is just a phone call away. AlexWindshield is your trusted, local expert for premium mobile auto glass repair and replacement.
We stand behind our craftsmanship, our high-quality materials, and our rigorous safety standards. That is why every single sunroof replacement we perform comes backed by our comprehensive Lifetime Warranty against leaks, wind noise, and manufacturer defects. Reach out to the Master Technicians at AlexWindshield today to schedule your 2002-2005 Kia Sedona sunroof replacement, and let us bring our unparalleled expertise directly to your driveway.




