The Asymmetrical Icon: Restoring the Open-Air Experience in Your 2012-2017 Hyundai Veloster
The 2012-2017 Hyundai Veloster broke the automotive mold with its quirky, asymmetrical three-door design, aggressive stance, and sport-compact agility. However, the true crown jewel of the Veloster’s interior is its expansive panoramic sunroof, designed to flood the sleek cabin with natural light and fresh air. Unfortunately, this specific generation of the Veloster is well-known in the auto glass industry for sunroof vulnerabilities, including spontaneous shattering, stress cracks from structural flex, and track mechanism failures. When your Veloster's roof glass breaks, it doesn't just ruin the aesthetic of your vehicle—it leaves your interior exposed to the harsh Canadian elements and creates a severe safety hazard.
As a Master Technician at AlexWindshield, I have replaced countless panoramic sunroofs on this exact make and model. We understand the precise engineering required to restore your vehicle to factory specifications. Whether you have suffered a rock impact on the highway or experienced a sudden temper-shatter, our premier mobile auto glass team is equipped to handle your Hyundai Veloster sunroof replacement with unmatched precision.
Why the 2012-2017 Hyundai Veloster Panoramic Sunroof Requires Specialist Expertise
Unlike standard pop-up or internal sliding sunroofs, the 2012-2017 Hyundai Veloster features a large, two-piece panoramic glass roof system. The front panel is the dynamic sliding mechanism, while the rear section is often a stationary, bonded piece of glass. Replacing either section requires more than just unbolting a panel; it demands advanced knowledge of automotive structural bonding, track alignment, and intensive shard remediation.
If the glass shatters, thousands of sharp, tempered glass fragments are blasted into the track mechanisms, the headliner, and the passenger cabin. A standard glass shop might simply bolt a new piece of glass on and send you on your way, leading to grinding noises, track motor burnout, and severe water leaks. At AlexWindshield, we go far beyond a simple swap. We perform a meticulous, top-to-bottom restoration of your sunroof assembly to ensure flawless operation and total safety.
Our Master Technician’s Step-by-Step Sunroof Replacement Process
To guarantee a perfect, leak-free installation, we follow a rigorous, step-by-step operating procedure designed specifically for the complex roof systems of the Hyundai Veloster.
Step 1: Pre-Installation Inspection and Interior Protection
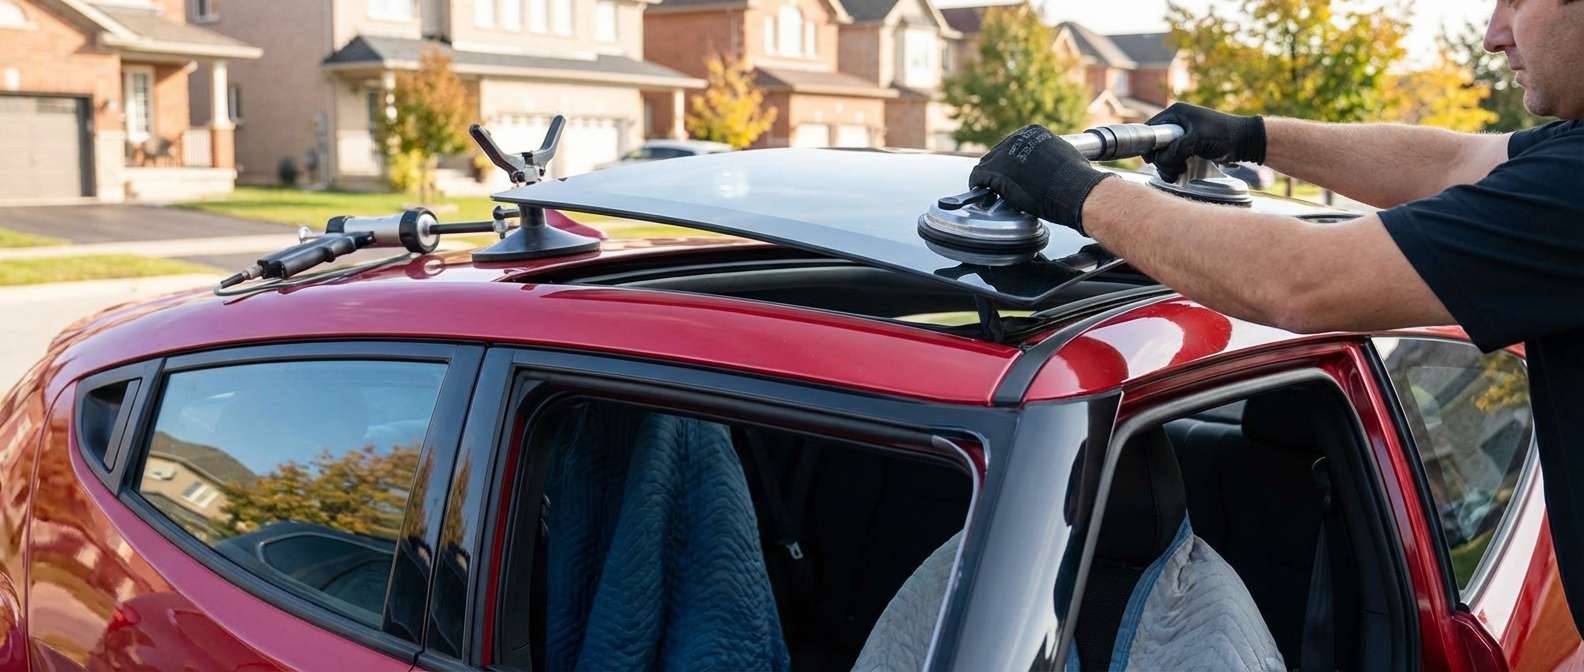
The moment our mobile service unit arrives, our first priority is the protection of your Veloster’s interior. Sunroof blowouts often leave a dangerous mess. We begin by laying heavy-duty, cut-resistant protective blankets over the sporty bucket seats, the center console, and the dashboard. We also apply protective tape to the exterior painted rooflines surrounding the sunroof opening to ensure our tools do not scratch your vehicle’s clear coat during the extraction process.
Step 2: Safe Removal of the Damaged Glass and Component Disassembly
Removing a damaged Veloster sunroof requires extreme care. If the glass is cracked but intact, we use specialized suction lifters to carefully unbolt and extract the panel from the sliding brackets. If the glass has completely shattered, we systematically dismantle the sunroof retaining clips, remove the side wind deflectors, and unbolt the mounting hardware. For stationary panoramic sections, we utilize precision cold-knife extraction tools to carefully slice through the factory polyurethane seal without damaging the structural pinch weld of the roof.
Step 3: Deep Vacuuming and Shard Extraction
Because the Veloster utilizes tempered safety glass for its sunroof, a break results in thousands of tiny, granular pieces. Vacuuming all broken glass shards from the vehicle's interior and mechanical assemblies is a mandatory and exhaustive step. We do not just vacuum the carpets; we use high-powered industrial extractors with micro-crevice tools to pull glass out from inside the sunroof track channels, the water drainage tubes, the mechanical sliding cables, and above the fabric headliner. Failing to remove even a single shard from the track can cause the sunroof motor to bind and fail immediately after installation.
Step 4: Surface Cleaning, Track Lubrication, and Primer Application
Once the area is 100% free of glass and debris, we focus on surface preparation. We clean the mechanical tracks using specialized automotive solvents to remove old, contaminated grease, followed by an application of high-grade lithium track lubricant to ensure the new panel glides silently. For bonded glass sections, we trim the old urethane bead down to a precise 1-2 millimeter base. We then thoroughly clean the bare metal pinch weld and apply a premium, fast-curing automotive glass primer. This primer is critical: it prevents future rust formation on the roof and creates an optimal chemical bonding surface for the new adhesive.
Step 5: Installation of the New Glass Using High-Quality Adhesive
With the framework prepped, we prepare the new, OEM-quality sunroof glass. Depending on the damaged section, we apply a thick, continuous V-bead of high-quality polyurethane adhesive to the stationary frame. For the movable front panel, we carefully lower the new glass into the exact factory position, aligning it with the mounting brackets. The Veloster’s roofline curvature is highly specific, so we use precision leveling tools to ensure the glass sits perfectly flush with the vehicle’s roofline to prevent wind whistling and aerodynamic drag.
Step 6: Motor Calibration, Testing, and Final Quality Assurance
After securing the glass and allowing the advanced adhesive to reach its safe drive-away time, we initiate the testing phase. We reconnect all electronic components and initialize a sunroof motor calibration cycle. We open, close, tilt, and slide the roof multiple times to ensure the action is buttery smooth. Finally, we perform a rigorous water leak test, flooding the roof channels with water to confirm that the new seals and the cleared drainage tubes are performing flawlessly. The vehicle is then given a final interior wipe-down, leaving your Veloster looking as good as new.
Expert Mobile Auto Glass Services in the Greater Toronto Area (GTA)
Dealing with a shattered sunroof is inconvenient enough; you shouldn't have to spend your day sitting in a repair shop waiting room. AlexWindshield brings the repair shop directly to your driveway, workplace, or garage. We are proud to offer comprehensive, fully equipped mobile auto glass replacements across the Greater Toronto Area (GTA).
Whether you are parked at a corporate office in Markham, at your home in the residential neighborhoods of Richmond Hill, or out running errands in Vaughan, our Master Technicians will arrive on-site with the exact glass and tools required for your 2012-2017 Hyundai Veloster. We understand the diverse weather conditions of the GTA, which is why we utilize temperature-adaptive urethanes that cure safely whether it is a hot Ontario summer day or a crisp autumn afternoon.
Why Choose AlexWindshield for Your Veloster Sunroof Replacement?
- Master Technician Expertise: We know the unique quirks, track mechanisms, and structural requirements of the 2012-2017 Hyundai Veloster inside and out.
- Comprehensive Debris Removal: We guarantee the meticulous removal of all broken glass shards from your headliner, tracks, and interior, protecting your passengers and your sunroof motor.
- Premium Materials: We use only OEM-equivalent or superior glass, high-quality polyurethane adhesives, and anti-corrosion primers to ensure a flawless, permanent fix.
- Mobile Convenience: Serving the entire GTA, including dedicated rapid-response teams for Vaughan, Richmond Hill, and Markham.
- Exceptional Protection: Every installation is backed by our industry-leading guarantee, giving you total peace of mind on the road.
Book Your Hyundai Veloster Sunroof Replacement Today
Do not let a shattered, cracked, or leaking sunroof compromise the safety and enjoyment of your sporty hatchback. Trust the experts who combine deep technical knowledge with unparalleled customer service. AlexWindshield is your premier choice for mobile auto glass services in the GTA, backed by our comprehensive Lifetime Warranty on workmanship and leaks. If your 2012-2017 Hyundai Veloster needs a new sunroof, contact AlexWindshield today to schedule your seamless, professional, and entirely mobile replacement.




