Restoring the Shield of Your Family Hauler: 2011-2017 Honda Odyssey Windshield Replacement
The fourth-generation Honda Odyssey, produced between 2011 and 2017, completely redefined the modern family minivan. Known for its distinctive "lightning bolt" side profile, whisper-quiet cabin, and advanced safety technologies, this generation of the Odyssey remains a staple for families on the go. However, that expansive, highly raked front windshield—while offering incredible visibility—acts as a massive canvas for flying road debris, rock chips, and stress cracks. When the glass on your family's daily driver is compromised, it is not merely a cosmetic issue; it is a critical structural and safety failure. As a Master Technician at AlexWindshield, I understand that replacing the glass on this specific vehicle requires far more than a standard swap. It demands precision engineering, premium materials, and an intricate knowledge of Honda's integrated safety systems.
Understanding the Complexities of the 2011-2017 Odyssey Windshield
Before diving into the technical replacement process, it is vital to understand what makes the 2011-2017 Honda Odyssey windshield unique. This is not just a piece of standard safety glass; it is a highly engineered component that contributes to up to 30% of the vehicle's structural integrity in the event of a rollover. Depending on your specific trim level (such as the EX-L, Touring, or Elite), your windshield is equipped with several advanced features:
- Acoustic Interlayer: High-end trims feature specialized acoustic windshields engineered with a sound-dampening vinyl layer to reduce wind noise and keep the cabin quiet.
- Advanced Driver Assistance Systems (ADAS): Models from 2014 onwards, in particular, integrate Forward Collision Warning (FCW) and Lane Departure Warning (LDW) cameras directly into the windshield mounting brackets.
- Rain Sensors & Wiper De-Icers: Many of these minivans feature automatic rain-sensing wipers and heated lower elements to prevent wiper freezing during harsh Canadian winters.
The AlexWindshield Step-by-Step Replacement Process: From A to Z
As a senior auto glass specialist, I adhere to a strict, uncompromising methodology to ensure that every replacement meets or exceeds factory specifications. Here is our master-level, step-by-step process for replacing the windshield on your 2011-2017 Honda Odyssey.
Step 1: Vehicle Pre-Inspection and Interior Protection
The process begins with a comprehensive pre-inspection. We scan the dashboard for any existing fault codes related to the ADAS cameras and verify the functionality of rain sensors and wipers. Because the Odyssey is designed as a comfortable family sanctuary, protecting the interior is our top priority. We drape the dashboard, steering wheel, and front leather or cloth seats with heavy-duty protective covers. Exterior fenders are also protected with specialized drop cloths to prevent any accidental scratches to the paintwork during the installation.
Step 2: Removal of Wipers, Cowl, and Exterior Trim
The Honda Odyssey features a deep-set wiper cowl system. To access the bottom edge of the glass, we carefully unbolt the wiper arms using dedicated pullers to avoid stripping the splines. Next, we remove the plastic cowl panel, taking special care not to break the brittle retaining clips—a common issue on vehicles of this age. The side rubber moldings and A-pillar trims are carefully detached and preserved for reinstallation, ensuring a factory-tight seal later.
Step 3: Disconnecting Interior Hardware and ADAS Sensors
Moving to the interior, we carefully unclip the rearview mirror, disconnect the rain sensor harness, and carefully detach the Lane Departure and Forward Collision Warning camera module from its bracket on the windshield. These delicate electronic components are stored safely in a static-free environment while the physical glass work takes place.
Step 4: Precision Cutting and Removal of the Damaged Glass
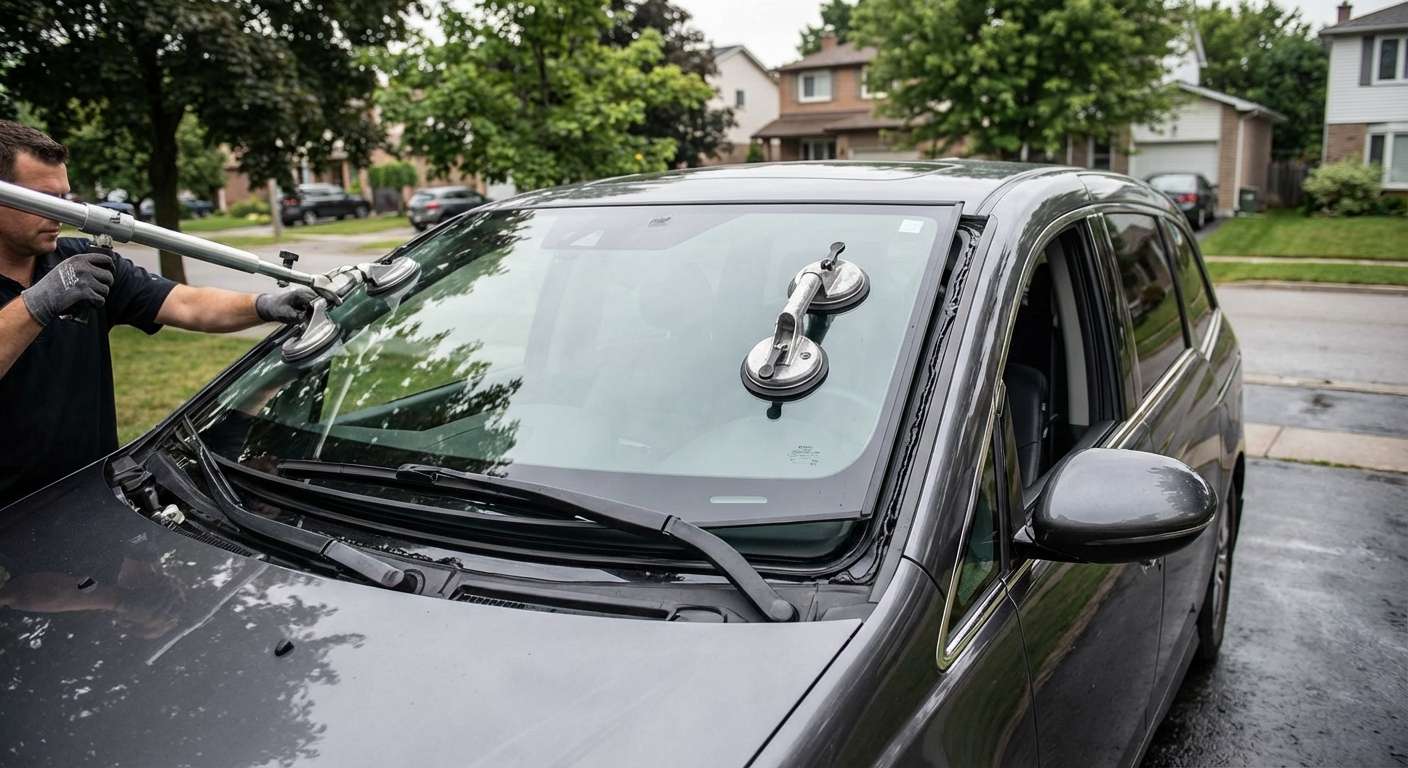
To extract the massive Odyssey windshield, we utilize an advanced fiber-line cutting system rather than traditional cold knives. This braided cutting wire is threaded through the factory urethane from the inside out and operated via a specialized winch system. This method cleanly slices the old polyurethane adhesive all the way around the perimeter of the glass without applying any torque or stress to the vehicle's metal pinch weld. Once the seal is broken, two technicians use heavy-duty suction cups to lift the heavy glass up and away from the minivan frame.
Step 5: Pinch Weld Preparation and Debris Vacuuming
The foundation of a safe windshield installation lies in the preparation of the pinch weld (the metal frame where the glass sits). We use specialized scraping tools to pare down the old urethane adhesive, leaving a precise 1-2 millimeter base layer. This ensures chemical compatibility with the new adhesive. We then thoroughly vacuum the entire dashboard gap, cowl area, and defroster vents to ensure no microscopic glass shards, dust, or dirt compromise the new seal.
Step 6: Chemical Cleaning, Primer Application, and High-Quality Adhesive
The new OEM-equivalent windshield is meticulously cleaned using alcohol-based glass strippers, focusing heavily on the ceramic frit band (the black painted border). We then apply a specialized, fast-drying active glass primer to both the newly trimmed urethane track on the vehicle frame and the frit band of the new glass. This primer promotes molecular adhesion and prevents future rust formation. Once flashed, we load our electric caulking gun with an industry-leading, high-modulus, non-conductive polyurethane adhesive. We extrude this adhesive in a precise "V-bead" pattern around the entire perimeter, guaranteeing a uniform, watertight, and structurally sound bond.
Step 7: Precision Glass Installation and Component Reassembly
Because the Honda Odyssey windshield is exceptionally large and heavy, we utilize a two-person setting technique or a specialized mechanical setting arm to precisely lower the new glass onto the fresh urethane bead. The glass is gently pressed into place, ensuring it sits perfectly flush with the roofline and A-pillars. We then apply specialized retention tape to hold the glass firmly in place while the adhesive cures. The wiper cowl, side moldings, wiper arms, and interior electronics are then meticulously reassembled and torque-tested to factory specifications.
Step 8: Mandatory ADAS Camera Calibration (Crucial Safety Step)
For the 2011-2017 Honda Odyssey models equipped with forward-facing cameras, the physical installation of the glass is only half the job. Even a millimeter of variance in the new glass's bracket placement can throw off the vehicle's Lane Departure Warning and Forward Collision systems. Mandatory ADAS camera calibration is a non-negotiable step at AlexWindshield. Using state-of-the-art diagnostic scanners and highly precise optical target boards placed at specific distances from the minivan's front bumper, we instruct the vehicle's onboard computer to recalibrate its camera system. We ensure the cameras recognize lane markings and obstacles with pinpoint accuracy, restoring your Odyssey's safety shield to perfect working order before you drive away.
Premium Mobile Auto Glass Services Across the Greater Toronto Area (GTA)
We know that managing a household, commuting to work, and dealing with a cracked windshield can be incredibly stressful. That is why AlexWindshield brings our Master Technician expertise directly to your driveway or workplace. Navigating the busy 401, cruising down the DVP, or shuttling the kids to hockey practice shouldn't be interrupted by lengthy repair shop waits. We proudly offer comprehensive mobile windshield replacement services across the Greater Toronto Area (GTA).
Whether you need an urgent replacement at your office in Vaughan, a driveway installation at your family home in Richmond Hill, or swift mobile service while you run errands in Markham, our fully equipped mobile service vans arrive with everything necessary to complete the job. We control the environment, utilize rapid-cure urethane with incredibly short Safe Drive-Away Times (SDAT), and perform comprehensive ADAS calibrations right on site in your local GTA neighborhood.
Choose AlexWindshield: Your Trusted GTA Auto Glass Experts
Your family's safety relies on the structural integrity and technological accuracy of your vehicle's windshield. Do not trust your 2011-2017 Honda Odyssey to just any generic glass shop. As a Senior SEO Specialist and Master Technician, I guarantee that AlexWindshield provides unparalleled craftsmanship, utilizing only OEM-quality glass, premium urethane adhesives, and dealership-level calibration software.
We stand firmly behind our workmanship. Every windshield replacement completed by our technicians comes backed by an industry-leading Lifetime Warranty against leaks, wind noise, and manufacturer defects. When you require flawless, safe, and convenient mobile auto glass services in the GTA, contact AlexWindshield. Let us restore your Honda Odyssey's glass with the precision, care, and expertise your family deserves.




