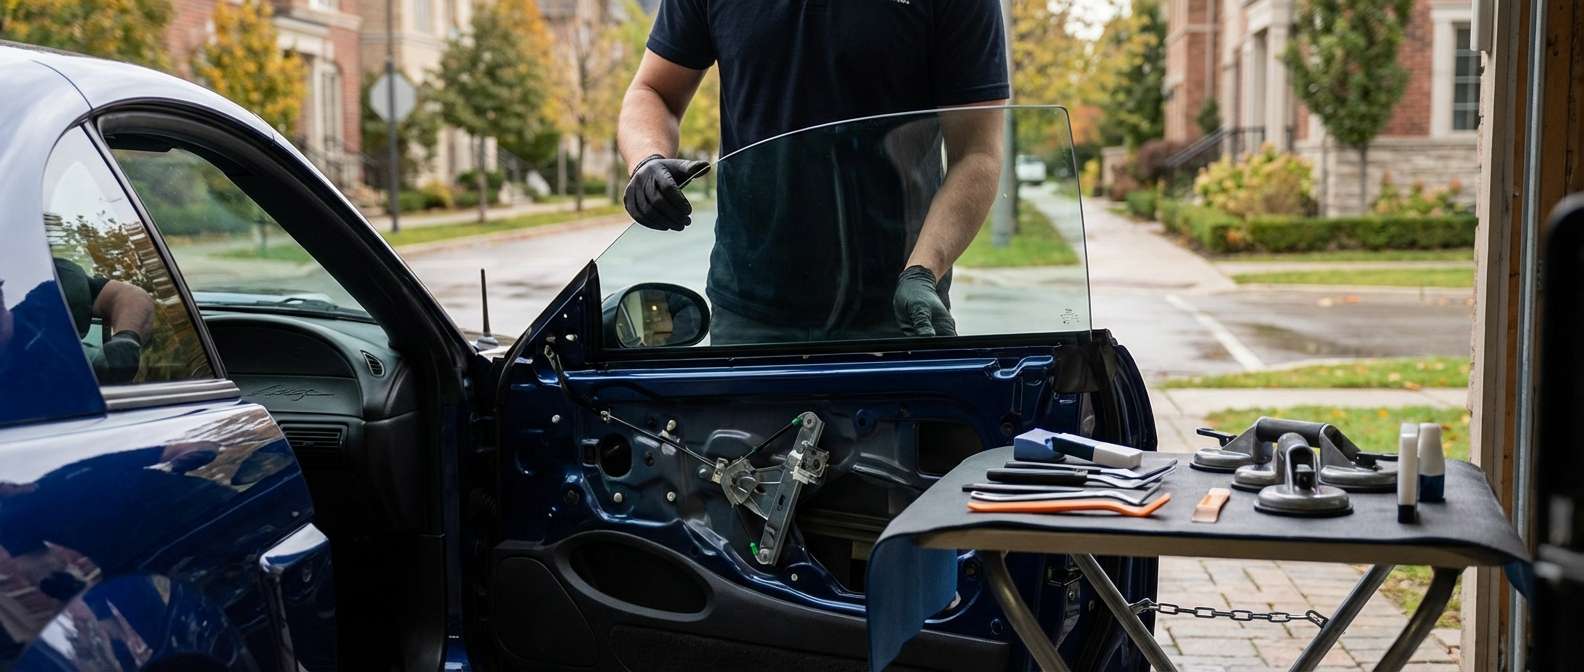
Reviving the "New Edge" Icon: Expert Door Glass Replacement for the 1999-2004 Ford Mustang
The 1999-2004 Ford Mustang, affectionately known by enthusiasts as the "New Edge" SN95 generation, represents a defining era for the iconic American pony car. With its sharp, aggressive body lines, roaring engine options, and unmistakable road presence, this vehicle commands respect. However, one of its defining aesthetic features—the sleek, frameless door glass—requires meticulous care and precision when compromised. A shattered window on a Mustang is more than an inconvenience; it exposes your pristine interior to the elements and disrupts the vehicle's aerodynamic integrity. At AlexWindshield, we combine our passion for classic automotive engineering with top-tier glass replacement techniques to restore your Mustang to its original glory.
Why the Greater Toronto Area Trusts AlexWindshield for Mustang Glass Services
Driving a classic Mustang through the bustling streets of the Greater Toronto Area (GTA) is a thrilling experience, but navigating road hazards, debris, or the unfortunate event of vandalism can leave you with a shattered side window. Whether you are showing off your GT at a local meet in Vaughan, commuting down Yonge Street in Richmond Hill, or parked safely at your workplace in Markham, a broken window compromises your security immediately.
Our premier mobile service brings the auto glass shop directly to your location. We understand that navigating the GTA with a missing window is stressful and dangerous. Our Master Technicians are dispatched seamlessly across Vaughan, Richmond Hill, Markham, and the surrounding municipalities, ensuring that your 1999-2004 Ford Mustang receives prompt, professional, and uncompromising care right in your driveway.
Understanding Tempered Door Glass on the 1999-2004 Mustang
Unlike windshields, which are made of laminated glass designed to crack but stay intact, the door glass of your 1999-2004 Ford Mustang is constructed from tempered safety glass. By design, when tempered glass sustains a severe impact, it shatters into thousands of small, granular, pebble-like pieces. While this prevents dangerous, sharp shards from injuring the driver or passengers, it creates a massive mess inside the cabin and deep within the intricate mechanisms of the door shell. Replacing this glass is not just about putting a new pane in; it is an extensive clean-up and mechanical restoration process.
The A-to-Z Step-by-Step Door Glass Replacement Process
At AlexWindshield, our Master Technicians follow a stringent, factory-approved protocol to ensure your Mustang's door glass is replaced flawlessly. Because the 1999-2004 Mustang features frameless windows, precise alignment is absolutely critical to prevent wind noise and water leaks. Here is our comprehensive, step-by-step methodology:
Step 1: Vehicle Preparation and Interior Protection
Before any tools are lifted, we secure the work area. Shards of tempered glass can easily scratch your Mustang's leather or cloth seats, center console, and interior trim. We begin by laying down heavy-duty, protective technician blankets across the seats, floorboards, and the door sill. We also tape off the exterior painted surfaces surrounding the door frame using specialized automotive masking tape to ensure our tools and equipment never mar your vehicle's paintwork.
Step 2: Door Panel and Hardware Removal
Accessing the window regulator and the shattered glass requires the careful removal of door panels. The "New Edge" Mustang features specific interior components that must be handled delicately, especially given the age of the plastics:
- Mach 460 Tweeter Pods: If equipped, we carefully detach the upper sail panel sail/tweeter pod housing at the top of the door.
- Switch Bezel: We use non-marring interior trim tools to gently pry up the power window and lock switch bezel, safely disconnecting the wiring harnesses.
- Handle and Trim: We remove the retaining screw behind the interior door handle and detach the trim surround.
- Panel Extraction: After removing the lower retaining screws, we carefully lift the interior door panel up and off the door shell, exposing the internal vapor barrier.
Step 3: Comprehensive Glass Cleanup and Vacuuming
This is one of the most critical steps in replacing a shattered side window. We meticulously peel back the waterproof vapor barrier. Using high-powered, industrial shop vacuums equipped with specialized micro-crevice tools, we begin vacuuming all broken glass shards from the vehicle's interior. We extract every single piece of glass from the seats, the carpet, the AC vents, and most importantly, the bottom cavity of the door shell. Failing to thoroughly clean the inside of the door can lead to infuriating rattles while driving, and stray glass shards can easily chew up the cables on your window regulator over time.
Step 4: Regulator Inspection and Old Glass Removal
With the door cavity clean, we inspect the window regulator (the scissor-style or cable mechanism that moves the window up and down) for any damage caused by the impact. We then remove any remaining chunks of old glass still bolted or glued into the regulator's sash channels. The tracks and weather stripping are thoroughly cleaned out with specialized picks to ensure no hidden glass granules will scratch the new window.
Step 5: Surface Cleaning and Primer Application
Depending on the specific aftermarket or OEM replacement glass assembly, the lower mounting brackets (sash clips) may need to be bonded to the raw glass pane. To ensure an unbreakable bond, we perform a rigorous surface cleaning of the bottom edge of the new door glass using high-purity, ammonia-free automotive glass cleaner. Once perfectly clean and dry, we perform a precise primer application along the bonding surface of both the glass and the mounting brackets. This chemical primer acts as a binding agent, preparing the surfaces to permanently accept the urethane.
Step 6: Installation Using High-Quality Adhesive
After the primer has flashed (dried completely), we proceed with the installation of the new glass using high-quality adhesive. We lay a precise, uniform bead of fast-curing automotive-grade urethane adhesive into the channels of the lower mounting brackets. The new window glass is then carefully pressed into these brackets and aligned to the exact factory depth. This high-tensile adhesive ensures that the glass will never separate from its lifting mechanism, even during the harsh freezing temperatures we experience in the GTA.
Step 7: Inserting and Bolting the New Glass Assembly
Once the glass is securely bonded to its brackets, the technician carefully angles the new window down through the top window sweep (weatherstrip), sliding it smoothly into the internal guide tracks. We then align the brackets with the window regulator mounting points and securely tighten the retaining bolts to factory torque specifications.
Step 8: Frameless Window Alignment and Adjustment
Because the 1999-2004 Mustang does not have an upper door frame to guide the glass, we must perform precise geometric adjustments. We adjust the up-stop brackets to control exactly how high the window rolls up, preventing it from crashing into the roof line. We also adjust the inward tilt mechanism so that when the door is closed, the top edge of the glass presses firmly against the weather stripping, creating a perfect seal against rain and minimizing highway wind noise.
Step 9: Testing and Final Reassembly
Before putting the interior back together, we reconnect the power window switches and cycle the window up and down several times. We check for smooth operation, listen for any binding or crunching noises, and verify the glass alignment. Once the new door glass operates flawlessly, we re-seal the vapor barrier, carefully re-hang the door panel, re-install the Mach 460 tweeter pods, and securely fasten all interior trim pieces. Finally, the new glass receives a streak-free detailing.
Preserving the Integrity of Your Mustang
Choosing the right technicians for your 1999-2004 Ford Mustang is paramount. An improperly installed frameless window will lead to frustrating water leaks that can destroy your vehicle's carpet, cause mold, or damage electrical components. Furthermore, utilizing subpar adhesives or skipping the vital primer application can result in the glass detaching from the regulator, causing the window to drop suddenly into the door shell while driving. We utilize only OEM-equivalent or superior safety glass, guaranteeing perfect curvature, tint matching, and structural integrity.
Your Trusted Mobile Auto Glass Experts in the GTA
At AlexWindshield, we don't just replace glass; we engineer peace of mind. Our extensive experience with classic and modern vehicles alike makes us the premier choice for automotive glass repair. We are proud to offer unparalleled mobile services across the Greater Toronto Area (GTA). If you are stranded with a shattered Mustang window in Vaughan, need an emergency replacement at your home in Richmond Hill, or require precise glass services at your office in Markham, our fully equipped mobile fleet is ready to deploy to your exact location.
Every full glass replacement we perform is backed by our industry-leading Lifetime Warranty, covering any leaks, manufacturer defects, or workmanship errors for as long as you own your Mustang. Do not let a broken window keep your iconic pony car off the road. Trust the Master Technicians at AlexWindshield for flawless, durable, and precise auto glass replacement. Contact us today to schedule your mobile service and experience the highest standard of auto glass care in the GTA.




