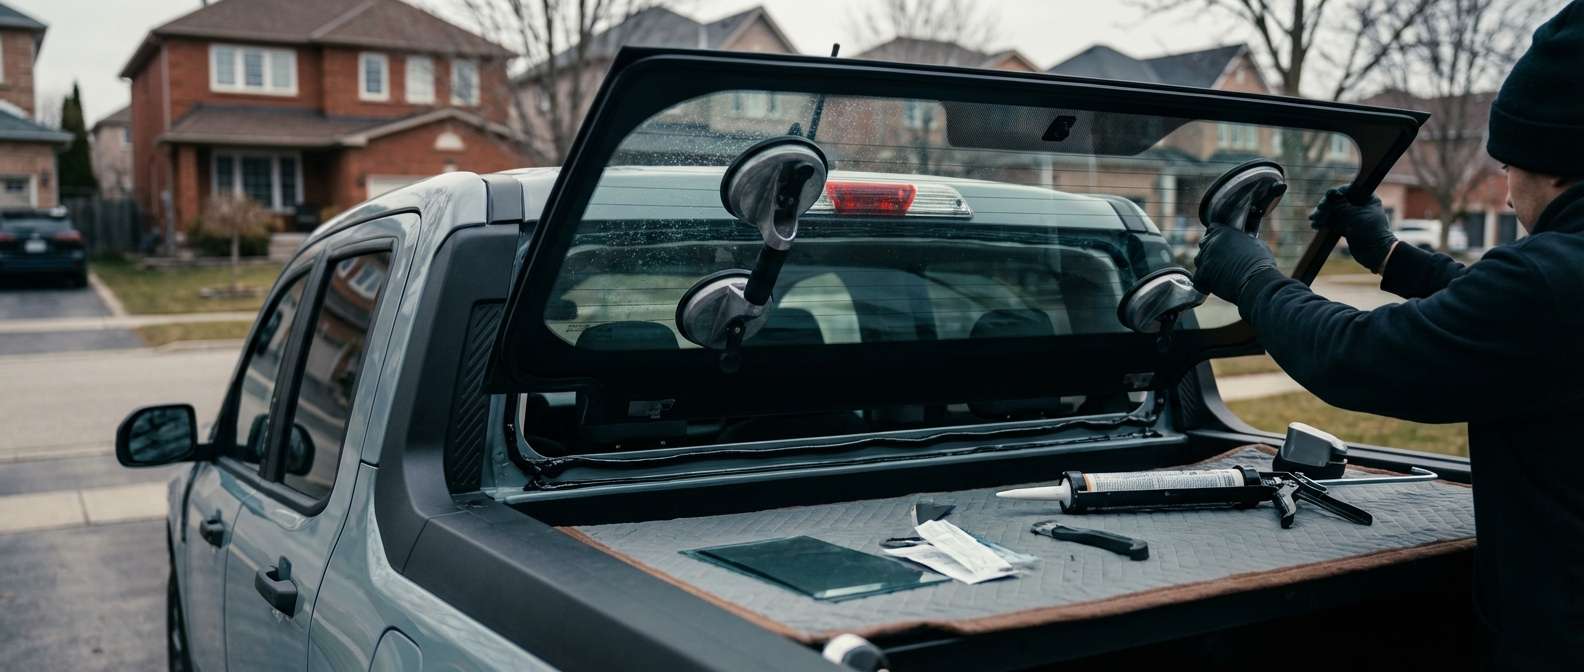
Reviving Your Compact Powerhouse: Expert Back Glass Replacement for the 2022-2027 Ford Maverick
The 2022-2027 Ford Maverick completely disrupted the compact truck market when it first rolled off the assembly line. By combining a highly efficient unibody design, an available hybrid powertrain, and the incredibly versatile Flexbed system, the Maverick quickly became the ultimate tool for urban adventurers and DIY enthusiasts alike. However, that same utility means your truck bed is frequently loaded with lumber, tools, bikes, and bulky cargo. All it takes is one sudden stop or an improperly secured load shifting forward, and your truck's rear window is instantly compromised. When you are dealing with a shattered rear window, the utility, security, and climate control of your Maverick come to a grinding halt.
Unlike laminated front windshields that crack but stay intact, the back glass of your Ford Maverick is manufactured using tempered glass. Upon impact, tempered glass is designed to instantly disintegrate into thousands of small, granular, pebble-like pieces to prevent severe lacerations. While this is an essential safety feature, it creates an absolute nightmare for the interior of your truck cabin. The weather outside is instantly let in, your cabin is exposed to potential theft, and your seats and floorboards become covered in hazardous glass debris.
As a Master Technician at AlexWindshield, I have engineered a precise, zero-compromise protocol specifically tailored to the unique unibody architecture of the 2022-2027 Ford Maverick. We do not just replace the glass; we completely restore the structural integrity, electrical functionality, and pristine interior condition of your vehicle.
The Technical Complexity of the Ford Maverick Rear Window
Replacing the back glass on a modern pickup truck is no longer a simple "pop-out and pop-in" job. Depending on your specific trim level (XL, XLT, Lariat, or Tremor), your 2022-2027 Ford Maverick may be equipped with a solid rear glass pane, a manual sliding rear window, or a power-sliding rear window. Furthermore, almost all modern Mavericks feature integrated rear window defroster grids directly printed onto the glass surface.
When this glass shatters, it can damage the defroster wiring harness, and if equipped, the sensitive tracks and motor cables for the power sliding unit. A generic, rushed replacement often leads to water leaks into the cab, electrical malfunctions, or annoying wind noises. At AlexWindshield, our technical approach ensures every single factory specification is met or exceeded.
Comprehensive Back Glass Replacement Process: A to Z Technical Breakdown
Our replacement methodology is an exacting, multi-step process designed to guarantee factory-level safety, perfect aesthetic fitment, and a fully restored interior environment. Here is our step-by-step technical workflow for the Ford Maverick.
Step 1: Vehicle Assessment and Advanced Interior Protection
Before any tools are utilized, we perform a thorough assessment of the damage. Because tempered glass violently shatters, fragments are often projected deep into the truck's cabin. We begin by applying heavy-duty protective drop cloths and moving blankets over your Maverick's rear seats, center console, and unique under-seat storage bins. We also utilize protective tape along the exterior roofline, C-pillars, and the front edge of the truck bed to ensure our tools never scratch your vehicle's factory paint.
Step 2: Meticulous Glass Shard Vacuuming and Debris Extraction
Because this is a back glass replacement, thoroughly vacuuming all broken glass shards from the vehicle's interior is an absolute, non-negotiable mandatory step. We deploy high-powered industrial shop vacuums equipped with specialized micro-crevice tools. We systematically extract the granular glass pebbles from the rear seat cushions, floor mats, child safety seat anchors (LATCH system), and inside the rear door pockets. We also vacuum the exterior cowl area between the cab and the truck bed to ensure no hidden glass falls into the bed later.
Step 3: Rear Interior Trim and Panel Removal
To safely access the structural pinch weld and the adhesive bead, the interior panels must be carefully detached. We use non-marring nylon pry tools to safely unclip the C-pillar trim panels and the rear roof headliner section without creasing the fabric or snapping the delicate plastic retention clips. If your Maverick is equipped with a rear defroster or a power slider, we meticulously disconnect the electrical wiring harnesses and isolate the connectors to prevent any electrical shorts during the installation process.
Step 4: Extracting the Damaged Back Glass and Old Adhesive
With the trim removed and the wiring disconnected, we address the encapsulated perimeter of the glass. Using a specialized automotive cold knife and an advanced wire-cutting system, we slice through the original factory polyurethane adhesive bead that bonds the glass to the steel unibody frame. This precision cutting technique separates the remaining glass frame from the truck cab without applying undue stress to the metal pinch weld.
Step 5: Pinch Weld Preparation and Surface Cleaning
A new window is only as secure as the surface it is bonded to. We trim down the old polyurethane bead so that only a thin, 1-2 millimeter base layer remains. This existing layer provides an excellent bonding substrate for the new adhesive. We then use specialized, lint-free wipes and alcohol-based auto glass surface cleaners to completely degrease and clean the entire perimeter. Any dirt, moisture, or chemical residue left on the pinch weld will compromise the watertight seal.
Step 6: Primer Application for Chemical Adhesion and Rust Prevention
If the wire-cutting process exposed any bare metal on the steel pinch weld, we immediately treat those microscopic areas with a specialized black body primer. This step is incredibly vital for preventing long-term rust and corrosion—especially given the heavy road salt utilized during our harsh winters. We also apply a glass-prep primer to the bonding edge of the new Premium OEM-quality back glass. We adhere strictly to the manufacturer's recommended "flash-off" time, allowing the primer to chemically cure and create an optimal bonding surface.
Step 7: High-Quality Urethane Adhesive Extrusion
Applying the adhesive requires the steady hand of a Master Technician. We utilize a premium, fast-curing, high-modulus automotive polyurethane adhesive. Using an electric caulking gun equipped with a precision V-notch nozzle, we extrude a continuous, uniform bead of urethane around the entire perimeter of the pinch weld. The V-notch ensures the adhesive stands at the exact height required to meet the Ford Maverick's factory depth specifications, guaranteeing a flawless, aerodynamic, and watertight seal.
Step 8: Precision Installation of the New Glass
With the urethane applied, two technicians carefully lift the new Ford Maverick back glass into position. We align the glass using factory reference points and gently press it into the urethane bead. We ensure that the depth is perfectly flush with the exterior body panels. Once seated, we apply specialized retention tape to hold the glass firmly in place while the polyurethane begins its chemical curing process.
Step 9: Reassembly, Reconnecting Electronics, and Final Quality Check
While the adhesive achieves its Safe Drive Away Time (SDAT), we reinstall all interior trim panels, headliner clips, and C-pillar moldings. We reconnect the rear defroster terminals and power sliding window motor cables, testing them fully to ensure factory functionality is completely restored. Finally, we perform a final cleaning of the new glass with an ammonia-free cleaner and conduct a secondary vacuuming sweep of the interior to guarantee your truck is returned to you in pristine, better-than-new condition.
Unmatched Mobile Auto Glass Services Across the Greater Toronto Area (GTA)
We know that driving a truck with a blown-out back window is not just uncomfortable; it is fundamentally unsafe and exposes your interior to rain, snow, and road debris. That is why AlexWindshield brings our state-of-the-art auto glass shop directly to your driveway, workplace, or job site.
We proudly offer comprehensive mobile service across the entire Greater Toronto Area (GTA). Whether you are working at a construction site in Vaughan, parked at a corporate office in Markham, or securely at your home in Richmond Hill, our fully equipped mobile service vans arrive with everything necessary to execute a flawless, factory-grade back glass replacement. You do not need to take time out of your busy schedule or tow your vulnerable vehicle to a shop—we bring the expertise directly to you.
Why Choose AlexWindshield for Your Ford Maverick?
When it comes to the safety and structural integrity of your 2022-2027 Ford Maverick, you cannot afford to cut corners with budget glass or inexperienced installers. Here is why truck owners across the GTA trust us:
- Master Technicians: Our technicians are highly trained, certified, and possess deep technical knowledge of modern unibody truck architectures like the Ford Maverick.
- High-Quality Materials: We use exclusively OEM-equivalent glass, premium auto glass primers, and industry-leading fast-cure polyurethane adhesives to guarantee a permanent, leak-proof bond.
- Comprehensive Cleanup: We never leave a mess behind. Our intensive interior vacuuming protocol ensures your cabin and truck bed are completely free of hazardous tempered glass shards.
- Convenient Local SEO Coverage: Rapid response mobile dispatch across the Greater Toronto Area (GTA), with dedicated routes servicing Vaughan, Richmond Hill, and Markham.
- Lifetime Warranty: We stand by our craftsmanship. Every back glass replacement comes backed by our comprehensive Lifetime Warranty covering water leaks, air leaks, and manufacturer defects.
Schedule Your Ford Maverick Back Glass Replacement Today
Do not let a shattered rear window sideline your Ford Maverick or expose your cabin to the harsh Ontario elements. Rely on the superior technical expertise, precision installation methods, and dedicated customer care that only AlexWindshield can provide. As the premier destination for mobile auto glass services in the GTA, we are committed to restoring your truck's safety and utility with our exclusive Lifetime Warranty.
Contact AlexWindshield today to book your mobile appointment, and let our Master Technicians get you and your Ford Maverick back on the road safely, securely, and with total peace of mind.




