The 8th Generation Elegance: Restoring the Integrity of Your Chevrolet Malibu's Sweeping Roofline
The 8th generation Chevrolet Malibu, spanning the 2013 to 2015 model years, brought a refined, aerodynamic, and aggressive silhouette to the competitive mid-size sedan market. A critical component of this sweeping design is the rear auto glass, which seamlessly connects the roofline to the rear decklid, optimizing airflow and providing essential structural support to the cabin. When your 2013-2015 Chevrolet Malibu back glass shatters, it is not merely an aesthetic setback; it immediately compromises your vehicle's structural integrity, interior climate control, and your safety on the road. At AlexWindshield, we understand the specific engineering of this classic American sedan, and our Master Technicians are equipped with the specialized knowledge to restore your vehicle to its factory-safe condition.
Expert Back Glass Replacement for Chevrolet Malibu 2013-2015
Unlike laminated windshields, the rear window of a 2013-2015 Chevy Malibu is constructed from tempered safety glass. By design, upon severe impact, tempered glass shatters into thousands of small, granular, pebble-like pieces rather than dangerous, jagged shards. While this mechanism is designed to prevent deep lacerations during an accident, it creates an extensive and overwhelming mess inside the cabin. Furthermore, the rear glass of this specific Malibu generation houses the intricate thermal defroster grid, requiring precise electrical reconnections during the replacement process. A generic replacement approach is simply not enough; you need the specialized touch of an AlexWindshield Master Technician.
Premium Auto Glass Services Across the Greater Toronto Area (GTA)
Driving with a shattered rear window on the busy highways of Ontario exposes your vehicle's interior to unpredictable weather, road debris, and potential theft. We proudly offer our premium, fully mobile auto glass replacement services across the entire Greater Toronto Area (GTA). Whether you are parked at your home in the quiet suburbs or at your office parking lot, our specialized mobile units are fully equipped to serve you. We maintain a heavy service presence and fast response times in Vaughan, Richmond Hill, and Markham, ensuring that you never have to drive an unsafe vehicle to a repair shop. We bring the professional auto glass shop directly to you.
The A to Z Technical Process: How We Replace Your Malibu’s Back Glass
As Master Technicians, we adhere strictly to the Auto Glass Replacement Safety Standards (AGRSS). Replacing the rear window on a 2013-2015 Chevrolet Malibu is a multi-stage process that requires precision, patience, and top-tier materials. Here is our detailed, step-by-step methodology:
Step 1: Pre-Installation Inspection and Interior Protection
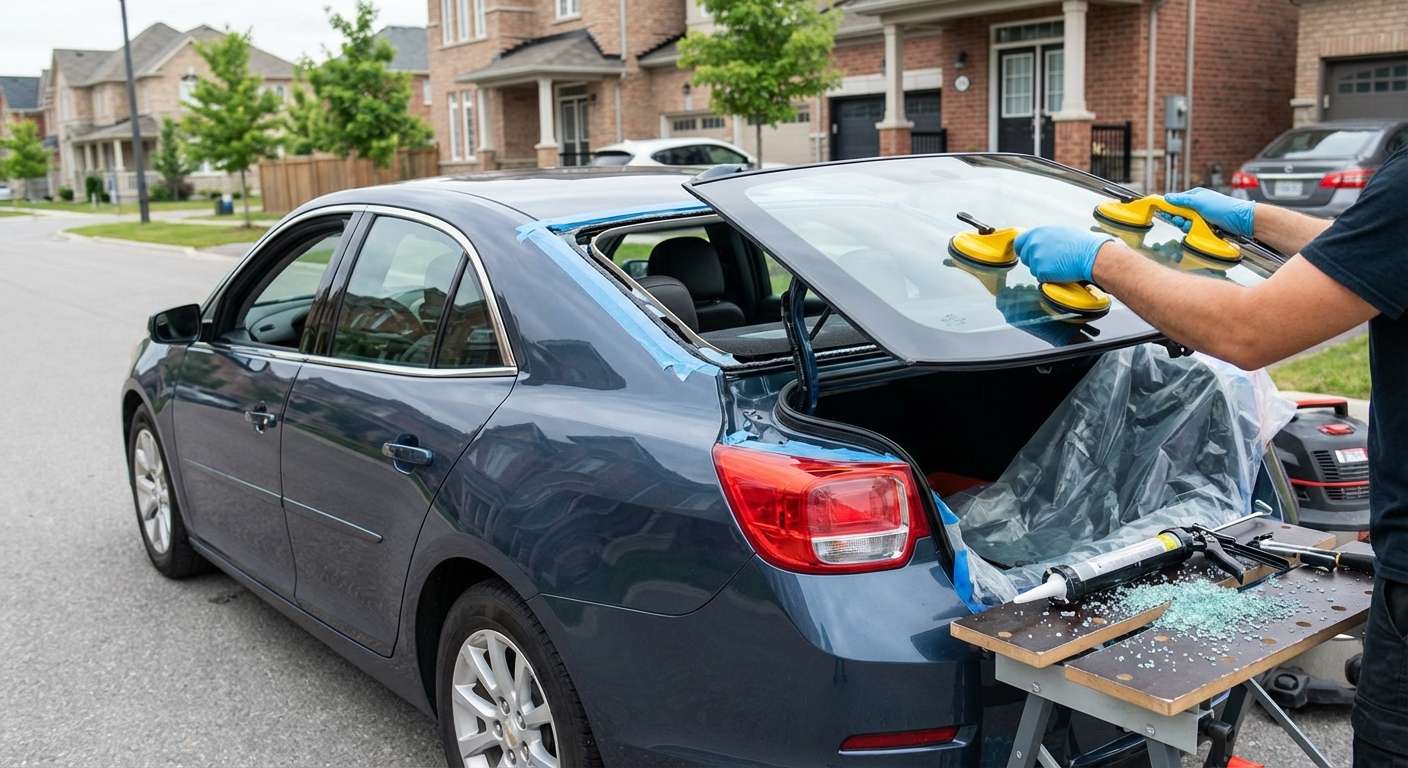
Before any tools are utilized, we conduct a thorough inspection of the vehicle's rear frame. We check for any pre-existing pinchweld damage or rust that could impede a proper seal. Because shattered tempered glass gets everywhere, we immediately lay down heavy-duty protective drop cloths over your Malibu's rear seats, rear parcel shelf, and trunk area. We also apply protective tape to the exterior painted surfaces surrounding the rear window opening to prevent any accidental scratches during the extraction of the remaining glass frame.
Step 2: Comprehensive Glass Cleanup and Debris Removal
This is arguably one of the most critical steps in a back glass replacement. Tempered glass cubes are notorious for falling into hidden crevices. Our technicians spend a significant amount of time thoroughly vacuuming all broken glass shards from the vehicle's interior. We use high-powered, industrial shop vacuums to extract glass from the rear seat cushions, the floorboards, the rear speaker grilles, and deep inside the trunk. In many cases, we temporarily remove the rear interior trim panels and the C-pillar covers to ensure absolutely no glass fragments remain hidden, preventing future rattling noises and protecting your passengers from stray pieces.
Step 3: Disconnecting the Defroster and Removing Rear Panels
The 2013-2015 Malibu features an integrated rear window defroster system. We carefully unclip the C-pillar trims and rear deck panels to access the electrical harnesses. The defroster tabs on the old glass frame are carefully disconnected. If there are any integrated antenna connections, these are also properly unhooked and safely tucked away to avoid damage during the urethane cutting phase.
Step 4: Removing the Old Urethane and Glass Frame
Using specialized cold knives, precision wire-cutting systems, and automated extractor tools, we carefully slice through the existing factory polyurethane adhesive that held the original glass in place. We must maintain absolute precision to avoid cutting into the metal pinchweld of your Malibu. Once the old bead is sliced, the remaining glass perimeter is safely lifted away and disposed of according to environmental guidelines.
Step 5: Pinchweld Preparation and Primer Application
A new window is only as secure as the surface it bonds to. We trim down the old urethane bead to a thin, even layer of about 1-2 millimeters, creating a perfect base for the new adhesive to bond with. The bare metal pinchweld is rigorously cleaned using specialized auto glass cleaners to remove dirt, grease, and moisture. Next, we apply a high-grade, fast-drying automotive glass primer to any exposed scratches on the metal to prevent future rust, as well as to the black frit band of the new OEM-quality replacement glass. This ensures a chemical bond that meets factory safety specifications.
Step 6: High-Quality Urethane Adhesive Application
At AlexWindshield, we never compromise on adhesives. We load our electric caulking guns with premium, fast-curing polyurethane adhesive. The technician expertly applies a continuous, uniform "V-bead" of urethane around the entire perimeter of the Malibu's pinchweld. The V-bead technique is crucial as it guarantees the adhesive will compress perfectly flat against the new glass, eliminating the risk of air gaps, wind noise, and water leaks.
Step 7: Precision Installation of the New Back Glass
Using heavy-duty suction cup handles, two technicians carefully lift the new, OEM-equivalent Chevrolet Malibu back glass into place. We align the glass perfectly with the vehicle's roofline and side panels before gently pressing it into the wet urethane bed. Once set in place, we reconnect the internal defroster tabs, test the electrical continuity to ensure the defogger is fully operational, and carefully snap all interior C-pillar and trunk trim panels back into their original factory positions.
Understanding Safe Drive-Away Time (SDAT)
After the new glass is installed, you cannot simply drive away immediately. The premium urethane adhesive requires specific curing time to reach its required tensile strength. Depending on the temperature and humidity in the GTA on the day of your installation, our technicians will calculate your precise Safe Drive-Away Time (SDAT). Usually, within just one to two hours, the urethane cures enough to safely withstand the structural stress of driving and meet federal roof-crush safety standards. We will brief you on post-installation care, such as leaving your windows cracked slightly to prevent cabin air pressure from pushing against the new seal when closing your car doors.
The Dangers of Ignoring a Damaged Rear Window
Many drivers mistakenly believe they can temporarily patch a broken back glass with plastic wrap or cardboard. For a sophisticated vehicle like the 2013-2015 Chevy Malibu, this is incredibly dangerous for several reasons:
- Structural Vulnerability: The back glass supports the rear roofline during a rollover accident. Without it, the structural integrity of the cabin is severely reduced.
- Carbon Monoxide Risk: Driving with a missing rear window creates an aerodynamic vacuum that can actually pull hazardous exhaust fumes directly into the passenger cabin.
- Weather Damage: The unpredictable weather in Vaughan, Richmond Hill, and Markham means rain or snow can instantly ruin your Malibu's electronic systems, rear speakers, and upholstery.
- Security Threat: A shattered back window is an open invitation for thieves to access your vehicle and everything stored inside your trunk.
Unmatched Mobile Auto Glass Convenience in the GTA
We know your time is highly valuable. Taking a day off work to sit in a dusty garage waiting room is a thing of the past. Our fully equipped mobile auto glass service is designed to provide unparalleled convenience without sacrificing quality. Whether you are navigating the busy tech hubs of Markham, running errands at the shopping centers in Vaughan, or relaxing at home in Richmond Hill, our mobile fleet comes directly to your location. We bring the exact same high-quality OEM-equivalent glass, the same premium urethane, and the same Master Technician expertise to your driveway.
Book Your Chevrolet Malibu Back Glass Replacement Today
Your 2013-2015 Chevrolet Malibu deserves the best care to keep it looking pristine and functioning safely. Don't let a shattered rear window disrupt your life or compromise your safety on the roads of the Greater Toronto Area. Trust the industry leaders who combine advanced technical skills with uncompromising customer service.
When you choose AlexWindshield, you are not just getting a piece of glass; you are getting peace of mind. We stand confidently behind our craftsmanship, which is why every single back glass replacement comes with our comprehensive Lifetime Warranty covering any air leaks, water leaks, or manufacturer defects for as long as you own your vehicle. Contact AlexWindshield today to schedule your mobile appointment and experience the premier auto glass replacement service in the GTA.




