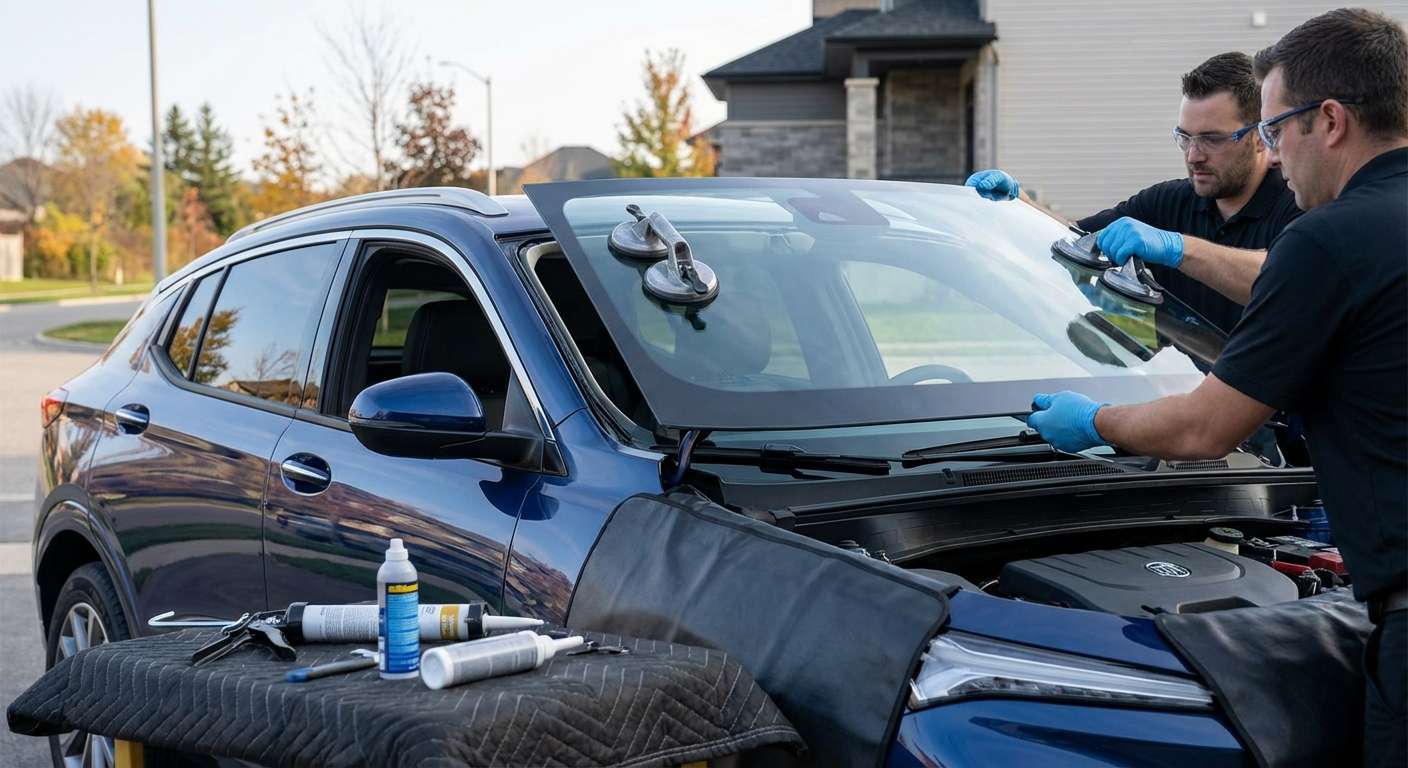
Premium Windshield Replacement for Buick Envista (2024-2027) in the GTA
The Buick Envista, introduced for the 2024 model year, represents a bold shift in design language for the brand. With its sleek, coupe-like profile, aggressive front fascia, and the new tri-shield logo, this vehicle is not just an SUV; it is a style statement. However, the sophisticated rake of the Envista’s front glass and its integration with the roofline makes it particularly susceptible to road debris impacts on highways. When the structural integrity of this stunning vehicle is compromised by a crack or chip, it requires more than just a quick swap. It requires the precision of a Master Technician who understands the complex relationship between modern automotive engineering and advanced safety systems.
At AlexWindshield, we specialize in high-end, technical glass replacement. We understand that your 2024-2027 Buick Envista is equipped with the Buick Driver Confidence suite, relying heavily on sensors mounted directly to the windshield. Our service is not merely about restoring a view; it is about restoring factory-level safety specifications to your vehicle. Serving the entire Greater Toronto Area (GTA), with dedicated mobile units in Vaughan, Richmond Hill, and Markham, we bring dealership-quality craftsmanship directly to your driveway.
The Critical Role of the Windshield in the Buick Envista
Many drivers view the windshield simply as a barrier against wind and rain. In reality, specifically for modern unibody vehicles like the Buick Envista, the windshield provides up to 45% of the vehicle’s structural integrity in a front-end collision and up to 60% during a rollover event. The glass acts as a backstop for the passenger-side airbag; if the windshield is installed poorly or with inferior adhesive, the airbag deployment can detach the glass, rendering the safety system useless.
Furthermore, the 2024-2027 Envista utilizes acoustic glass technology to maintain the brand’s signature "QuietTuning." Using non-compliant aftermarket glass can result in increased cabin noise, wind whistling, and a disruption of the luxury driving experience you paid for. At AlexWindshield, we strictly utilize glass that meets or exceeds OEM (Original Equipment Manufacturer) standards to ensure safety, silence, and clarity.
Step-by-Step: The Master Technician’s Replacement Process
Replacing a windshield on a 2024-2027 Buick Envista is a meticulous operation. As a Master Technician at AlexWindshield, I follow a rigorous protocol to ensure a leak-proof, safe, and durable installation. Here is our detailed A to Z process:
Step 1: Pre-Inspection and Vehicle Protection
Before a single tool touches the vehicle, we conduct a thorough pre-inspection. We check the operation of the windshield wipers, the rain sensor (if equipped), and the status of the ADAS (Advanced Driver Assistance Systems) camera. Once verified, we proceed to protection:
- We apply protective tape to the exterior body panels and A-pillars to prevent accidental scratches during glass removal.
- Inside the cabin, we cover the dashboard, steering wheel, and front seats with heavy-duty protective covers. This ensures that no debris, urethane, or glass shards damage your Envista’s premium interior materials.
Step 2: Disassembly of Cowl and Trim
To access the bottom edge of the glass, we must remove the windshield wiper arms and the plastic cowl panel (the ventilation grille at the base of the windshield). On the Buick Envista, specific care must be taken with the plastic retention clips, which can be brittle in colder GTA weather. We also carefully remove the interior rear-view mirror, the ADAS camera bracket housing, and any connected wire harnesses for rain sensors or humidity sensors.
Step 3: Surgical Removal of the Damaged Glass
This is the most critical phase for preventing future rust. Using a specialized tool—either a Cold Knife or a Fiber Wire extraction system—we cut through the existing urethane bead holding the glass to the vehicle’s "pinch weld" (the metal frame).
Master Tech Note: We never leverage the glass against the metal body. Doing so can scratch the paint on the pinch weld. Even a microscopic scratch can lead to rust forming under the glass months later, eventually causing leaks and structural failure. We ensure the blade or wire rides exclusively against the glass or the old adhesive.
Step 4: The "Full Cut" and Surface Preparation
Once the old glass is removed, a layer of old urethane remains on the vehicle frame. We perform a "Full Cut," trimming this old adhesive down to approximately 1-2mm thickness. This provides a fresh, clean base for the new adhesive to bond to.
Next, we vacuum any debris from the dashboard and pinch weld. We then scrub the pinch weld with a specialized contaminant-free cleaner to remove dirt, grease, and road salts—common issues in Markham and Richmond Hill.
Step 5: Priming for Prevention
If there are any minor nicks or scratches on the pinch weld from the factory or previous replacements, we apply a high-grade anti-corrosion primer. This is a mandatory step at AlexWindshield. We also apply a bonding primer to the frit band (the black ceramic strip) of the new windshield glass to ensuring a molecular bond with the adhesive.
Step 6: High-Modulus Urethane Application
We utilize Sika or Dow top-tier, high-modulus urethane adhesives. Using a high-viscosity power gun, we apply the adhesive in a precise "V-bead" profile. The V-shape is superior to a round bead because it prevents air pockets and ensures uniform contact when the glass is compressed against the frame. This ensures a factory-match seal that is water-tight and wind-proof.
Step 7: Precision Installation
Using dual suction cups (or the "Set-Right" tool for solo technicians), we carefully lower the new windshield onto the pinch weld. Alignment is crucial here. We check the VIN window alignment and ensure the gap between the glass and the roof/pillars is symmetrical. The glass is then pressed firmly to seat the adhesive.
Step 8: Reassembly
We reinstall the cowl panel, wiper arms (ensuring they are torqued to spec and aligned correctly on the windshield markings), and side moldings. Inside, we reattach the rear-view mirror, connect the rain sensor, and remount the ADAS camera bracket.
Mandatory ADAS Calibration: The Buick Driver Confidence System
The 2024-2027 Buick Envista comes standard with safety features such as Automatic Emergency Braking, Lane Keep Assist with Lane Departure Warning, and Following Distance Indicator. All of these systems rely on a forward-facing camera mounted behind the windshield.
When a windshield is replaced, the angle of the camera changes—even if only by a fraction of a millimeter. This tiny variance translates to a significant error margin down the road. For example, your Lane Keep Assist might think you are in the center of the lane when you are actually drifting into oncoming traffic.
At AlexWindshield, calibration is not optional; it is a safety requirement.
- Dynamic Calibration: Depending on the specific software version of your Envista, we may perform a dynamic calibration. This involves a Master Technician driving the vehicle at specific speeds on marked roads (like Highway 404 or 407 in the GTA) with a diagnostic computer connected, teaching the camera to recognize lane markings again.
- Static Calibration: If required, we set up precise targets at exact distances and heights in a controlled environment to calibrate the camera geometrically.
We provide a Certificate of Calibration upon completion, verifying that your safety systems are functioning as designed by General Motors.
Mobile Service Across the GTA: Vaughan, Richmond Hill, Markham
We understand that a shattered windshield is an inconvenience that disrupts your busy schedule. You shouldn't have to drive a compromised vehicle to a shop and wait for hours. AlexWindshield offers a premier Mobile Service that covers the entire Greater Toronto Area.
Whether you are parked at your office in the Vaughan Metropolitan Centre, your home in the suburbs of Richmond Hill, or at a shopping complex in Markham, our mobile vans are fully equipped workshops on wheels. We carry generators, power tools, and climate-control shelters to ensure the urethane cures properly, regardless of the weather conditions.
Post-Installation Care for Your New Windshield
To ensure the longevity of your new installation on your Buick Envista, we recommend the following for the first 48 hours:
- Wait to Drive: Allow the vehicle to sit for at least one hour after installation (Safe Drive-Away Time) to let the adhesive develop initial strength.
- Crack a Window: Keep a side window slightly open (about an inch) for 24 hours. This prevents air pressure build-up when closing doors from popping the fresh seal on the windshield.
- Avoid High-Pressure Washes: Do not take the car through an automatic car wash for at least 48 hours. Hand washing is acceptable, but high-pressure jets can displace the uncured adhesive.
- Leave Retention Tape: If we apply retention tape to the top molding, leave it in place for 24 hours to prevent the molding from lifting while the glue sets.
Why Choose AlexWindshield?
Your Buick Envista is a sophisticated machine that deserves expert care. Choosing the cheapest option often leads to water leaks, rust damage, and malfunctioning safety cameras. At AlexWindshield, we prioritize quality and safety above all else.
We offer:
- Lifetime Warranty: We stand behind our workmanship for as long as you own the vehicle. If you experience a water leak or air noise due to our installation, we fix it for free.
- Insurance Approved: We work directly with all major insurance providers in Ontario to handle your glass claim seamlessly.
- Certified Technicians: Our team undergoes continuous training on the latest EV and ADAS technologies.
Don't compromise on safety. For the best Windshield Replacement for Buick Envista 2024-2027 in the GTA, trust the experts.
Contact AlexWindshield today to schedule your mobile replacement in Vaughan, Richmond Hill, Markham, or anywhere in the Toronto area. Drive with clarity; drive with confidence.




