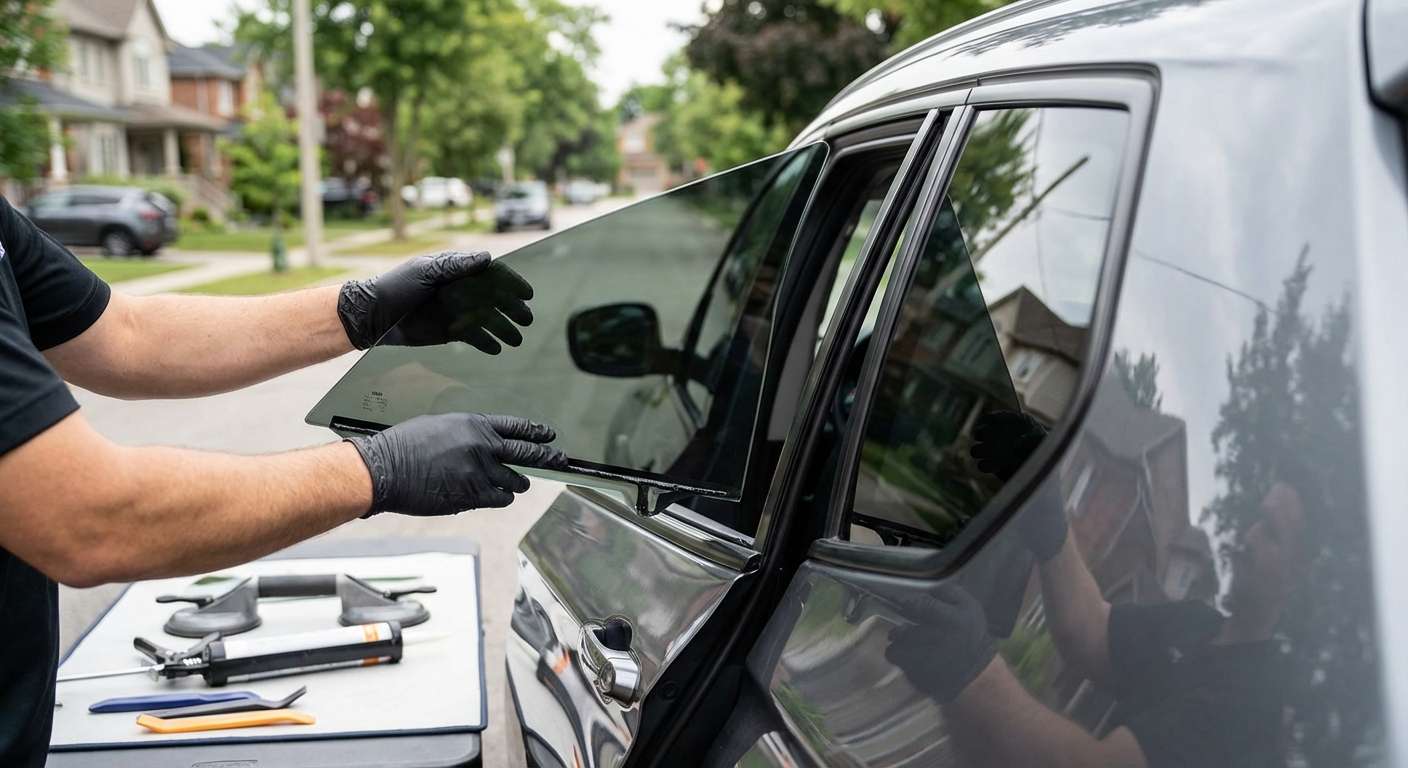
Expert Vent Glass Replacement for BMW X3 2011-2017 (F25)
The BMW X3 (F25 chassis), produced between 2011 and 2017, represents a pinnacle of German engineering, blending the agility of a sedan with the utility of an SAV. However, even the robust design of this luxury vehicle has a vulnerability often exploited by thieves or damaged by road debris: the rear door vent glass. Unlike the laminated windshield, this triangular piece of tempered glass is designed to shatter into thousands of granular pieces upon impact. When this happens, it is not merely a cosmetic issue; it compromises the security, weatherproofing, and acoustic integrity of your ultimate driving machine.
At AlexWindshield, we understand that a BMW requires a technician who appreciates the intricate assembly of Bavarian door panels and the precise chemistry required for glass bonding. We do not simply "patch up" your window; we restore your F25 to its factory specifications using OEM-quality glass and superior urethane adhesives.
Why the BMW X3 (F25) Vent Glass is Unique
The vent glass on the F25 X3—specifically located in the rear door frame—is a stationary component separated from the main drop glass by a division bar. Unlike older vehicles where this glass might be held in by a rubber gasket, the BMW X3 utilizes a bonded installation method or a complex channel system that is integrated tightly with the window regulator run channel. Replacing it is not a matter of popping a new piece in; it requires the surgical dismantling of the door's interior to ensure no damage occurs to the leather, the ambient lighting strips, or the delicate window regulator mechanism.
Mobile Service Across the GTA: Vaughan, Richmond Hill, and Markham
We know that driving a luxury SUV with a shattered window is stressful, unsafe, and exposes your interior to the unpredictable Canadian weather. That is why AlexWindshield brings the repair shop to you. Our fully equipped mobile units service the entire Greater Toronto Area (GTA).
Whether you are parked at your office in Markham, your home driveway in Richmond Hill, or shopping in Vaughan, our Master Technicians arrive with every tool necessary to perform a dealership-level replacement on-site. We specialize in servicing high-end vehicles in these specific locales, ensuring that your BMW X3 receives immediate attention without the need for towing.
Step-by-Step: The Technical Replacement Process
As a Master Technician, I follow a rigorous, standardized protocol for every BMW X3 vent glass replacement. This process ensures safety, longevity, and a leak-proof seal. Here is exactly how we handle your F25:
Phase 1: Site Preparation and Safety
Before touching the vehicle, we assess the damage. Because vent glass is tempered, it explodes into "safety shards." These shards are sharp and can embed themselves in the perforated leather seats or the carpet pile.
- Exterior Protection: We apply protective tape and heavy-duty coverings to the rear fender and door exterior to prevent scratches from falling glass or tools.
- Interior Shielding: We cover the seats and center console with high-grade protective blankets.
- Initial Vacuuming: We remove the bulk of the broken glass from the seats and floor mats before beginning disassembly to create a safe workspace.
Phase 2: BMW Door Panel Removal (Disassembly)
Accessing the vent glass mounting points on a 2011-2017 X3 requires removing the interior door card. This is a delicate process on BMWs due to the stiff retaining clips and hidden fasteners.
- Trim Removal: Using non-marring plastic pry tools, we carefully pop off the decorative wood or aluminum trim piece on the door handle to reveal the hidden Torx screws.
- Disconnecting Electronics: We gently detach the door panel, being mindful of the cables for the door latch, the speaker wiring, and specifically the ambient lighting ribbon cables common in the F25 Premium packages.
- Vapor Barrier Management: We carefully peel back the foam vapor barrier (sound insulation) to access the inner door cavity without tearing it, as this barrier is crucial for preventing water from entering the cabin.
Phase 3: The Deep Clean (Glass Shard Removal)
This is the step most budget shops skip. When vent glass breaks, shards fall inside the door shell.
- We insert a flexible vacuum attachment deep into the bottom of the door cavity.
- We manually inspect the window regulator rails and the speaker magnet. Glass shards stuck here can cause rattling noises later or grind against the main window when it rolls down.
- Verification: We close the door and shake it gently to listen for any remaining debris, repeating the vacuuming process until the door is silent.
Phase 4: Removing the Division Bar and Old Glass
The vent glass is held in place by the division bar (the pillar separating the small glass from the main moving window) and urethane adhesive.
- We lower the main drop glass to create clearance.
- We remove the top and bottom securing bolts of the division bar located behind the weatherstripping.
- We carefully manipulate the run channel rubber to release the old vent glass frame.
- If the glass was bonded to the body pinchweld, we use a specialized cold knife or extractor tool to cut the old urethane bead down to roughly 1-2mm. This provides a fresh base for the new bond.
Phase 5: Surface Preparation and Priming
A leak-proof installation depends entirely on chemical preparation. We treat the metal pinchweld of your BMW X3 with the respect it deserves.
- Cleaning: The bonding surface is cleaned with an alcohol-based solvent to remove dirt, grease, and old contaminants.
- Primer Application: We apply a high-quality black primer to any exposed metal scratches caused by the glass breakage or removal process. This serves two purposes: it prevents rust formation (which creates bubbles under the paint) and acts as a chemical bridge between the metal body and the urethane adhesive.
Phase 6: Installation and Bonding
We use only Sika or Dow automotive-grade urethane, the same adhesives used in the BMW factory.
- We apply a V-shaped bead of high-modulus, non-conductive urethane to the vent glass assembly or the vehicle frame (depending on the specific aftermarket or OEM part configuration for the F25).
- The new vent glass is carefully inserted into the cavity, sliding the division bar back into position.
- We tighten the division bar screws to the precise torque specifications to ensure the main window still tracks perfectly up and down without friction.
- We check the exterior flushness to ensure the glass aligns perfectly with the B-pillar and C-pillar trims, minimizing wind noise.
Phase 7: Reassembly and Final Inspection
Once the glass is set, we reverse the disassembly process.
- The vapor barrier is resealed using butyl tape to ensure the cabin remains waterproof.
- The door panel is reattached, ensuring all BMW specific clips engage with a satisfying "click."
- We test the door lock, the handle release mechanism, the window switch, and the speakers to ensure complete functionality.
- A final glass cleaning is performed inside and out to remove any fingerprints or suction cup marks.
The Importance of High-Quality Glass for BMW
For the BMW X3 2011-2017, using inferior glass can result in optical distortion or poor fitment that creates wind whistles at highway speeds. At AlexWindshield, we utilize glass that meets or exceeds OEM (Original Equipment Manufacturer) standards. This ensures the tint shade matches your existing factory privacy glass and that the curvature aligns perfectly with the vehicle's aerodynamic profile.
Furthermore, the F25 X3 often comes with advanced acoustic dampening. We ensure the replacement vent glass matches the thickness specifications of your vehicle to maintain that quiet, luxurious cabin experience you expect from a BMW.
Why AlexWindshield is the GTA's Top Choice
Choosing the right technician is just as important as choosing the right glass. A poor installation on a vent glass can lead to water leaking into the door shell, which eventually corrodes the window regulator motor and speaker wiring—a repair that costs hundreds of dollars more than the glass itself.
Residents of Vaughan, Richmond Hill, and Markham trust AlexWindshield because:
- Experience: We have replaced hundreds of BMW glasses and know the F25 chassis inside and out.
- Detail-Oriented: We go the extra mile to vacuum every shard of glass from inside your door panel.
- Convenience: Our mobile service saves you time and keeps you safe.
- Transparency: No hidden fees. The price we quote is the price you pay.
Lifetime Warranty and Final Guarantee
We stand firmly behind our craftsmanship. Every vent glass replacement performed by AlexWindshield comes with a Lifetime Warranty on leakage and workmanship for as long as you own the vehicle. If you experience wind noise, water leaks, or loose molding related to our installation, we will fix it free of charge.
Don't let a broken vent glass compromise the look and safety of your BMW X3. Trust the experts who treat your vehicle with the care of a Master Technician.
Contact AlexWindshield today to schedule your mobile replacement in the GTA. Drive with clarity, drive with confidence.




