Premium Back Glass Replacement for BMW X2 2018-2023 (F39)
The BMW X2 (F39), produced between 2018 and 2023, is not merely a compact SUV; it is a "Sports Activity Coupe" that prioritizes style, agility, and a distinct low-slung aesthetic. The rear architecture of this vehicle is defined by its aggressive roofline and the compact, steeply raked rear window that contributes to its athletic stance. However, when this tempered back glass shatters, it does more than just disrupt the visual flow of your Bavarian machine—it compromises the security and weatherproofing of your vehicle's cabin. At AlexWindshield, we understand that replacing the rear glass on a luxury vehicle like the BMW X2 requires surgical precision, knowledge of Bavarian electronics, and a commitment to restoring the vehicle to its factory condition.
Unlike a front windshield which is laminated, the rear glass of your BMW X2 is constructed from tempered safety glass. When impacted, it is designed to shatter into thousands of granular chunks to prevent injury. While safe, this creates a chaotic mess that requires a Master Technician to remediate. If you are located in the Greater Toronto Area (GTA), specifically in Vaughan, Richmond Hill, or Markham, AlexWindshield provides a mobile sanctuary for your vehicle, bringing dealership-quality glass replacement directly to your driveway.
The Critical Importance of OEM-Quality Rear Glass
For the BMW F39 chassis, the back glass is a multifunctional component. It is not simply a transparent shield; it is an integrated part of the vehicle's electronic ecosystem. When sourcing a replacement for your 2018-2023 X2, we ensure the glass meets or exceeds Original Equipment Manufacturer (OEM) standards. Key features of the F39 back glass include:
- Integrated Defrost Heating Grid: The electrical resistance lines must be perfectly calibrated to clear ice and fog without overloading the vehicle's electrical system.
- Radio and GPS Antenna Diversity: Many BMW models integrate antenna circuits directly into the glass or the immediate molding. Poor quality glass can lead to radio static or GPS signal loss.
- Privacy Tint Matching: The X2 often comes with factory privacy glass. Our replacements match the specific tint percentage of your rear side windows for a seamless look.
- Wiper Assembly Mounting: The glass must have precision-drilled holes with proper grommets to house the rear wiper motor shaft without leaking.
Service Availability: Mobile Auto Glass in the GTA
A shattered rear window renders your BMW X2 drivable only in the strictest emergency sense. Driving exposes your interior to rain, road debris, and exhaust fumes, while the lack of security makes the vehicle a target. We eliminate this risk with our Mobile Service Unit.
We specialize in serving the communities of Vaughan, Richmond Hill, and Markham. Whether you are parked at Vaughan Mills, your office in Markham's tech hub, or your driveway in Richmond Hill, our fully equipped mobile vans arrive with the glass, the tools, and the power required to perform a factory-spec installation on-site. We treat your location as our workshop.
Step-by-Step Replacement Process: The AlexWindshield Standard
Replacing the back glass on a BMW X2 is significantly more complex than a standard windshield replacement due to the debris management and the disassembly required of the rear hatch. As Master Technicians, we follow a rigorous protocol to ensure no damage occurs to your paint, leather, or electrical systems.
Step 1: Site Preparation and Interior Protection
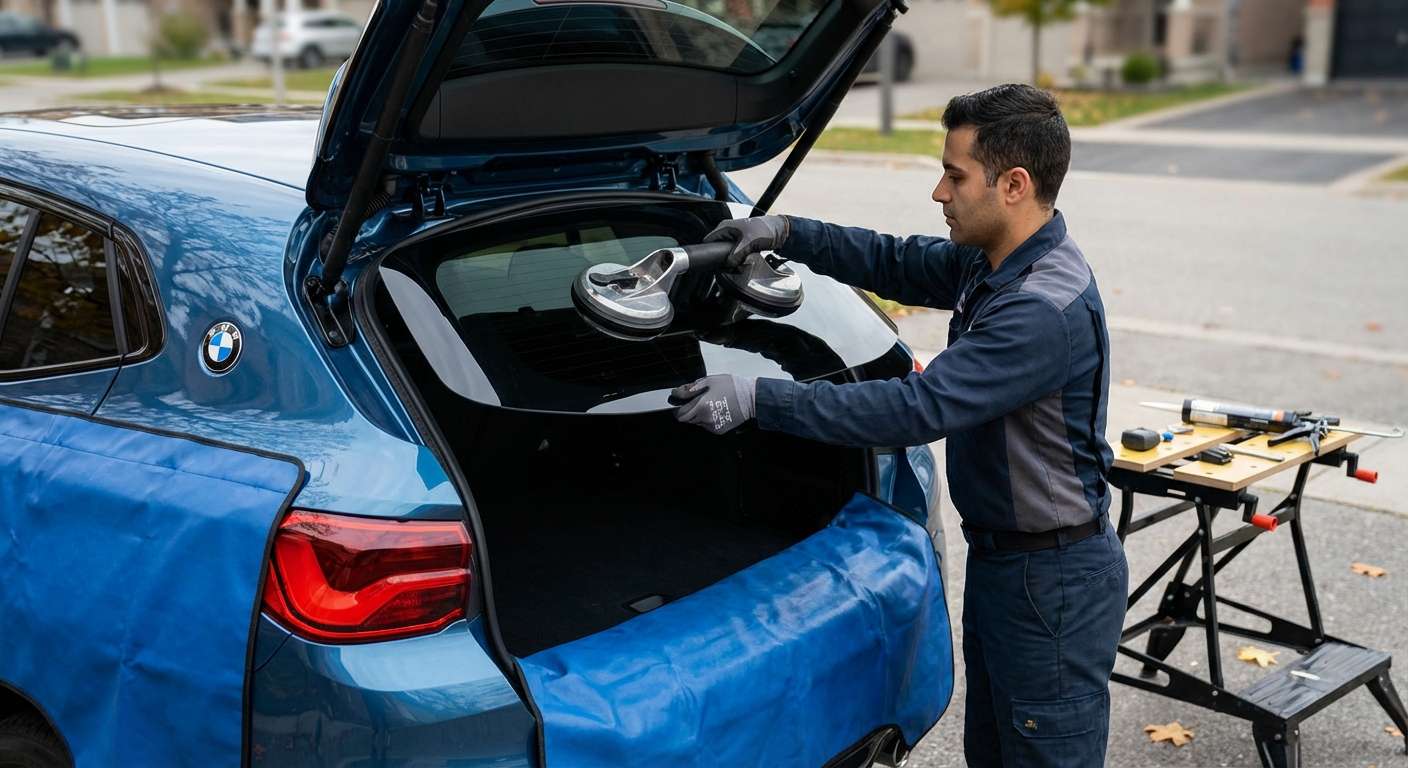
Before we touch a shard of glass, we protect the vehicle. The BMW X2 features premium materials—Sensatec or Dakota leather, and high-gloss interior trims. We apply protective covers to the rear seats and the cargo area floor. We also use exterior fender covers and tape off the painted sheet metal of the rear hatch to prevent accidental scratches from tools or glass debris during the removal process.
Step 2: Disassembly of the Rear Hatch Components
To access the bonding surface, we must strip down the rear hatch (liftgate). This involves:
- Rear Wiper Removal: We carefully remove the wiper arm and the outer nut securing the motor shaft through the glass.
- Spoiler Inspection: On the F39 M-Sport models, the rear spoiler overhangs the glass. We inspect this area to ensure we have clearance for our cutting tools.
- Interior Trim Removal: We gently pop the interior plastic trim panels of the liftgate. This exposes the wiring harness for the third brake light, the heating element connectors, and the antenna amplifiers.
- Disconnecting Electronics: We unplug the defrost tabs and antenna leads, ensuring the connectors are not damaged.
Step 3: The Intensive Vacuuming Process (Debris Mitigation)
This is the step that separates a generic glass shop from AlexWindshield. When tempered glass explodes, it gets everywhere. It falls inside the double-walled metal cavity of the rear hatch/gate.
We use high-powered industrial vacuums with flexible, narrow attachments to extract glass from:
- The carpet fibers of the trunk and rear seat backs.
- The spare tire well and battery compartment.
- Inside the rear hatch door itself: We vibrate the tailgate and use compressed air to dislodge shards trapped inside the metal frame, ensuring you don't hear a "rattle" every time you close your trunk later.
- The weatherstripping channels and drainage tubes.
We ensure that all broken glass shards are removed from the vehicle's interior to protect your family and pets.
Step 4: Removing the Old Adhesive and Glass Remnants
Using specialized cold knives or oscillating extraction tools, we cut through the existing urethane bead that held the old glass. We carefully remove any remaining jagged pieces of glass still stuck to the frame. Once the glass is gone, we pare down the old urethane adhesive until only a thin, smooth layer (approximately 1-2mm) remains. This old layer serves as the best base for the new adhesive to bond to.
Step 5: Surface Preparation and Primer Application
A bond is only as strong as the surface preparation. We clean the aperture of the vehicle and the edge of the new glass with a specialized prep-sol to remove grease, silicone, and road grime. We then apply a black primer to any exposed metal scratches (to prevent rust) and to the frit band (the black border) of the new glass. This primer promotes adhesion and protects the urethane from UV degradation.
Step 6: High-Modulus Urethane Application
For a BMW X2, we utilize a high-viscosity, non-conductive, high-modulus urethane adhesive, such as Sika or Dow. We apply the adhesive in a distinct triangular bead shape using a battery-operated caulking gun for consistent flow. This triangular shape is crucial; it ensures that when the glass is pressed down, the glue spreads outward evenly, eliminating air pockets and preventing water leaks.
Step 7: Precision Installation of the New Back Glass
Using heavy-duty suction cups (vacuum lifters), two technicians (or one aided by a mechanical setting tool) carefully align the new glass with the vehicle's body lines. On the F39 chassis, the gap tolerances between the glass and the roof spoiler are tight. We gently press the glass into the urethane, ensuring it sits at the correct depth relative to the bodywork to minimize wind noise.
Step 8: Reassembly and Functionality Check
Once the glass is set, we reassemble the vehicle:
- We reconnect the rear defroster cables and test for continuity.
- We reinstall the interior tailgate trim panels, ensuring all clips engage with a satisfying "click."
- We remount the rear wiper motor assembly and wiper arm, aligning the blade so it parks horizontally as per factory spec.
- We perform a final vacuum sweep and clean the new glass to a streak-free shine.
Post-Installation Care and Safety
After we complete the installation on your BMW X2, there is a mandatory Safe Drive-Away Time (SDAT). Thanks to the advanced rapid-cure adhesives we use, this is typically only 60 minutes. However, we advise the following for the first 24 to 48 hours:
- Do not use high-pressure car washes: The water pressure can displace the curing adhesive.
- Leave a window cracked: Cracking a side window by an inch prevents air pressure buildup when closing doors, which could otherwise push the fresh wet adhesive outward and cause a leak.
- Be gentle with the trunk: Avoid slamming the rear hatch aggressively.
Why Trust AlexWindshield for Your BMW?
Your BMW X2 is a precision-engineered vehicle that deserves more than a budget repair. At AlexWindshield, we combine technical expertise with customer convenience. We don't just swap glass; we restore the structural integrity and aesthetic beauty of your car.
Our Promise to You:
- Lifetime Warranty: We stand behind our workmanship. Our warranty covers you against air leaks, water leaks, and manufacturer defects in the glass for as long as you own the vehicle.
- Mobile Convenience: We service the entire GTA, with a heavy focus on Vaughan, Richmond Hill, and Markham.
- Master Technicians: Our team is trained in handling the complex disassembly required for luxury SUVs.
Don't let a shattered back window compromise your BMW X2's safety or style. Contact AlexWindshield today for a quote and experience the premier auto glass service in Toronto.




