Restoring the Aesthetic and Security of Your BMW X1 (U11): Expert Back Glass Replacement
The 2023-2027 BMW X1 (chassis code U11) represents a bold evolution in the compact luxury SUV segment. With its upright proportions, monolithic surface treatment, and distinct rear profile featuring slim, three-dimensional L-shaped LED taillights, this vehicle demands perfection in every curve. However, when the back glass of your X1 shatters, it does more than just ruin the vehicle’s sophisticated silhouette—it exposes your luxury interior to the elements and theft. Unlike a front windshield which is laminated, the rear glass in your BMW X1 is tempered. When impact occurs, it is designed to shatter into thousands of granular pebbles to prevent major injury, but this creates a chaotic mess that requires a specialized cleanup and replacement protocol.
At AlexWindshield, we understand that owning a U11 BMW X1 means you value precision engineering. A standard "quick fix" is not sufficient for this vehicle. Our Master Technicians provide a comprehensive replacement service that restores the structural integrity, heating capabilities, and acoustic insulation of your rear windshield, ensuring your BMW looks as pristine as it did on the showroom floor.
Why the U11 Back Glass Replacement is a Specialized Procedure
Replacing the rear glass on the 2023-2027 BMW X1 is significantly more complex than a standard door glass replacement. This component is not merely a transparent shield; it is an integrated part of the vehicle's electronic and aerodynamic systems. The U11 model features a highly specific curvature to match the rear spoiler and the aerodynamic "air curtain" design features.
Furthermore, the back glass houses critical heating elements (defroster grid) and often integrates radio or GPS antenna arrays depending on your specific trim package. A sub-par installation can lead to water leaks into the trunk, failure of the rear defogger, or interference with the vehicle's connectivity. Our team at AlexWindshield uses only OEM-equivalent glass that matches the tint, thickness, and heating element resistance required by BMW’s strict specifications.
Service Availability: Mobile Auto Glass in the GTA
We recognize that driving a BMW X1 with a shattered rear window is dangerous and impractical. The open cabin causes drag, noise, and allows rain or snow to damage the premium upholstery. To address this, AlexWindshield offers a premium mobile auto glass service. We bring the shop to you.
We proudly serve the entire Greater Toronto Area (GTA), with a high concentration of mobile units available in:
- Vaughan: From the busy corridors of Highway 7 to the residential enclaves of Kleinburg.
- Richmond Hill: Servicing neighborhoods from Oak Ridges to the Doncrest area.
- Markham: Covering everything from Unionville to Cornell.
Step-by-Step Technical Process: The AlexWindshield Standard
As Master Technicians, we adhere to a rigorous workflow. For the BMW X1 (U11), the process involves extensive preparation and cleanup due to the nature of tempered glass. Below is the detailed, step-by-step procedure we follow for every back glass replacement.
Phase 1: Site Preparation and Vehicle Protection
Before any glass is removed, we must protect the vehicle's exterior and interior. Shards of tempered glass can scratch paint and damage leather easily.
- Exterior Protection: We apply protective tape and heavy-duty covers over the rear quarter panels, bumper, and the roof spoiler to prevent accidental scratches from tools or glass debris.
- Interior Shielding: The cargo area and rear seats are covered with thick blankets. This catches the majority of falling glass during the removal process and protects the BMW’s premium interior materials.
Phase 2: Component Removal and Interior Disassembly
This is the differentiator between a budget shop and AlexWindshield. To do the job right, we must access the full pinch weld and clean out hidden glass.
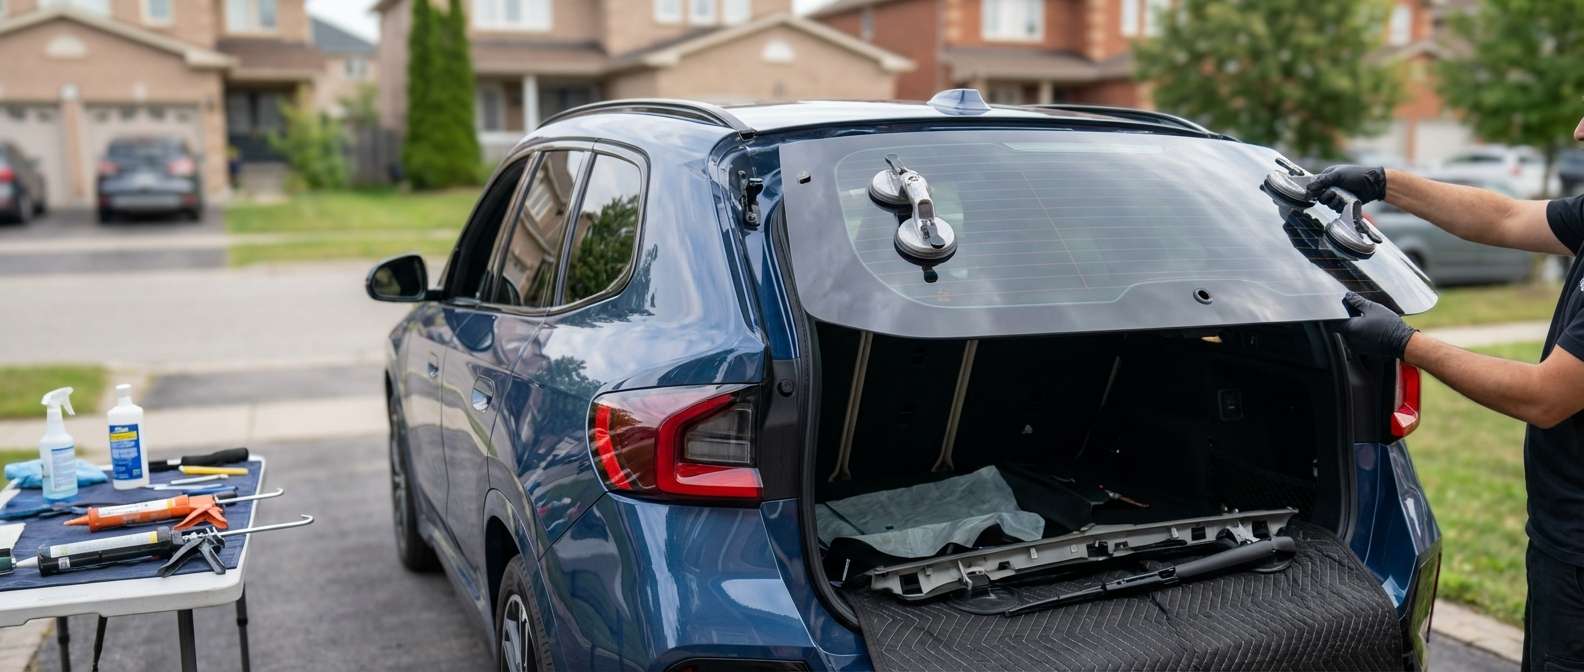
- Wiper Assembly Removal: The rear wiper arm is carefully removed. On the U11 X1, the wiper motor shaft passes through the glass. We must carefully dismantle the nut and cap assembly without stripping the threads.
- Spoiler and Trim Inspection: We inspect the upper roof spoiler. While often not required to be fully removed, we must ensure enough clearance to slide the new glass in without damaging the spoiler’s underside.
- Interior Panel Removal: This is a critical step. We carefully pop the clips and remove the interior liftgate trim panels (the plastic covering the inside of the trunk lid). When back glass shatters, shards fall down into the hollow metal shell of the liftgate. If these panels are not removed, you will hear a "rattling" sound every time you open or close your trunk for the rest of the car's life.
Phase 3: The "Deep Clean" Vacuum Process
Cleanup is 50% of the labor in a back glass replacement. We treat this stage with extreme diligence.
- Surface Vacuuming: Using industrial-grade vacuums, we remove all visible glass from the trunk floor, spare tire well, and rear seats.
- Cavity Extraction: With the interior liftgate panels removed, we insert flexible vacuum attachments into the holes of the metal liftgate structure to suck out the hidden shards that fell inside the door frame.
- Manual Removal: We ensure no glass remains in the rubber weather seals or the latch mechanism, which could prevent the trunk from closing properly.
Phase 4: Glass Removal and Pinch Weld Preparation
Once the debris is cleared, we proceed to remove the remains of the glass bonded to the car.
- Adhesive Cutting: Using a specialized cold knife or wire cutting system, we slice through the old urethane bead that held the original glass. We are extremely careful to avoid scratching the metal pinch weld, as scratches lead to rust.
- Trimming the Bead: We trim the old urethane down to a thin layer, providing a clean base for the new adhesive to bond to.
- Primer Application: Any bare metal exposed during the cutting process is treated with a high-grade anti-corrosion primer. This prevents rust formation, which is a common cause of leaks years down the line.
Phase 5: New Glass Installation
With the vehicle prepped, we prepare the new BMW X1 specific glass.
- Glass Activation: The ceramic band (the black frit on the edge of the glass) is cleaned and primed chemically to ensure the adhesive bonds molecularly to the glass surface.
- Urethane Application: We apply a high-viscosity, high-modulus urethane adhesive. This adhesive is non-conductive (to protect the antenna and heating elements) and provides rapid drive-away times. We apply it in a precise "V-bead" shape to ensure a uniform seal that mimics the factory robot installation.
- Setting the Glass: Using specialized suction cups, two technicians (or a technician with a setting arm) carefully lower the glass onto the pinch weld. We align the glass using the BMW U11’s alignment pins or reference points to ensure perfectly even gaps on the left, right, and top.
Phase 6: Reassembly and Connectivity
The final steps involve reconnecting the technology that makes your X1 a modern vehicle.
- Electrical Connections: We reconnect the rear defroster tabs and any antenna leads. We inspect the connectors for corrosion or damage and apply dielectric grease if necessary.
- Wiper Reinstallation: The rear wiper motor grommet is seated, and the wiper arm is reattached and torqued to spec. We test the wiper to ensure it does not hit the spoiler or the paint.
- Panel Reinstallation: The interior liftgate panels are snapped back into place, ensuring no clips are broken and the fit is tight and rattle-free.
The Importance of High-Quality Glass for the BMW X1
The 2023-2027 BMW X1 utilizes advanced glass technology. Cheap aftermarket glass often suffers from "optical distortion," where the view through the rearview mirror appears wavy. Furthermore, budget glass often has poorly printed defroster lines that fail within a few months.
At AlexWindshield, we prioritize OEM (Original Equipment Manufacturer) or OEE (Original Equipment Equivalent) glass. This ensures:
- Perfect Fitment: The glass curvature matches the U11 body lines exactly, preventing wind noise.
- Solar Management: High-quality glass includes the proper solar tint to protect your interior from UV rays.
- Defroster Efficiency: The heating elements are designed to clear ice and fog rapidly, maintaining visibility in Canadian winters.
Serving Vaughan, Richmond Hill, and Markham with Excellence
Our reputation in the GTA is built on trust and technical capability. Whether you are parked at a corporate office in Markham, your home driveway in Richmond Hill, or shopping in Vaughan, our mobile vans are equipped with everything needed to perform this complex repair on-site. We do not need to tow your vehicle to a shop; we bring the shop environment to you, weather permitting.
We understand the local climate conditions. We use urethanes that cure properly even in the variable temperatures of Southern Ontario, ensuring your vehicle is safe to drive shortly after the installation is complete.
Lifetime Warranty and Final Inspection
We stand firmly behind our craftsmanship. Every back glass replacement performed by AlexWindshield comes with our industry-leading Lifetime Warranty. This covers you against:
- Air Leaks and Water Leaks: For as long as you own the vehicle.
- Manufacturer Defects: Issues with the glass clarity or heating element failure (unrelated to physical impact).
- Workmanship Errors: Any loose trim or rattling resulting from our installation.
When you choose AlexWindshield for your BMW X1 (U11) back glass replacement, you are choosing safety, expertise, and convenience. Don't let a shattered rear window compromise the luxury and security of your BMW. Trust the Master Technicians who know your vehicle inside and out.
Contact AlexWindshield today to schedule your mobile replacement service in the GTA.




