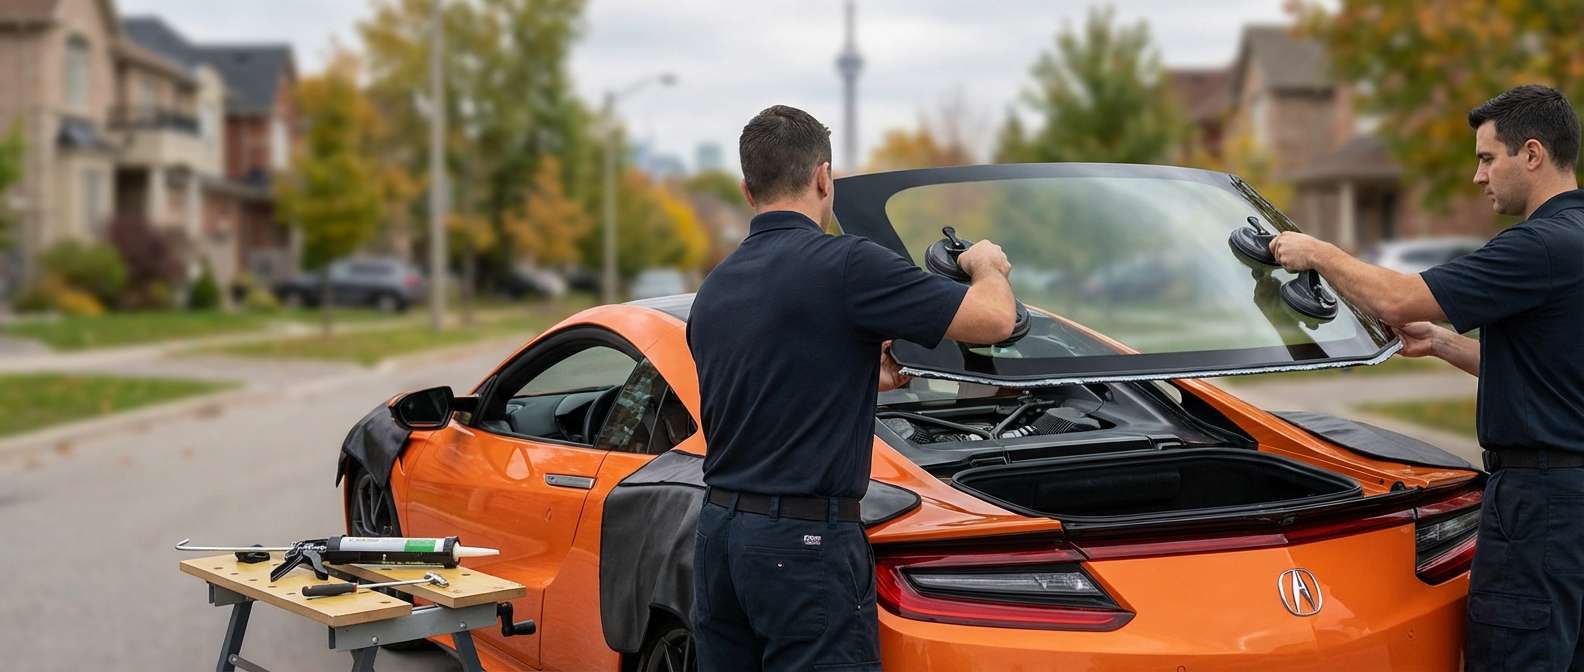
The Intersection of Art and Engineering: Acura NSX Back Glass Replacement
The Acura NSX (2017-2022) is not merely a vehicle; it is a technological tour de force, representing the pinnacle of hybrid supercar performance. With its mid-engine layout, Sport Hybrid SH-AWD system, and bespoke aluminum space frame, every component of the NSX is designed for aerodynamic efficiency and structural rigidity. This includes the auto glass. The back glass on an NSX serves a dual purpose: it acts as a window into the soul of the machine—the twin-turbo V6 engine—and it functions as a critical component of the cabin's thermal and acoustic management system. When this glass is compromised, whether through road debris impact or stress fractures, it requires a replacement protocol as precise as the engineering of the car itself. At AlexWindshield, we do not simply swap glass; we restore the integrity of your supercar.
Replacing the rear glass on a mid-engine exotic car is fundamentally different from servicing a standard sedan. The proximity to the engine bay, the complexity of the interior trim materials, and the curvature of the glass demand the hands of a Master Technician. A standard installation approach will not suffice. Our team understands that for NSX owners, perfection is the baseline. We provide a specialized Back Glass Replacement service tailored specifically for the 2017-2022 Acura NSX, ensuring that the thermal properties, optical clarity, and structural bond meet or exceed factory specifications.
Why the NSX Requires Specialized Glass Care
The second-generation NSX utilizes a multi-material space frame construction. The back glass is bonded directly to this high-performance structure. An improper installation can lead to water leaks into the cabin or, more catastrophically, into the engine compartment where sensitive hybrid electronics reside. Furthermore, the acoustic laminate used in premium vehicles helps cancel out road noise while allowing the aggressive notes of the engine to permeate the cabin appropriately. Using sub-par glass or incorrect adhesives can disrupt this acoustic balance.
At AlexWindshield, we utilize high-modulus, non-conductive urethane designed specifically for aluminum bodies to prevent galvanic corrosion between the vehicle frame and the glass. Our technicians are trained to handle the unique disassembly requirements of the NSX, ensuring that carbon fiber accents, Alcantara headliners, and leather trim are treated with white-glove care throughout the process.
Premium Mobile Service Across the GTA
We understand that owners of an Acura NSX value their time and discretion. Bringing a supercar to a general repair shop can be stressful and inconvenient. That is why AlexWindshield brings the workshop to you. Our fully equipped mobile units operate extensively throughout the Greater Toronto Area (GTA).
Whether your vehicle is parked in a climate-controlled garage in Vaughan, at a workplace in Markham, or in a residential driveway in Richmond Hill, our Master Technicians arrive with every tool and material necessary to perform a factory-quality replacement on-site. We service the entire region, ensuring that access to premium auto glass repair is never out of reach for our discerning clients.
Step-by-Step: The AlexWindshield Replacement Protocol
Transparency is key to trust. Below is the detailed, step-by-step technical process we employ when replacing the back glass of an Acura NSX. This is a meticulous procedure designed to protect your vehicle and ensure a bond that lasts a lifetime.
Phase 1: Site Setup and Vehicle Protection
Before a single tool touches the glass, we secure the environment. The NSX is low to the ground and features wide hips and delicate paintwork.
- Exterior Protection: We apply non-abrasive, magnetic (where applicable) or micro-fiber fender covers to the rear quarter panels and engine cover area to prevent accidental scratches from belt buckles or tools.
- Interior Shielding: The interior of the NSX is a cockpit of luxury. We place protective covers over the seats, steering wheel, and center console. Special attention is paid to the rear bulkhead area where the technician will be working.
- Tape-Off: We apply specialized painter's tape around the perimeter of the rear window frame. This protects the paint and the rubber moulding channels from the cutting tools used during removal.
Phase 2: Deconstruction and Shard Management
If the back glass has shattered, glass shards can migrate into the most inaccessible parts of the vehicle. This phase is critical for safety and comfort.
- Trim Removal: To access the full pinchweld (the metal frame where the glass bonds), we must carefully remove the interior rear trim panels. On the NSX, this may involve removing the rear bulkhead cover and pillar trim. We use plastic pry tools to ensure no clips are broken and no leather is marred.
- Defroster Disconnection: The NSX back glass is equipped with heating elements. We locate the electrical connectors for the rear defroster, carefully disconnect them, and tape them back to prevent damage during the cutting process.
- Vacuuming Protocol: This is a mandatory step for shattered glass. We use industrial-grade vacuums with HEPA filters and specialized thin-nozzle attachments.
- We vacuum the parcel shelf and the crevices behind the seats.
- We vacuum the interior carpets and seat tracks.
- Critical Step: Because the NSX is mid-engine, we meticulously inspect and vacuum the engine cover vents and the engine bay perimeter to ensure no glass shards have fallen near the intake or moving engine parts.
Phase 3: Surgical Removal of Damaged Glass
Removing the old glass from an aluminum frame requires precision to avoid scratching the "pinchweld." Scratches on the metal can lead to oxidation, which compromises the bond of the new glass.
- Cutting System: We avoid using reciprocating blades or "cold knives" on high-end vehicles like the NSX to eliminate the risk of paint damage. Instead, we utilize a synthetic fiber wire cutting system (like the WRD Spider or similar technology).
- The Process: The high-strength fiber line is threaded through the adhesive bead. A pulley system is attached to the interior of the glass. The technician slowly winds the line, slicing through the old urethane seal from the inside out. This method exerts zero pressure on the vehicle body and ensures a perfectly smooth cut.
- Extraction: Once the seal is severed, suction cups are applied to the glass (or remaining fragments), and it is lifted vertically away from the vehicle to avoid contact with the rear deck.
Phase 4: Chemical Preparation and Priming
The longevity of the installation depends entirely on surface preparation. This is where chemistry meets mechanics.
- Trimming the Old Bead: We trim the existing urethane on the car's frame down to approximately 1-2mm thickness. This old urethane serves as the best base for the new adhesive to bond to.
- Pinchweld Inspection: We inspect the frame for any minor abrasions. If any bare metal is exposed during the cleaning process, we apply a self-etching black primer. This primer prevents rust/oxidation and acts as an adhesion promoter.
- Glass Preparation: The new OEM-quality glass is cleaned with a specialized alcohol-based glass cleaner to remove manufacturing oils.
- Activator Application: An adhesion promoter (activator) is applied to the ceramic band (the black frit) on the edge of the new glass. This chemical opens the pores of the glass surface, allowing the urethane to bond at a molecular level.
- Moulding Installation: If the NSX model year or trim requires a surrounding rubber moulding, it is attached to the glass edge at this stage, ensuring a flush fit with the body lines.
Phase 5: Precision Installation and Bonding
The final installation requires steady hands and high-performance materials suitable for the thermal dynamics of a mid-engine vehicle.
- Adhesive Application: We apply a triangular bead of high-viscosity, high-modulus polyurethane adhesive directly to the glass or the vehicle body (depending on the specific factory service manual requirement for the NC1 chassis). We use a battery-operated caulking gun to ensure a consistent bead size without air gaps.
- The Set: Using heavy-duty suction cups, two technicians (for safety and precision) lift the glass and hover it over the opening. It is gently lowered into place, ensuring the alignment pins (if present) match the body holes and the glass is perfectly centered between the pillars.
- Decking: We apply light, even pressure around the perimeter to "deck" the glass, compressing the adhesive to the correct factory height. This ensures the glass sits flush with the roofline and engine cover, preserving the vehicle's aerodynamics.
- Reassembly: The defroster cables are reconnected and tested for continuity. The interior trim panels are snapped back into place, ensuring all gaps are even and no rattles will occur.
Phase 6: Post-Installation Inspection
Before handing the keys back, we perform a final quality control check.
- Visual Check: We inspect the moulding for straightness and ensure the glass reveals are symmetrical on both sides.
- Clean Up: The glass is cleaned inside and out to a streak-free shine. Any remaining dust from the vacuuming process is wiped down.
- Cure Time: We advise the client on the Safe Drive Away Time (SDAT). With our advanced adhesives, the vehicle is usually safe to drive within 60 minutes, though we recommend avoiding high-pressure car washes for 48 hours.
The Importance of OEM Quality Glass
For a vehicle as sophisticated as the Acura NSX, "aftermarket" or "generic" glass is simply not an option. The specific curvature, the tint percentage, the heating element resistance, and the acoustic properties must match the original engineering. At AlexWindshield, we source OEM (Original Equipment Manufacturer) or OEE (Original Equipment Equivalent) glass. This ensures that the replacement part was manufactured by the same companies that supply Acura (such as AGC Automotive or Saint-Gobain Sekurit), guaranteeing a perfect fit and identical performance to the glass that came with the car from the factory in Marysville.
Lifetime Warranty and Customer Promise
We stand behind our craftsmanship. When you choose AlexWindshield for your Acura NSX back glass replacement, you receive a Lifetime Warranty. This warranty covers:
- Water Leaks: We guarantee the seal will never leak for as long as you own the vehicle.
- Workmanship: Any issues related to the installation process, such as wind noise or moulding detachment, are fully covered.
- Distortion: We guarantee the glass is free from optical distortion that could impair rear visibility.
Your Acura NSX deserves nothing less than the expertise of a Master Technician. Don't compromise the safety, aesthetics, or value of your supercar with budget services. Trust the experts who understand the intricacies of luxury and exotic vehicles.
Ready to restore your NSX? Contact AlexWindshield today. We are the trusted choice for mobile auto glass replacement in Vaughan, Richmond Hill, Markham, and the entire Greater Toronto Area. Call us now to schedule your premium service.




